If like me, you’ve been keeping tabs on what Microsoft has been up to on the Power Platform world, you would have noticed that there are two concepts that are regularly referenced in their architectures and generally associated to each other – Azure Data Lake Storage (ADLS) Gen 2 and Common Data Model (CDM).
As my colleague, Francesco Sbrescia, referenced in his blog, Microsoft’s ultimate goal is for the CDM to be the de facto standard data model. However, although there is a fair amount of resources talking about the capabilities and features, it can be a bit confusing to understand how you can actually store your data in the CDM format in ADLS and use it to run data analytics such as data warehousing, Power BI reporting and Machine Learning.
In this blog series I’ll cover 6 different ways to instantiate a CDM model in ADLS:
- Export to data lake (Common Data Service) – Legacy
- Power BI Dataflows
- Azure Data Services – Databricks
- Azure Data Services – Data Factory Data Flows
- Synapse Link for Dataverse – Delta Lake Export
- Dataverse integration with Microsoft Fabric
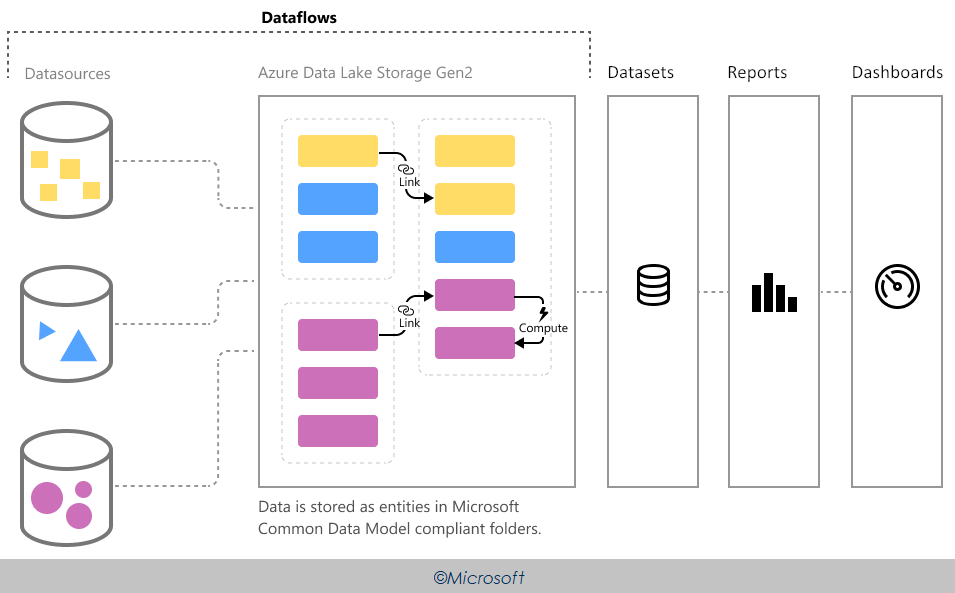
Power BI Dataflows are designed to use the CDM. The data ingested from on-premises and cloud-based data sources are mapped to CDM entities and stored in ADLS as CDM folders. These folders contain a metadata file called model.json that describes the entities, their attributes and data types as well as details about the partitioning strategy.
Because Dataflows store data in the CDM format, it can also consume CDM folders that have been added to the organisation’s data lake by other data producers. A Power BI user can add the CDM folder to Power BI as a dataflow, build semantic models on top of the existing data, enrich it or process it from other dataflows.
By default, the organisation’s dataflow data is stored in Power BI provided storage. You would have thought that moving to your own data storage would be an easy and pain free process, however, there is a very important point that you should be aware of. At the time of writing this blog, the functionality that allows you to store dataflow data in your own storage account is still in preview (been for more than an year). What this means is that, once a dataflow storage location is configured, it cannot be changed. If the storage account was deleted, you will no longer be able to create dataflows in the workspace configured to use dataflow storage (whenever I tried to revert back to the Power BI provided storage it threw an error) and more importantly, lose the capability to store the data in your own storage account and run advanced data analytics operations using azure data services.
UPDATE
It is now possible to select workspace-level storage, meaning, we can have different storage accounts linked to different workspaces. To enable this, you’ll have to go to the Admin Portal and enable Workspace-level storage permissions (preview).
In theory, it’s also possible to disconnect the original storage account associated to the tenant, however, when I attempted to remove an existing link, nothing happened (potentially because the storage account no longer exists).
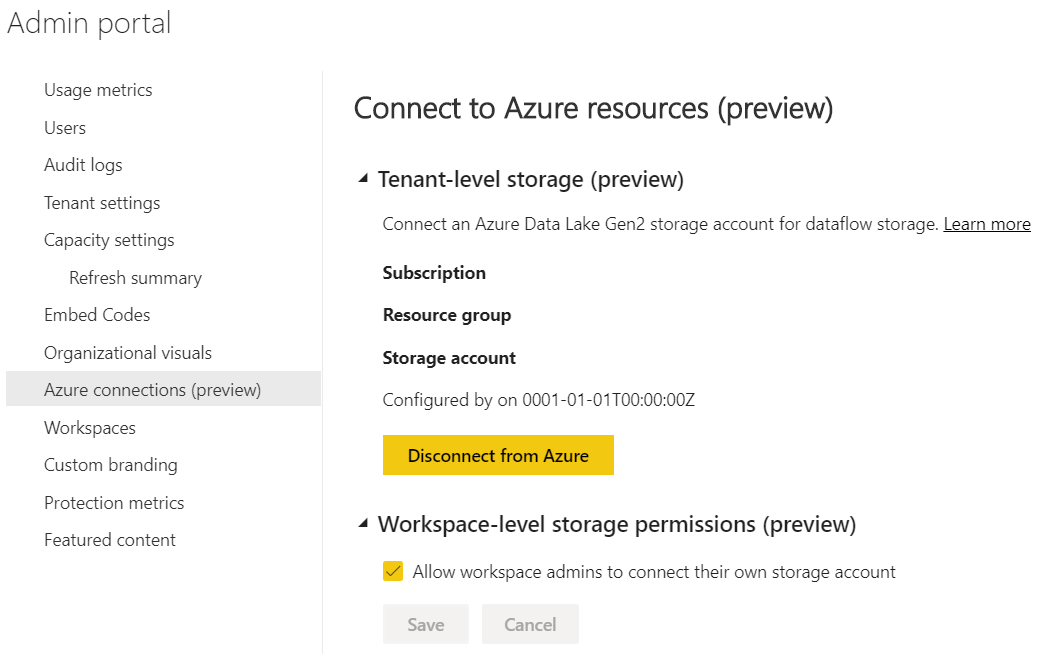
To understand how to connect ADLS for dataflow storage and gather further insights around considerations and limitations, follow this link. To enable dataflow storage in a Power BI workspace, follow this link.
In my previous blog I demonstrated how to export Common Data Service data to ADLS using the Export to Data Lake Service. Using the same data source, I’ll now show how to achieve the same result using Dataflows.
After configuring the dataflow storage and the workspace, select Create > Dataflow.
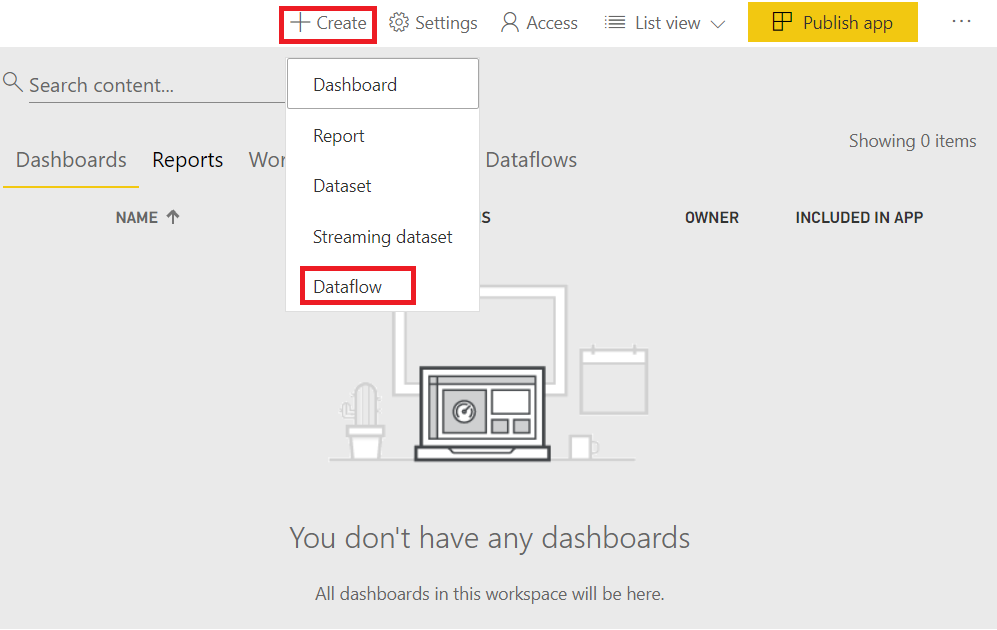
When creating a new dataflow, we have 4 options:
- Define new entities by connecting to a large variety of on-premises and cloud-based data sources
- Link entities from existing dataflows. This feature is only supported among workspaces in the same storage account
- Import a dataflow model from your local machine
- Attach a CDM folder created by a different data producer. These should exist in the same storage account

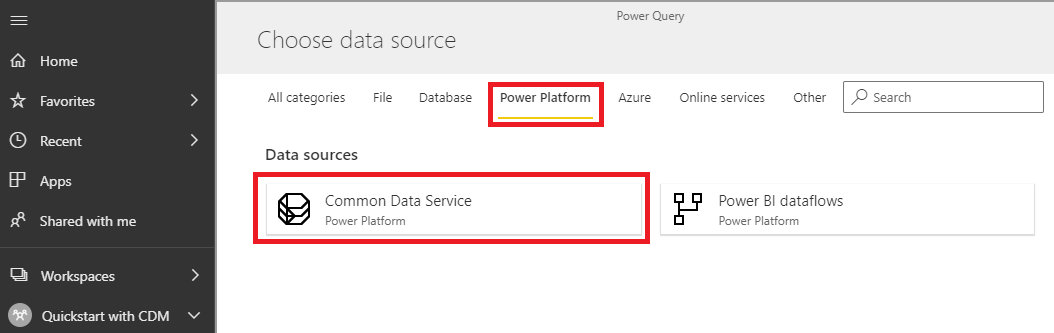
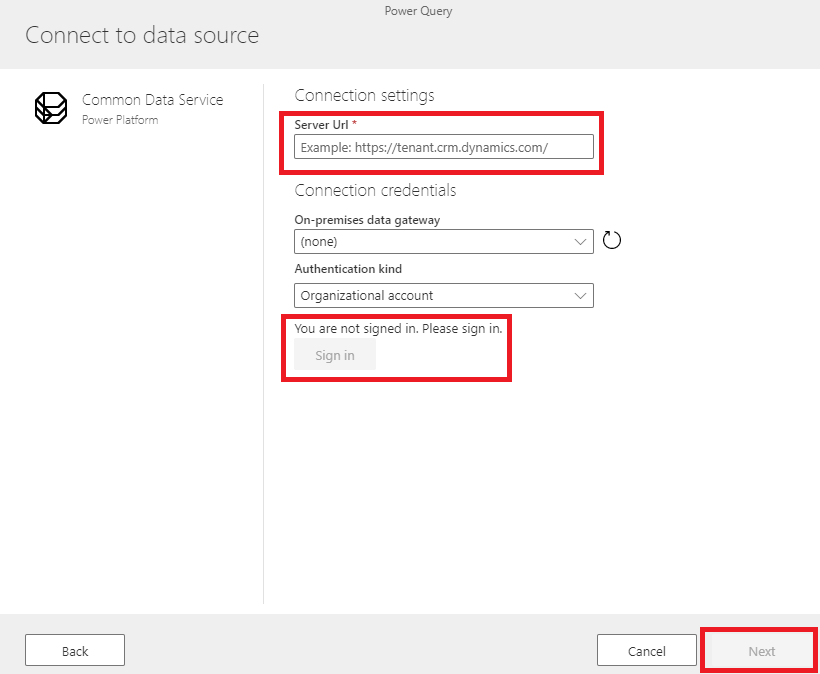
After selecting the first option, either navigate to the Power Platform tab or search for Common Data Service
In this screen, we have to provide the url to the Power Apps application and sign in with the credentials that have access to the CDS connection. You can obtain the Url by going to Power Platform Admin Center > Analytics > Common Data Service.
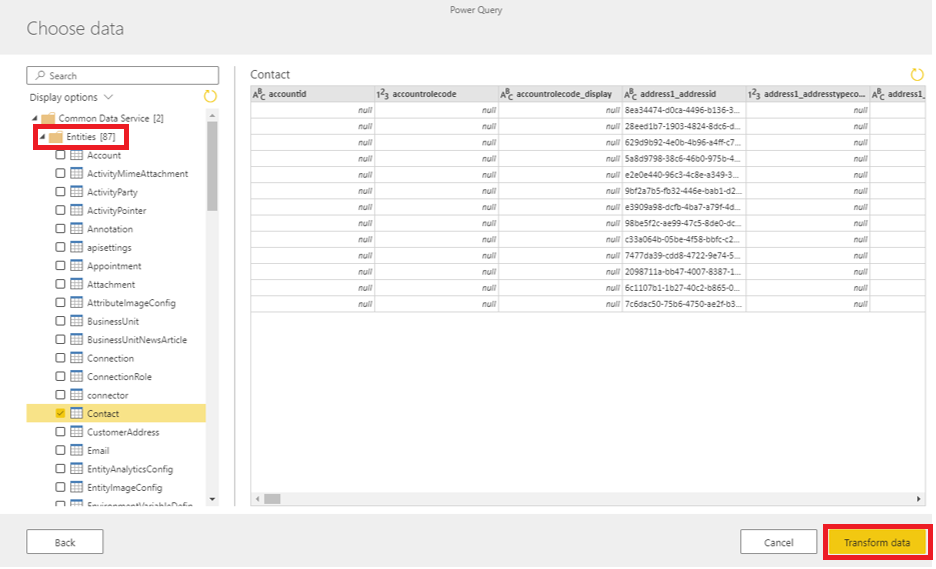
When expanding the Entities folder, we will have access to all the CDM entities available in CDS. Because our application is based on Contact, we choose this entity and select Transform data.
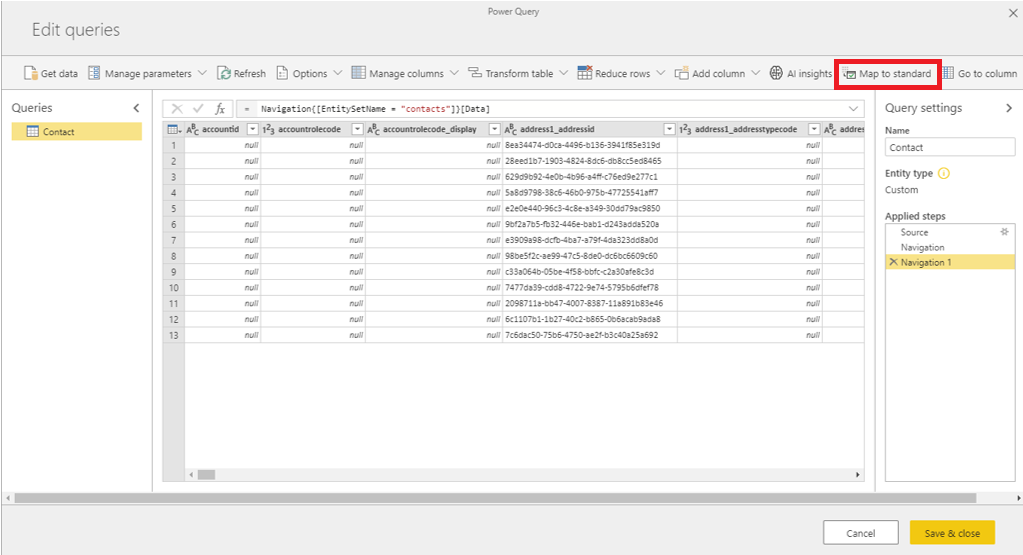
This step gives the ability to apply different transformation actions using Power Query. In this example, no transformations are applied, however, a mapping exercise is performed, allowing us to map the columns from our source entity to standard CDM entities.
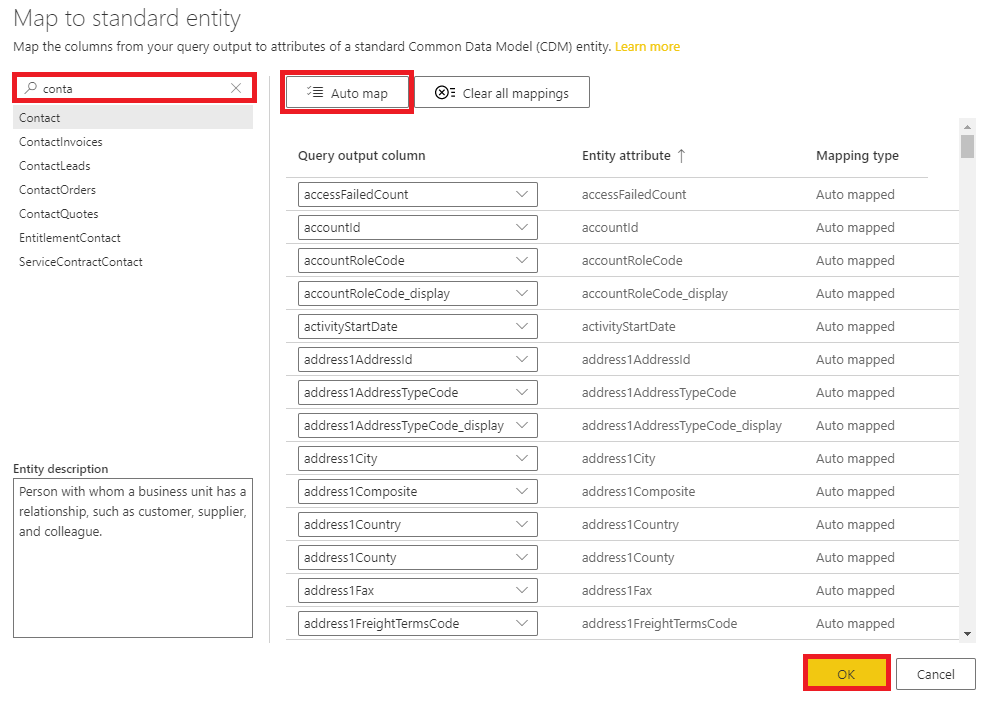
Power BI simplifies our life by offering the Auto map option, mapping the source columns with the entity attributes where the name matches. In this case, because our source is a CDM entity, all columns match, however, if we were mapping from a custom data source, not all columns would match to the CDM entity. In this scenario, we would have two options. Either discard columns that do not match with the CDM entity or do not perform the mapping exercise and create a custom Contact CDM entity.
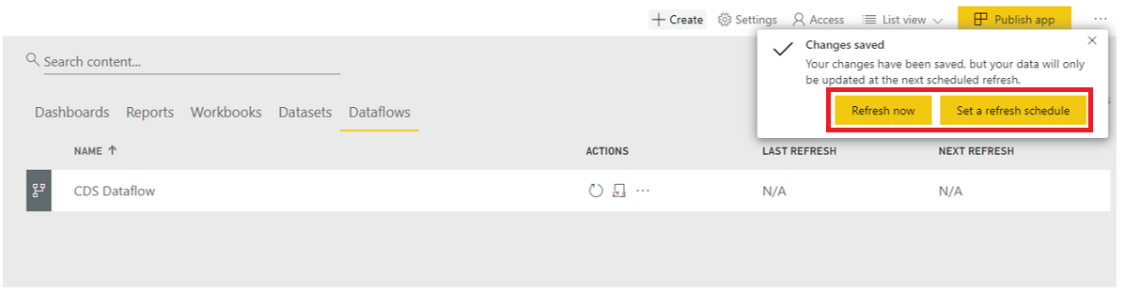
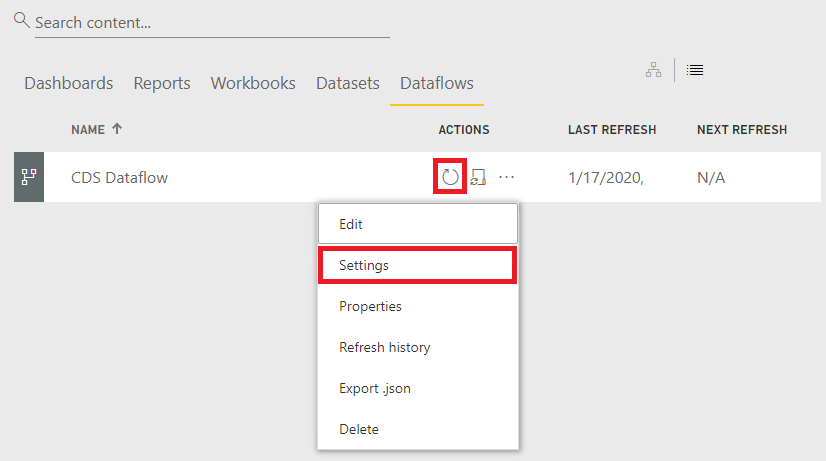
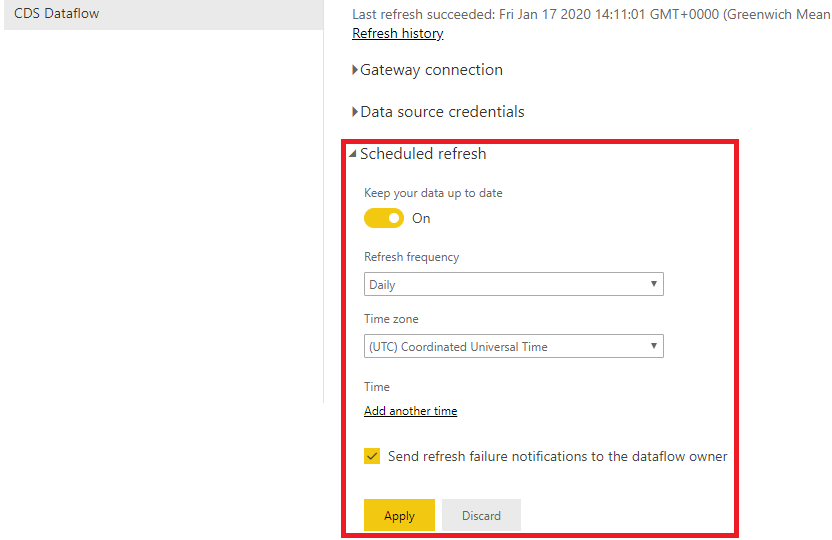
After the dataflow is created, Power BI offers the option to either Refresh now or to Set a refresh schedule. The first option will trigger an update and create the entity in ADLS. The second option is required if there’s a need to frequently update the data by setting a schedule. If a schedule is not set, then the entity will have to be manually refreshed (circular arrow). These two options can be triggered right after the creation of the dataflow or later by navigating to the Dataflows tab and select the required action.
If you read my previous blog, you will find a few differences in terms of how the CDM is structured in ADLS.
At a root level, we will have a folder named after the workspace (eg. Quickstart with CDM). It is possible to have multiple workspaces using the same storage account.
The next level is a folder named after the dataflow (eg. CDS Dataflow). There will be as many folders as dataflows created in Power BI.
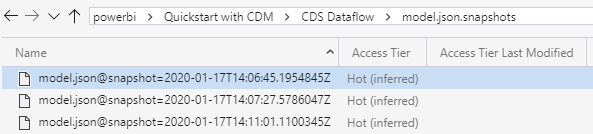
The third level contains the model.json file and two folders, one containing the entity snapshots and the other the model.json snapshots. Each time the dataflow is refreshed, a snapshot of the entity file is taken.
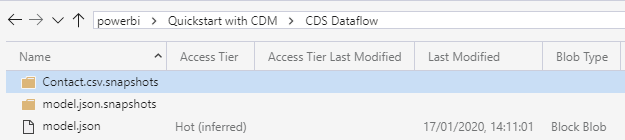

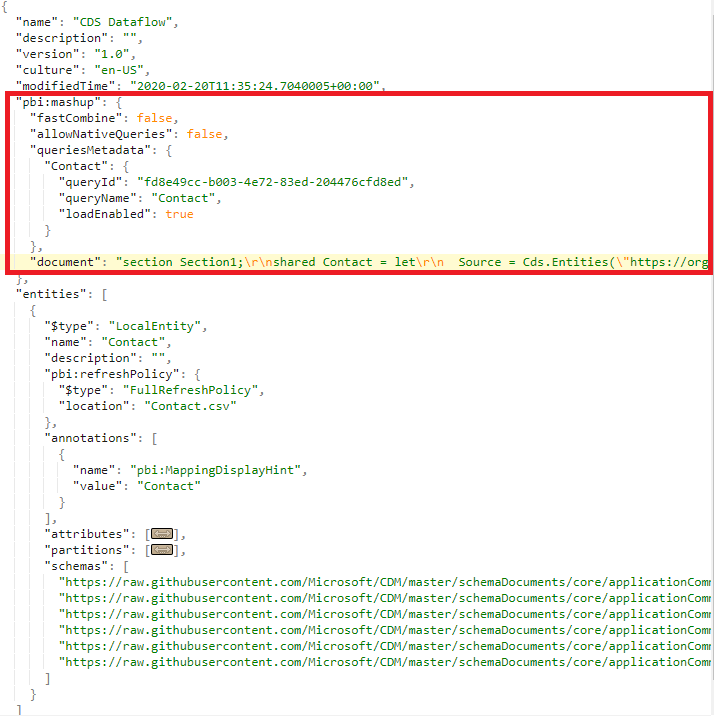
One other difference is how the model.json is structured. On top the mandatory attributes that we expect to find in the file, there are a couples of attributes specific to dataflows that provide information about the data definition and the queries used to extract the data.


Hi, very good info!
Do you know if Dataflows can be stored in ADLS as parquet files instead of csv?
According to Microsoft it is now possible to land the data in csv and parquet (here).