In a recent project I was asked to upgrade a BI solution from SQL Server 2012 to 2014. The aim of which was to consolidate a number of database sources onto a single version of SQL Server. This blog looks at the steps required in order to achieve the upgrade process, along with issues I hit along the way.
Where do I start?
In order to develop on SQL Server 2014, you’ll need to update your development tools! This involves downloading the following applications.
You’ll also need to update any custom components within the solution. For me, this was the 2014 Attunity drivers (3.0) to connect to our Oracle sources and some custom Adatis Framework components, both will need GACing. Remember that if you develop using 32 bit components you may need to download the equivalent 64 bit components once your solution is deployed to a server.
Once you have the necessary tools locally, you can start the upgrade process. Open up the solution in your new environment.
The Solution Upgrade Process
The first thing I noticed was that during the upgrade I lost all my SSIS components layout and comments when opening up the packages in VS 2013 that were developed in VS 2012. The code was still in the package file, but did not seem to do anything. I’m not sure this happens for everyone as the information I found to resolve the issue was not particularly well documented around the internet. Its possible that upgrading to Update 5 beforehand may resolve this issue. To fix the the problem, I had to open up the packages code and search for the line that says version=”sql11″. This needs to be changed to “sql12”. The next time you open the package, everything should appear again. I also found that if you open up the package first in 2013, the application will automatically change this to sql12 however the comments/layout did not seem to appear. You also won’t be able to amend the file at this point so will need to roll back if using version control such as TFS.
Another issue I ran into was that even after I ran this process, a few developers were unable to see the comments still. This is due to the fact they were running the dark themed Visual Studio which did not invert the text colour on the comments therefore making them appear hidden. Again, probably another bug with the base version of SSDT I downloaded off the Microsoft website before upgrading to Update 5.
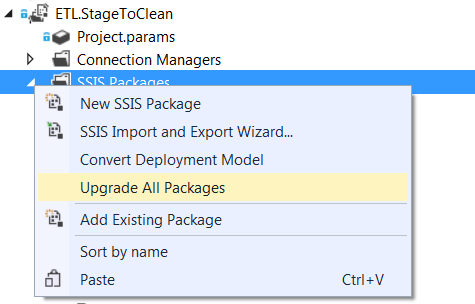
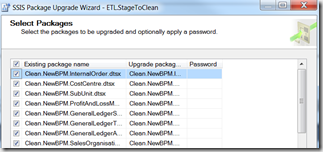
At this point you can start to run the packages through the Upgrade Package Wizard (if you right click on the SSIS packages folder in the project) .
If packages are not appearing in the wizard, then the application is not recognising the packages as coming from a previous version of SQL Server. Its possible that even after running through the wizard, it reports the packages as having failed the upgrade. It’s fairly safe to ignore this, and is usually the result of custom components or similar.
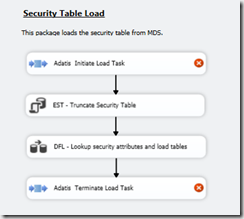
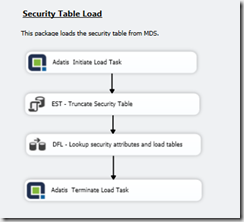
Depending upon how many packages you need to upgrade you are now faced with the unfortunate task of replacing any of the custom components in those packages, with the new ones you downloaded to work with SQL Server 2014. In my case, this was the custom Adatis components in the Control Flow (Initiate Task/Terminate Task – remember to set LoadStatusType to Success on the Terminate properties), Data Flow (Clean – Data Cleansing/Standardise/Validate Columns), and Event Handlers (Row Throughput/Terminate Task on Error – remember to set LoadStatusType to Failure on the Terminate properties).
In some cases, components before the upgrade display a different icon than afterwards so its easy to tell what version you have. When this is not the case, you’ll have to check the package code.
Following this, I then modified any connection strings I had within the solution to point to our new server. If you are not changing servers during your upgrade, just skip this step.
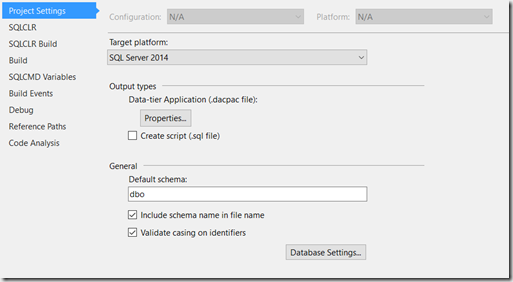
The next step is to update the DB projects to 2014 via the properties of the project. Very simple.
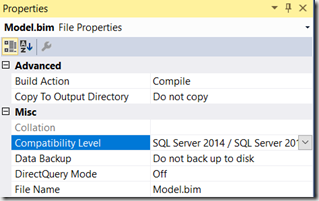
The final step needed within the solution is to upgrade the tabular model (if you have one). Firstly, make sure the model is open and then via the model properties, select the SQL Server 2014 compatibility level. Note – that if the model is not open, then this field will display blank.
Master Data Services
As part of my upgrade, I also had to upgrade our Master Data Services (MDS) to 2014. One of the pre-requirements for this is to have an IIS Web Server installed. If you’re provided a fresh clean server like I was then you’ll need to install this. This can be done through the Server Manager. Make sure the following features are added.
Web Server
- Common HTTP Features
- Static Content
- Default Document
- Directory Browsing
- HTTP Errors
- DO NOT INSTALL WebDAV Publishing
Application Development
- ASP.NET 3.5/4.5
- .NET Extensibility 3.5/4.5
- ISAPI Extensions
- ISAPI Filters
Health and Diagnostics
- HTTP Logging
- Request Monitor
Security
- Windows Authentication
- Request Filtering
Performance
- Static Content Compression
Management Tools
- IIS Management Console
- .NET Framework 3.0 Features
- WCF Activation
- HTTP Activation
- Non-HTTP Activation
Windows Process Activation Service
- Process Model
- .NET Environment
- Configuration APIs
The MDS configuration tool is quite good as it identifies if you are missing any pre-reqs. Once you have the pre-requisites for MDS installed as well as MDS 2014 itself, you can begin the upgrade process – which comes in 2 parts, the database, and the web site
Unfortunately, model deployment packages can be used only in the edition of SQL Server they were created in. You cannot deploy model deployment packages created in SQL Server 2008 R2/SQL Server 2012 to SQL Server 2014. Therefore you’ll need to take a database-level backup of your MDS database and restore to the new 2014 instance. In my case, I also needed to give our service account that was running SQL Server security access to the folder in which the backup was stored as it wasn’t able to see it.
Once you have successfully restored the previous MDS database to the new instance, you will need to load up the Master Data Services Configuration tool. To start with click on Database Configuration. If you then select the database you have just restored, it will suggest the database is not compatible with the current version of MDS and requires upgrading. Click on the Upgrade Database button and you should now have a compatible 2014 MDS database. I also had to re-set up the MDS mail profile at this point as this does not transfer across with the database.
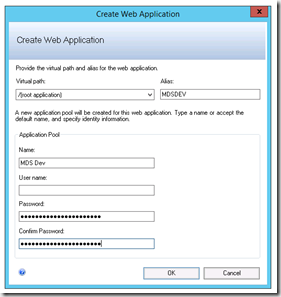
The next step is to configure a new MDS website which can be done via the Web Configuration button. Firstly, select the default website that is created when you install IIS. There is no need to create anything separate – in fact this caused me more hassle than it was worth. You can then go about creating the site which requires you to specify an alias, and the application pool information (name and service account information).
You are then required to associate both the database and web site together. At this point, you should be able to load up the new MDS web site and explore your old model.
One issue I ran into that stopped me loading into MDS at this point was that the service account you specify above will then need to be added to a local security group called “Log on as a batch job”. This can be done via the Computer Management application, then Local Users and Groups, Groups, Log on a batch job.
I also had some minor issues when loading MDS where the page was malformed and I was unable to see the database. I resolved this by providing the service account access to the web config of the web site directly.
Deploying & Testing
At this point, all the necessary requirements should be in place for you to deploy and test the upgrade. Deploy the solution as you would normally.
Your first step once your at this point is to add a new SSISDB Catalog to your new instance. If like me you did this via the old 2012 Management Studio, you’ll run into some errors potentially. Instead, load up the new 2014 Management Studio and you should be fine.
Depending on how your solution is setup, you’ll need to re-confirm any environment variables or script them out again and then configure the SSISDB projects to use them.
Then you will need to re-setup any SQL Agent Jobs you had on the previous instance, again this can be scripted across – just make sure you change the connection details.
Following this, make sure you GAC any components required on the new server similar to what you did locally.
Lastly, you will also need to add your SSAS Service Account into the new SSAS instance.
You can then run the solution out as per usual and check your execution status reports for any irregularities.
Summary
Hopefully this covers everything you need to upgrade your solution. Whether its from 2008/2012 to 2014 or 2014 to 2016, the steps should be roughly the same, you might just run into slightly different issues. Generally the process is fairly straightforward, the hardest part was keeping track of the number of steps required and then ticking them off as you do them. If you need to do this for both development and production servers, I’d advise running the steps side by side so they are set up in a similar fashion. Please let me know in the comments below if you’ve had any similar experiences / issues.

Introduction to Data Wrangler in Microsoft Fabric
What is Data Wrangler? A key selling point of Microsoft Fabric is the Data Science
Jul
Autogen Power BI Model in Tabular Editor
In the realm of business intelligence, Power BI has emerged as a powerful tool for
Jul
Microsoft Healthcare Accelerator for Fabric
Microsoft released the Healthcare Data Solutions in Microsoft Fabric in Q1 2024. It was introduced
Jul
Unlock the Power of Colour: Make Your Power BI Reports Pop
Colour is a powerful visual tool that can enhance the appeal and readability of your
Jul
Python vs. PySpark: Navigating Data Analytics in Databricks – Part 2
Part 2: Exploring Advanced Functionalities in Databricks Welcome back to our Databricks journey! In this
May
GPT-4 with Vision vs Custom Vision in Anomaly Detection
Businesses today are generating data at an unprecedented rate. Automated processing of data is essential
May
Exploring DALL·E Capabilities
What is DALL·E? DALL·E is text-to-image generation system developed by OpenAI using deep learning methodologies.
May
Using Copilot Studio to Develop a HR Policy Bot
The next addition to Microsoft’s generative AI and large language model tools is Microsoft Copilot
Apr