Azure Purview (a.k.a Data Catalog gen 2) has been released into preview and is currently free to play around with. I’d like to describe some of the concepts and terminology in this blog, as well as step through setting up a Azure Purview resource and connecting it to an Azure SQL Database before diving deeper in future articles. Microsoft’s tag line for Purview is “Unified data governance to maximize the business value of data”. Let’s unpack that statement a little…
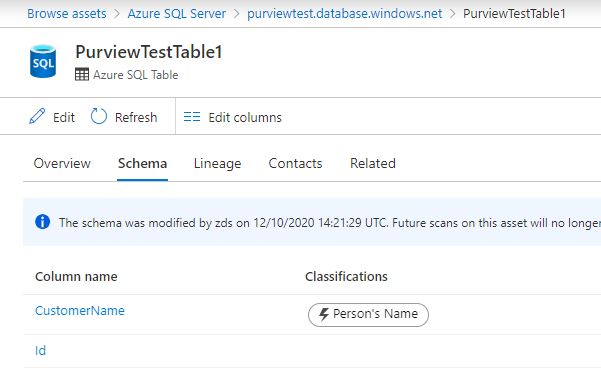
Purview connects to and catalogs your data sources (e.g. Azure Data Lakes, Azure SQL DBs) and the entities within them (e.g. files, SQL tables) to a columnar level. Over that columnar data, you can run scans to automatically identify whether the column holds a certain type of information such as a telephone number, national insurance number, or a credit card number, and tag it as such. At time of writing, there are 105 classification rules available, but this can be extended by creating your own custom rules using regex. This is a massive help when we’re talking about things like GDPR and trying to understanding exactly where sensitive or PII data is be stored.
Once you’ve cataloged your data sources you can create a glossary within Purview, which you can then associate to your cataloged data sources.
These features combined gives businesses the ability to develop a common lexicon of terms specific to them and their data, with detailed descriptions of what the term truly means to the business, and where you can find data related to that term.
Within the glossary, you can define synonyms against each term to help people find what they’re looking for, as well as related terms such as product data being related to sales data, for example.
There are a number of clients I’ve worked with who I know could really benefit from a tool like this.
Creating a Purview resource
Now let’s create a Purview resource and connect it up to an Azure SQL Database. Along the way I’ll describe the terminology used within Purview.
Firstly, we need to ensure your Azure subscription has the correct Resource Provides registered. You can do this by going to your Subscription > Settings > Resource Providers and ensuring the following three are registered:
- Microsoft.Storage
- Microsoft.Purview
- Microsoft.EventHub (I was missing this one!)
I won’t include the setup and configuration of these in this tutorial, but you’re going to need an Azure Key Vault and Azure SQL Database to follow along.
Step 1. If you haven’t already, log into portal.azure.com, hit add resource, and search for “Azure Purview”. You’ll be presented with the usual resource creation page with some information about the tool and a create button. Press Create…

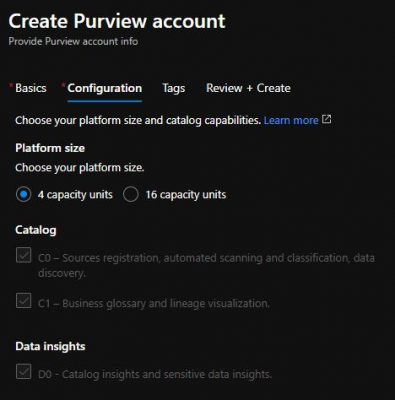
Step 2. Initial set up and configuration is very simple at the moment. On the first page (Basics) you simply need to enter a name for your Purview along with location and resource group information. One the second page (Configuration), you’re currently able to choose between 4 and 16 Capacity Units. Capacity Units are the compute power behind Purview, and are described as “Provisioned API throughput. 1 capacity unit = 1 API/sec” in the pricing documentation, with a price tag of £0.255 per 1 capacity unit hour. I.e. if you use 16 capacity units for 1 hour, you’ll pay £4.08.
There a few more options which are greyed out at the moment, assumingly whilst the product is in preview. Once you’ve filled in the Basics and Configuration tabs, hit Review + Create, then Create.
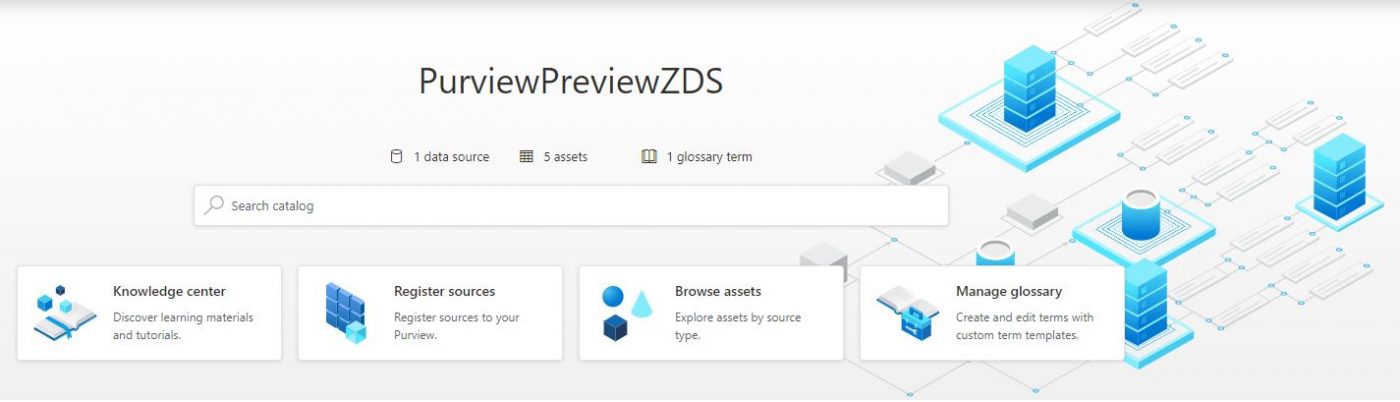
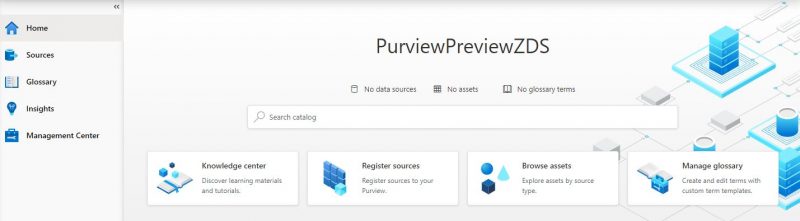
Step 3. Once the resource has finished creating, click into it and you’ll see Open Purview Studio – click into it and you’ll be greeted with the Purview studio landing page (no more dark theme!):
Step 4. Now that we have our Purview resource and we’re in the studio, we need to register a data source. We do that by either going to “Register sources” below the Search catalog text box, or by going to “Sources” via the menu to the left. Once on the sources page, select “Register” at the top to expose the list of sources currently available to register. Choose Azure SQL Database from the list, and hit Continue. There are 10 at time of writing, ranging from Data Lake to PowerBi:

Step 5. Give your resource a meaningful name and select the server it resides on. You can also choose a collection to add your registered source to. A collection is optional and is nothing more than a logical container for your sources.There’s going to be some thought required about how best to structure your collections – for example by environment, by resource group, by scan types… For the purposes of this tutorial, you can set it to None. Click Finish.
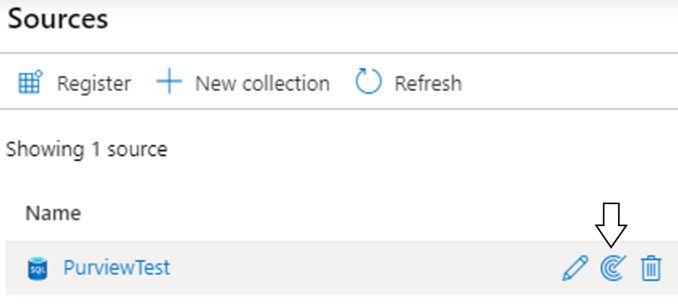
Step 6. Now that we’ve connect up to a server, we want to perform a scan! We start configuring this by hovering over the source we just created and select the radar icon to expose the New Scan Window.
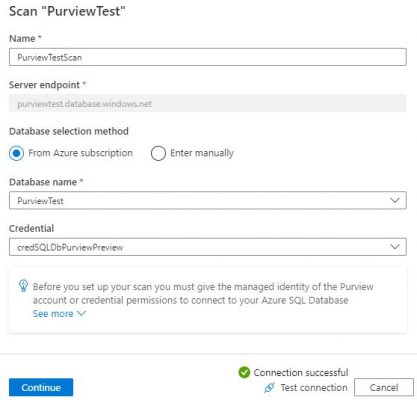
Step 7. Choose the database you’re interested in scanning – the list will be populated with the databases available on the server we connected to in steps 4 & 5. On this window, you also choose the credentials you’re going to use to connect to and scan the database. Select New and you’ll be presented with the New credential window. Name your credential something meaningful, choose SQL Authentication as the authentication method (it defaults to this), enter a SQL username with access to the database, but the password must be provided via an Azure Key Vault Secret!
As mentioned, I won’t guide you through how to set up Azure Key Vault directly in this tutorial, but you can follow the guide here: https://docs.microsoft.com/en-us/azure/key-vault/secrets/quick-create-portal. It’s important that you give your Purview resource access to your secrets via Key Vaults access policies.
Once the form is completed, click create to finish creating your credential and be taken back to New Scan window where your new credential will be selected for use. Test your connection, and if it succeeds press Continue – if this fails, you may have “No” selected to “Allow Azure services and resources to access this server” against the SQL Server – go to that resource and change it to “Yes” in the Firewall settings if so.
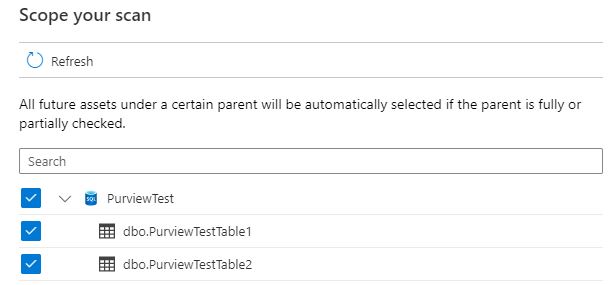
Step 8. You should now be on the “Scope your scan” window. This will show a list of all tables available to be scanned in. All are ticked by default, in my case I just have two dummy tables, but for performance you will want to take out meta-data or system type tables where you know there won’t be any information valuable to the business.
As stated in the window, by having the parent selected, or partial selected (I.e. if I unticked Table1, but left Table2), then any new tables added to the PurviewTest database will automatically be included in the scan. This means if the system is under development, you may have to revisit your scoping from time to time to ensure you’re only scanning worthwhile tables.
Conclusion
There’s lots more to explore here, and I intend on writing further articles on Purview, which I’ll link to here once I have:
For more information please see our recent announcement blog from our CTO, Sacha Tomey


Thank you for this informative article. I am interested in the connectors that are available. Is it possible to connect to the Common Data Service to scan Dynamics 365 CE data?
Hi Barry, CDS isn’t currently available in Purview. I’m sure the list of connectors will grow rapidly as the product gains momentum. A workaround could be to ingest data from sources not directly available into a Data Lake, then scan that…
Nice article, thank you. Do we have any indication when this will be coming to UK South region?
Hi Darryl, thanks glad you enjoyed it! I’ll ask one of my colleagues to get in touch with you to discuss what we know.