When you are in the process of rolling out Power BI, many factors must be considered. For this reason, a planned and incremental approach is recommended for increasing adoption and the overall success rate. As part of this approach, an important process that should be carried out is the identification of the Power BI Administrator and going through the Tenant Settings in the Admin Portal to ensure all settings are configured to reflect your organisations policies.
Now, the purpose of this blog is to explore the various settings we can configure in the Tenant Settings. This blog will be broken into two parts, as we have many settings available. We will briefly touch upon each setting and also highlight some of the details we should be aware of when configuring these settings. Not doing this early in the process can lead to various people in the organisation making decisions without the knowledge of the core teams. This can lead to data being leaked, uncertified visuals being used, unauthorised individuals viewing reports, multiple workspaces being created, and more.
With that said, let’s jump into Part 1 of Exploring the Power BI Tenant Settings.
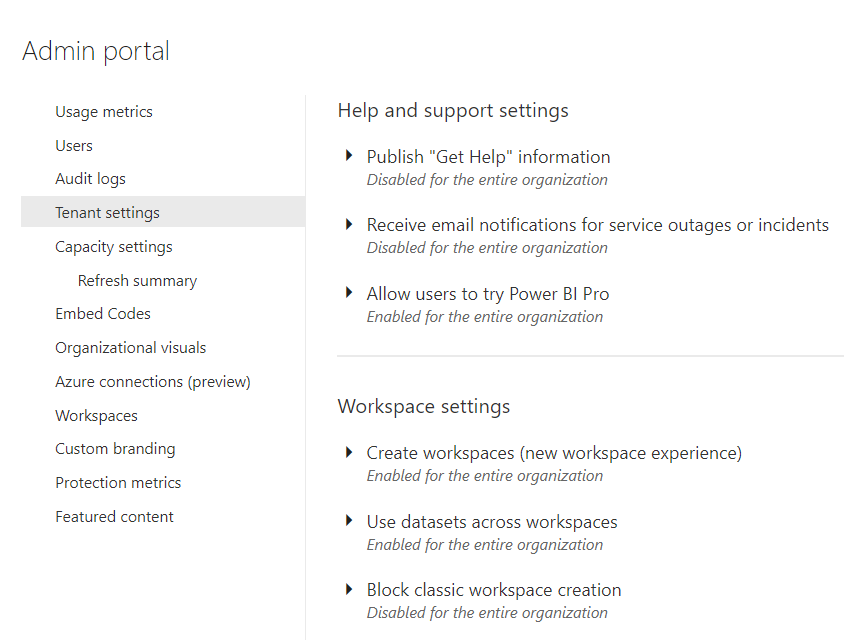
1.1 Help and Support Settings: Publish “Get Help” information
When we are rolling out Power BI to the enterprise, it is recommended to create an internal environment for sharing and collaborating. Here members of the organisation can ask questions, access bespoke learning resources, and raise requests for reports and licenses. Creating this community feeling eases the common fear factor of change and shows everyone how Power BI can be used to assist them in their day to day decision making.
This community can be configured in Microsoft Teams by setting up a Power BI related site or by using any other communication and collaboration platform. After investing time and effort in creating various training sources and applications it can be a challenge to educate members of the organisation about the availability of these organisational resources. With that said, Power BI through the setting ‘Publish “Get Help” information’ in the Tenant Settings contributes to creating this internal environment, implementing governance policies, and overcoming the challenge of understanding the availability of resources.
When logged in to the Power BI Service, you will notice in the top right a ‘?’ icon which is the Help & Support link. By default, this points users to the Microsoft sites for Guided Learning, the Power BI community, and the Power BI support forum. We can now choose to customise the links which are illustrated in the below screenshot, so members of the organisation are directed away from the default links and to the organisation specific resources.
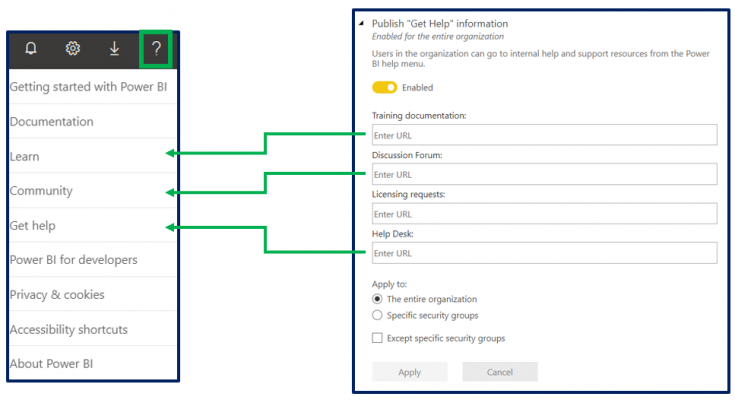
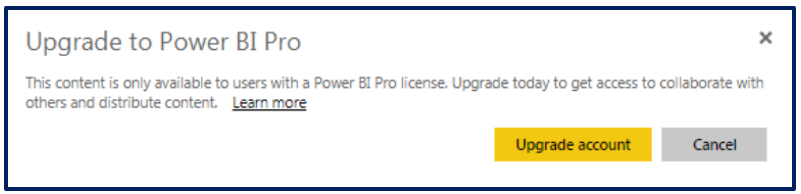
It is also worth mentioning the option to customise the default licensing request link. It is advised to develop a license management application for automating the process. Doing this will modify the link ‘Upgrade account’ so members are redirected to the provided link.
1.2 Help and Support Settings: Receive email notifications for service outages or incidents
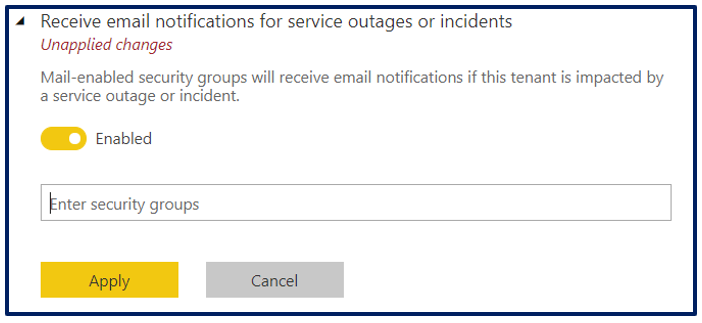
Do you know what I find worst than a service outage or incident… being left in the dark about the service outage or incident. Luckily enough Power BI offers a setting that can be configured to send emails to an individual or group of individuals in a security-enabled group.
It is advised that the Power BI Administrator receives these emails and also, a selection of other individuals around the organisation too. This is to cover any instances of the Power BI Administrator being away from the office.
1.3 Help and Support Settings: Allow users to try Power BI Pro
Managing licensing in Power BI is an important consideration, as things can quickly get out of control if members of the organisation are signing up for a free trial of Power BI Pro. For this reason, depending on your organisation policy and governance processes implemented, the decision should be made to decide whether members can sign up for a 60-Day free trial of Power BI Pro.
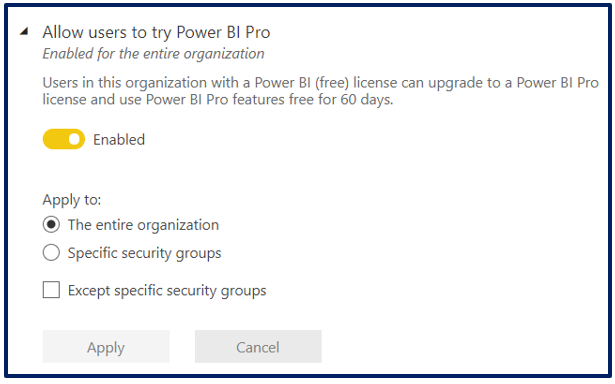
In addition to this setting, it is possible to change an additional setting in Azure Active Directory to disable the self-purchase of Pro licenses. This gives us the necessary settings to govern our Power BI tenancy and manage Power BI licenses.
2.1 Workspace Settings: Create workspaces (new workspace experience)
As we are now in the space of exploring three settings in the Tenant Settings that are relating to workspaces, it’s worth ensuring we all understand what these are. Quite simply, workspaces are a shared environment for which members of an organisation can be added to for sharing and collaboration. They store the Power BI items of datasets, dataflows, reports, workbooks, and dashboards. So, we can see these as our folders. Many use workspaces as a production environment, but in large enterprises, it is advised workspaces are used only for testing and development.
Also, it’s worth noting that we have two types of workspaces, old workspaces, and new workspaces. Some of the core differences are that in the new workspace you can assign AD security groups whilst in the old you could only add people individually and new workspaces do not automatically create an O365 group as the old workspaces would – which I hated! The key difference is the new roles that come with the new workspace experience. The detail of these roles is out of scope for this blog, but the old workspaces offered little flexibility regarding access roles we could assign.
Now that we have a brief overview of workspaces, back to the Tenant Settings in the Admin Portal. So, we can configure this setting to restrict the number of people who can create new workspaces in the Power BI tenancy. By default, this is enabled for the entire organisation, so this question must be raised when outlining your data governance strategy, as you can quickly end up with a chaos of workspaces. It may be that only the core data team and designated Power BI Champions can only create new workspaces, or it may be enabled for the entire organisation, and have a selection of core workspaces under management.

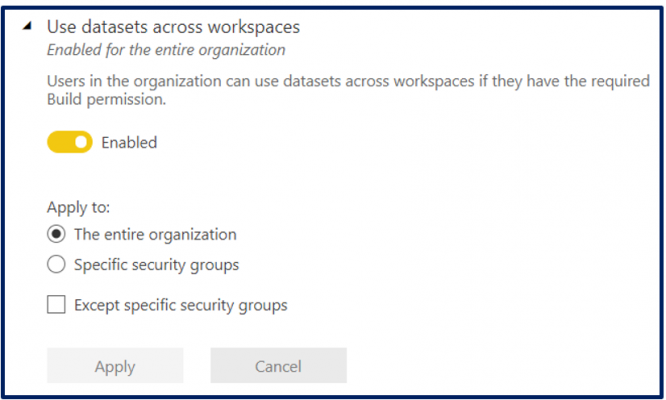
2.2 Workspace Settings: Use datasets across workspaces
Shared datasets could arguably be one of the biggest and most needed features that the Power BI team incorporated into the platform. Limiting the ability to use datasets across workspaces for the entire organisation, is not recommended from my perspective as this is the way to create a single version of the truth, break down data silos and democratise your data throughout the organisation.
However, every organisation is different and may have its consolidated, single version of the truth outside of Power BI. So, if you do go ahead and disable shared datasets, it’s worth knowing it will also have the below effects on your report authors:
- Unable to copy reports across workspaces. When copying a report across a workspace, only the report is copied and not the dataset too, as it takes advantage of shared datasets.
- Unable to edit reports that are working on a shared dataset. In my opinion, this wouldn’t be the worst thing, as I am against editing reports in the Power BI Service, due to not being able to use any version control on the changes applied.
- Only able to select datasets from workspaces where you are a member. If you have a core dataset in a workspace, any report authors that require this dataset to develop a report must be added as a member to this workspace.
If you keep this setting enabled, members will still require the necessary build permission for specific datasets.
2.3 Workspace Settings: Block classic workspace creation
If new workspaces are so much better, then why can’t we block any additional old workspaces from being created… Well now we can, this is a recent addition to the Tenant Settings and is very much welcomed.
As mentioned previously, it was frustrating and chaotic to have O365 groups generated with old workspaces and old workspaces generated with every Teams created in Microsoft Teams. Having this setting available prevents this from occurring.
This setting is not per-user or security group, as it’s a tenant wide setting. When I first heard of this setting, my first thought was what happens to the already existing old workspaces? Well, no panic is needed as they will be safe with no interruption to any of the Power BI items. However, if you have any old workspaces that have not had any activity by a member of the organisation, these will be removed.
With this setting now available, it is worth organisations cleaning and simplifying their existing workspaces. Keep in mind, that deleting a Power BI old workspace will also delete the underlying O365 group due to both of them being tied together. So, be sure to first upgrade the old workspace to a new workspace and then deleting, as this unties it from the O365 group.

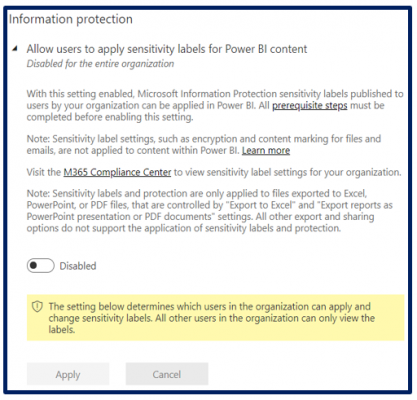
3.1 Information Protection: Allow users to apply sensitivity labels for Power BI content
Microsoft sensitivity labels allow us to classify and protect Power BI content that is sensitive to the organisation. It’s no secret that even with the powerful capabilities of Power BI, many still go ahead and export data to Excel or as a PDF for sharing through email with colleagues and other stakeholders of the organisation. These sensitivity labels are defined by the organisation in one central location and can be used against Power BI content. These are the same labels that can be used to label O365 items like Excel, PowerPoint, and email in Exchange.
So, if a member of the organisation exports data to Excel from a Power BI report that has a ‘High Confidentiality’ sensitivity label, Microsoft Information Protection validates this member has the permissions to view this data. In summary, sensitivity labels on Power BI content allow us to extend protection and governance policies to exported data outside Power BI.
Enabling this setting in the Power BI Admin Portal allows specified members and security groups to classify and apply sensitivity labels to Power BI items, which all members will be able to see. Keep in mind, applying sensitivity labels not only requires a Power BI Pro license, but also an Azure Protection license. Furthermore, make sure before applying this setting, the organisation has pre-defined the sensitivity labels, otherwise, more harm than good could be caused.
4.1 Export and sharing settings: Share content with external users
Onwards we go and finally, we are to the fourth set of settings which are all around exporting and sharing. So, for the first, we have sharing content with external users, which is quite self-explanatory.
This setting is enabled by default, meaning when report users have the right permissions they can share the content of a workspace, such as a report, with external users. When they do this, they will receive the below message:
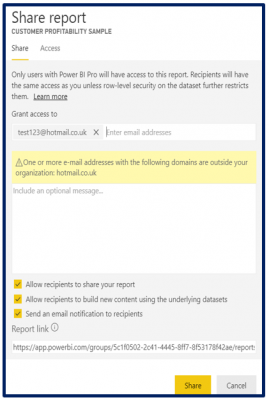
If they accept and share with external users, Power BI sends an invite out to the external user to become Azure Active Directory B2B guest users in the organisation. If this goes against your organisation policies, make sure to disable this setting.
4.2 Export and sharing settings: Publish to web
This is the all famous publish to web, which has come up too many times in conversation for my liking over the years of working with Power BI. When talking to various individuals who told me they were using Publish to Web, they were surprised to hear that they were making the report and the data behind it accessible to everyone on the web, as no authentication exists when using this capability.
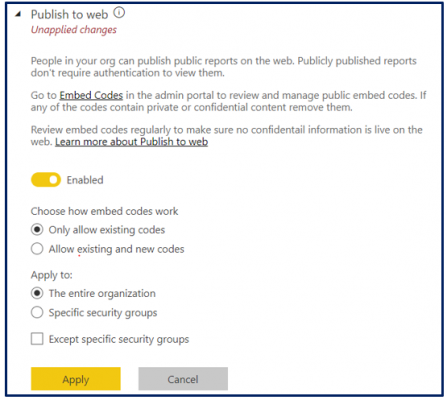
Previously, this setting in the Admin Portal was enabled by default, which I and many found insane as it caused many cases of accidentally leaking data. However, the Power BI team has made the change to restrict members of the organisation from using this capability by default. Now, the Power BI Administrator must authorise members beforehand. As you can see from the below screenshot, the setting will still show as ‘Enabled’, but it is set to ‘Only allow existing codes’, therefore anyone who tries to use this feature moving forward will not be able to.
With all the above said, I’m sure you all gathered what I would suggest with the configuration of this setting. Leave it on ‘Only allow existing codes’ or allow only restricted groups of members to use this capability. A final tip, have a look at the ‘Embed Codes’ in the Admin Portal, just to make sure no accidents already exist.
4.2 Export and sharing settings: Copy and paste visuals
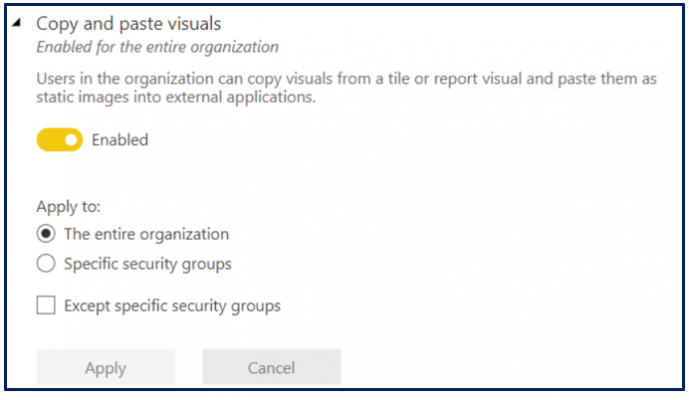
The next setting we have is for copying and pasting visuals from the Power BI Service to other applications as static images. This should not be confused with the capability of copying and pasting visuals from one Power BI Desktop solution to the other.
When viewing a report or a dashboard in the Power BI Service, the option exists to copy the individual visual. This copies the visual to your clipboard, therefore allows us to easily capture the visual as an image with a single click and pass it elsewhere.
Using this capability not only copies the visual itself, but also additional metadata for providing the necessary context. For instance, it also provides a link back to the initial report, the title of the report or dashboard tile, any applied filters, timestamp as well as the sensitivity labels, if any were being applied.
By default, this setting is enabled, so if you want to disable it for the entire organisation or enable it only for a selected group of individuals, make sure to make this change through the Admin Portal. In addition to this, if you would like to disable this capability for a single visual in a selected report, you can configure this directly in Power BI Desktop edit mode, no need to access the Admin Portal. This can be done in the ‘Visual Header’ options under the Visual Formatting pane when in Power BI Desktop.
4.3 Export and sharing settings: Export data
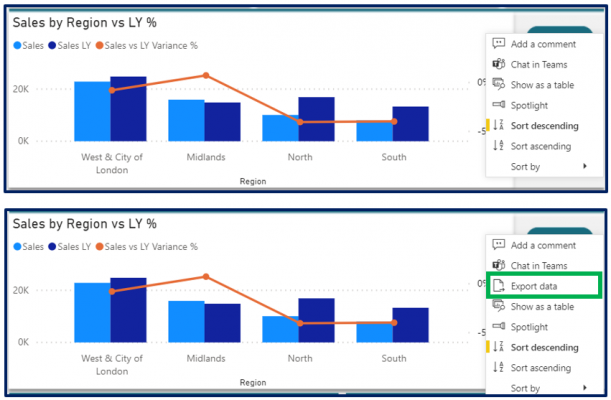
We now have the setting export data, which encapsulates more than the name suggests. This setting which is enabled by default allows members of the organisation to carry out the below capabilities. If these capabilities go against your organisational policies, you can go ahead and disable this setting.
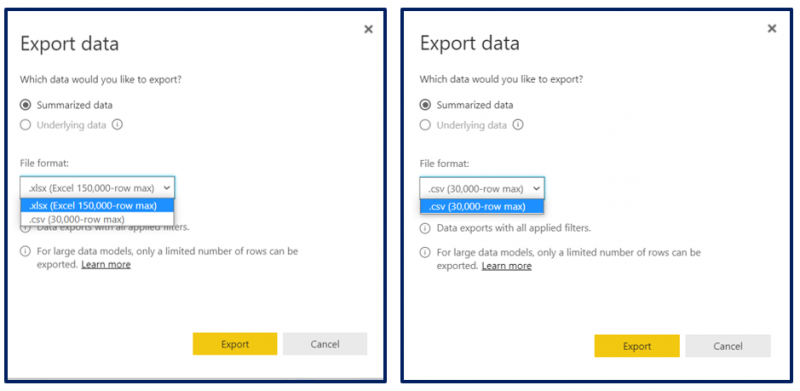
The first and obvious capability of the export data setting in Tenant Settings is export data. This allows us to export the summarised or underlying data from a Power BI visual. As you can see from the below screenshot, the option to select ‘Export data’ exists when this setting is enabled.
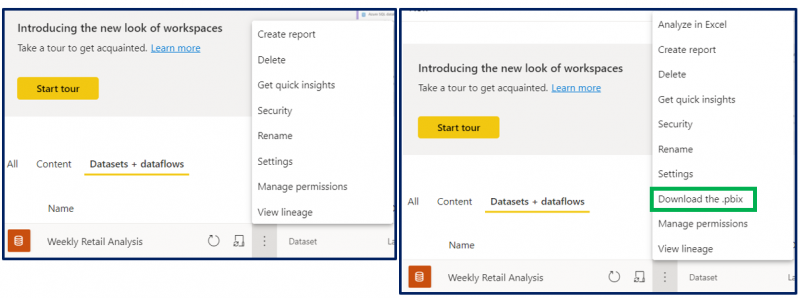
We then have the capability Analyse in Excel, which brings the Power BI dataset to Excel. Members can then interact with the dataset using pivot tables, slicers, charts, and various other Excel features. From the below screenshot, we can see that when this setting is enabled, the ‘Analyse in Excel’ option is not grayed out.
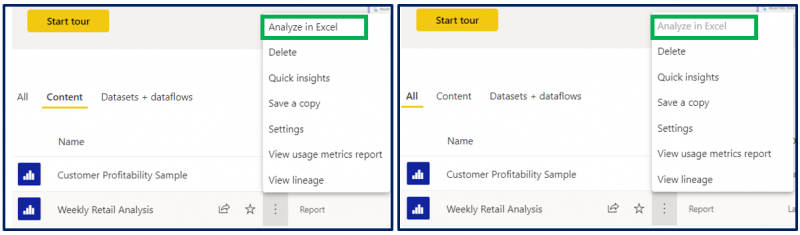
We also have the capability ‘Download the .pbix’ which allows us to download the PBIX file to our local machine from the Power BI Service. Once again, as we can see from the below screenshot when we have disabled export data, the button to download the PBIX is not available.
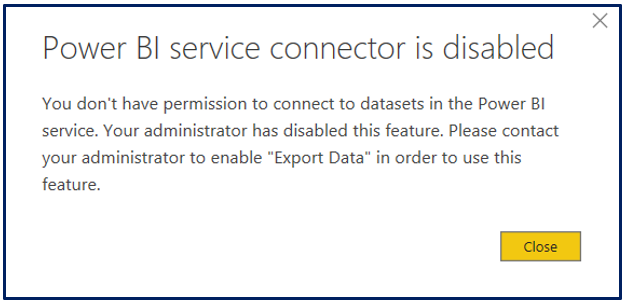
The last capability that is covered under the export data, is establishing a connection to a shared dataset. So, if we go to Power BI Desktop and we select ‘Get data’, followed by ‘Power BI datasets’, here we will be presented with a list of shared datasets that we can use as our underlying data model. If this setting is not enabled, we will be restricted from using shared datasets and be presented with the below message.
4.4 Export and sharing settings: Export to Excel
Okay, so this setting can cause some confusion as it did for me. Surely exporting to Excel is packaged under the export data setting which we highlighted above. Well, this was the case before this setting came into play and it still is unless we make the necessary change.
If you were working with Power BI before the ‘Export to Excel’ setting was introduced, exporting to Excel is controlled by the setting ‘Export data’. But, you will see the message ‘Unapplied changes’ against ‘Export to Excel’. Once you go ahead and apply the change to the ‘Export to Excel’ setting, it will now take over exporting to excel.
As you can see from the below screenshot, I have indeed applied the changes to ‘Export to Excel’ and have the ability to enable members of the organisation to export data but restrict them from exporting to Excel.
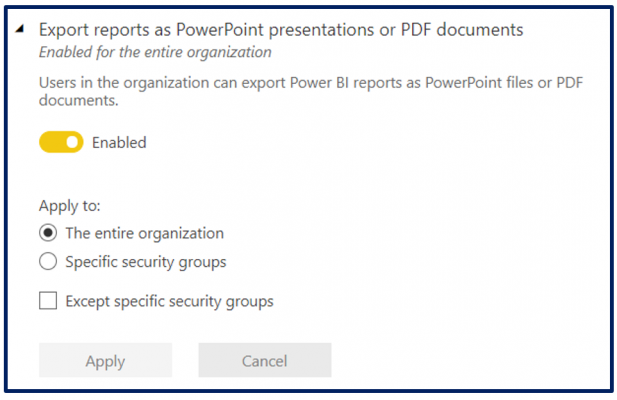
4.5 Export and sharing settings: Export reports as PowerPoint presentations or PDF documents
Through the Power BI Service, we can export our Power BI reports to a PowerPoint slide deck or a PDF document. When exporting, each page in the Power BI report will be one slide in PowerPoint or one page in the PDF document. Keep in mind, these are high-resolution images and not working versions.
When going through the process of change it is very common for members of the organisation to pushback against a new technology and revert to what they know and feel comfortable with. For this reason, exporting to PowerPoint or PDF is a common activity carried out by various members of an organisation. Depending on the organisation, this can be a positive as it slowly eases people into accepting Power BI or it can be negative as different snapshots can be used for decision making.
For this setting and various other exporting settings, this must be raised in the discussions when defining governance policies. Not doing this can lead to many areas of the organisation reporting directly out of PDF and PowerPoint documents.
4.6 Export and sharing settings: Print dashboards and reports
This setting is quite self-explanatory and is enabled by default. It allows members of the organisation to print Power BI reports and dashboards through the Power BI Service. Once again, this should be discussed when defining governance policies.
It is still common to see organisations print report packs on a Monday morning and take them to board/trading meetings. In cases like this, it may not be wise to suddenly disable this capability until the organisation slowly transitions into the new way of working or have alternative solutions such as tablets. It may be decided that only a limited group of people have this capability.

4.7 Export and sharing settings: Certification
This setting is linked to Shared Datasets, as it allows us to certify, therefore give datasets the stamp of approval that showcases they have gone through a process of checks and hold a high level of integrity. As this setting can essentially distinguish the most valuable datasets in the organisation, it’s important to have carefully selected the individuals who will have access to approving certified datasets.
By default this setting is disabled, and before enabling it the process of certifying a dataset should be discussed and the various endorsement statuses should be defined. When you access a Power BI Workspace, a dataset can have three types of endorsements which are illustrated below.
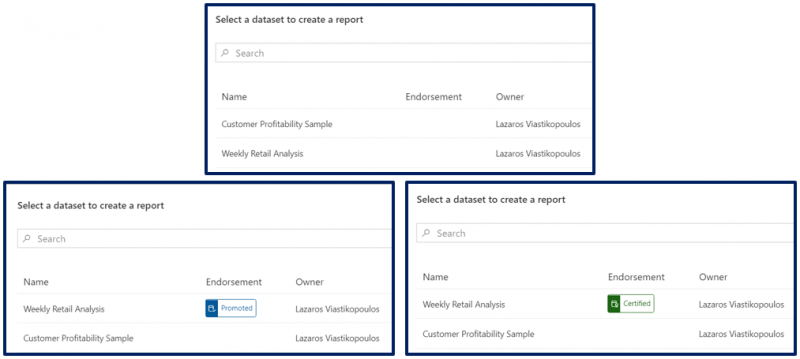
The first endorsement status which is on by default to all datasets is simply no status. The second status is the ‘Promoted’ status which dataset owners can mark their datasets with. Lastly and more importantly, we have the ‘Certified’ status which can only be assigned by a Power BI administrator or those who have been given the right permissions. Again, the organisation needs to predefine each of these statuses and outline the process of certifying a dataset.
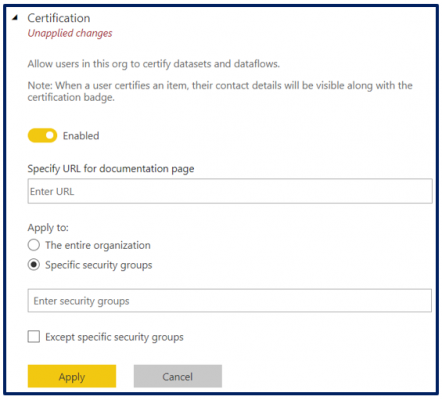
Also, notice in the below screenshot of the setting in the Admin Portal, we can add a URL link to internal documentation that specifies the approval process.
4.8 Export and sharing settings: Allow external guest users to edit and manage content in the organization
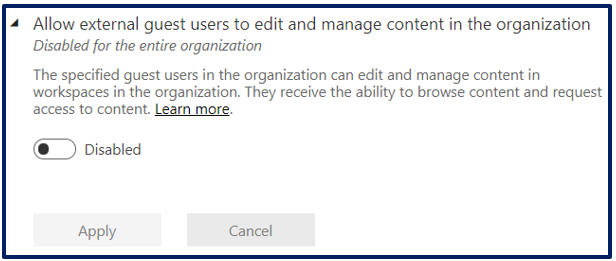
This setting allows Azure AD B2B Guest Users to collaborate with members of the organisation beyond the constrained read-only experience. With this setting enabled, the selected external users can modify and manage content, therefore carry out tasks such as edit reports and dashboards, publish or update apps, connect to data they have permissions to, and create workspaces.
As this setting offers a larger volume of control to external users, the Power BI administrator should limit which guest users have these additional capabilities and not enable them for everyone.
4.9 Export and sharing settings: Email Subscriptions
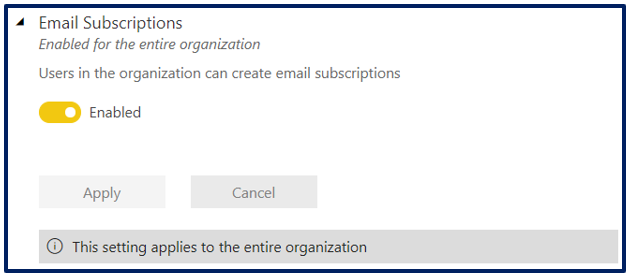
Well, this setting offers availability to a very popular capability, in fact, it’s the second most popular behind exporting data to Excel… After all, everyone loves a report waiting for them in their mailbox on a Monday morning. Email Subscriptions allow Power BI users to subscribe themselves or their colleagues to Power BI reports, dashboards, and paginated reports.
This setting is enabled by default and it’s not per-user or security group, but a tenant wide setting. Only users with a Power BI Pro license or those viewing content in a Premium workspace or app can subscribe to content. Also, even though edit permissions aren’t needed to configure your subscription, you do need edit rights to subscribe other members of the organisation.
Again, depending on your organisation policy and governance processes implemented, the decision should be made on whether this is available for everyone in the organisation.
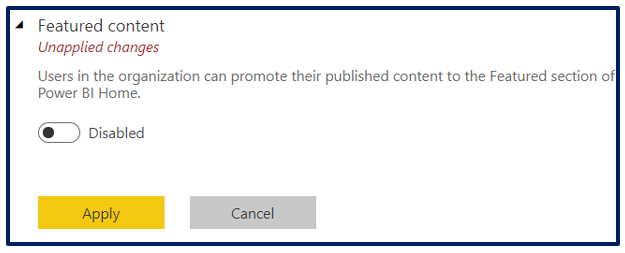
4.10 Export and sharing settings: Featured content
This is another great capability that contributes to creating an internal community that offers easy and fast access to various Power BI content. Power BI has the Home page which acts as a one-stop-shop for all content. Here you can access metrics from your favourite dashboards, easily identify most frequently used reports, Microsoft recommended learning resources, and let’s not forget the global search for all your content.
The setting which we are exploring here is for ‘Featured content’ and this was implemented by the Power BI team on the back of the feedback they collected from the Home page. More control was needed on what content features on the Home Page. Featured content allows the Power BI administrator or ‘promoters’, those enabled to use this feature, to promote content such as reports, dashboards and apps to the featured section on the Home page.
This feature is disabled by default in the Tenant Settings. If this is something that your organisation will start using, it advised starting off with a small group of ‘promoters’ at the beginning.
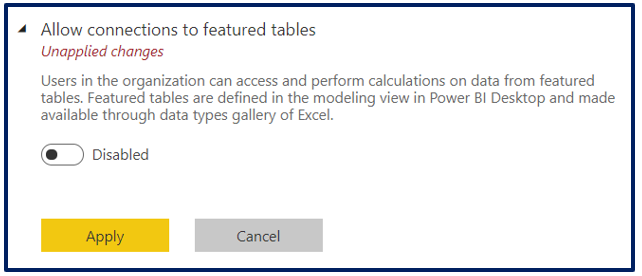
4.11 Export and sharing settings: Allow connections to featured tables
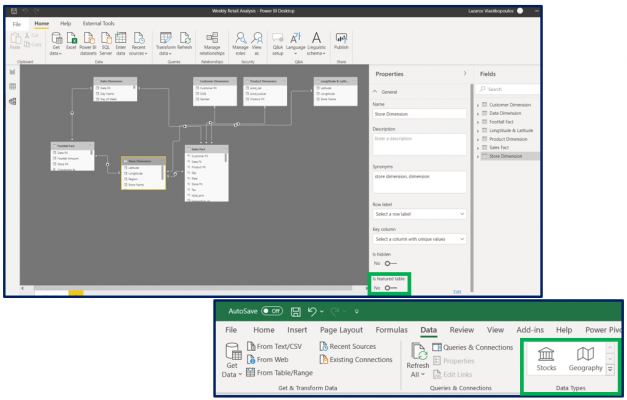
This setting enables members of an organisation to generate Featured Tables, which are a way to link data in Excel to data in a Power BI dataset. This makes it easier to add your data from Power BI to Excel sheets. So, once you have this enabled and you configure it through the Model tab, as the below image illustrates, you will then see the Featured Table appear in the Data Types gallery in Excel.
This setting is disabled by default for the organisation, and if enabled it requires not only a Power BI Pro license but also requires an O365 E5 license.
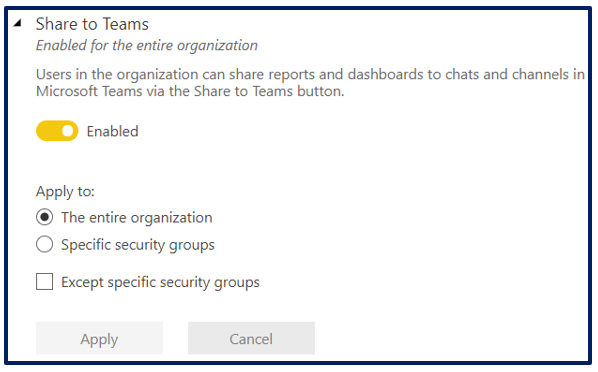
4.12 Export and sharing settings: Share to Teams
We now come to the last Tennant Setting that is available through the Admin Portal, which is Share to Teams. As we mentioned multiple times in this blog, it’s important to create an internal community, and many organisations achieve this through Microsoft Teams. There are multiple ways to share and collaborate on interactive Power BI content in Microsoft Teams channels and chat. For this setting, it’s all through the button ‘Chat in Teams’, which is displayed in the Power BI Service, as you can see below.
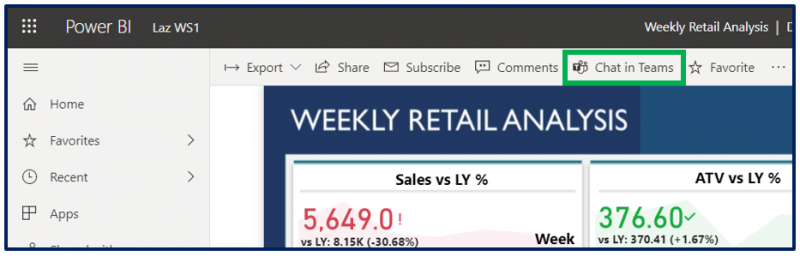
This setting is enabled by default and is a great way for members to quickly share a Power BI report or visual with their colleagues. Again, the availability of this capability should be discussed internally when outlining your organisations policies and governance processes, as the decision should be made on whether this is available for everyone in the organisation.
Conclusion
We should now have a good understanding of all the Tennant Settings available through the Admin Portal for Help and support, Workspaces, Information protection as well as Export and sharing. With this knowledge, we should start the process of identifying the Power BI Administrator and discussing these various settings internally, to ensure they are aligned to our organisational policies and governance processes. In Part 2 of Exploring the Power BI Tenant Settings, we will continue exploring the remaining Tenant Settings available.
Sources
Administering Power BI in the admin portal – link
Enjoyed this blog on Power BI? Check out our whitepaper here for more in-depth knowledge
Introduction to Data Wrangler in Microsoft Fabric
What is Data Wrangler? A key selling point of Microsoft Fabric is the Data Science
Jul
Autogen Power BI Model in Tabular Editor
In the realm of business intelligence, Power BI has emerged as a powerful tool for
Jul
Microsoft Healthcare Accelerator for Fabric
Microsoft released the Healthcare Data Solutions in Microsoft Fabric in Q1 2024. It was introduced
Jul
Unlock the Power of Colour: Make Your Power BI Reports Pop
Colour is a powerful visual tool that can enhance the appeal and readability of your
Jul
Python vs. PySpark: Navigating Data Analytics in Databricks – Part 2
Part 2: Exploring Advanced Functionalities in Databricks Welcome back to our Databricks journey! In this
May
GPT-4 with Vision vs Custom Vision in Anomaly Detection
Businesses today are generating data at an unprecedented rate. Automated processing of data is essential
May
Exploring DALL·E Capabilities
What is DALL·E? DALL·E is text-to-image generation system developed by OpenAI using deep learning methodologies.
May
Using Copilot Studio to Develop a HR Policy Bot
The next addition to Microsoft’s generative AI and large language model tools is Microsoft Copilot
Apr