In this blog article I will be detailing how I use TeamCity in order to automate the building and deployment of SSIS projects using the project deployment model. This is a little more complicated than doing a CI build for database projects or other project types as MSBuild will not be able to build or deploy these without a little work.
Prerequisites
This blog assumes the reader has first followed or is familiar with the steps outlined in the previous blogs in this series. These are available from:
https://adatis.co.uk/getting-started-continuous-integration-team-city-installation-and-setup
https://adatis.co.uk/configuring-teamcity-to-connect-to-visual-studio
https://adatis.co.uk/using-teamcity-to-automate-building-and-deployment-of-database-projects
As per the last blog Visual Studio should be installed on the build server, as well as the Business Intelligence Data tools extensions for both Business Intelligence and Database projects. Team City will need to be configured and setup to connect to TFS.
Adding the .dll
There is a dll released by a kind member of the community we will use to enable MSBuild to build/deploy the SSIS projects. The dll is called Microsoft.SqlServer.IntegrationServices.Build before you can enable CI for SSIS projects you will need to get the source and build the dll.The source for the dll is available as part of the ‘Microsoft SQL Server Community Samples: Integration Services’ project which is currently hosted at the following url: http://sqlsrvintegrationsrv.codeplex.com/
Once you have downloaded the source from the link you need to open the project located in the relative path ‘mainSSISMSBuildProjectMicrosoft.SqlServer.IntegrationServices.Build.csproj’
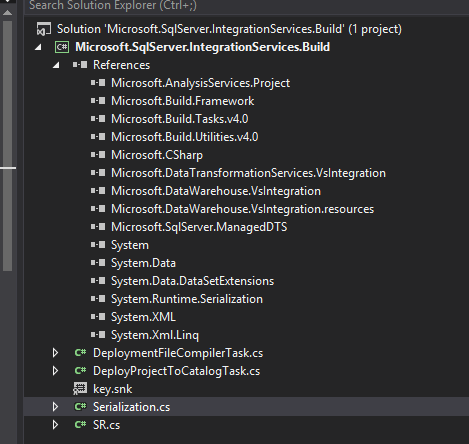
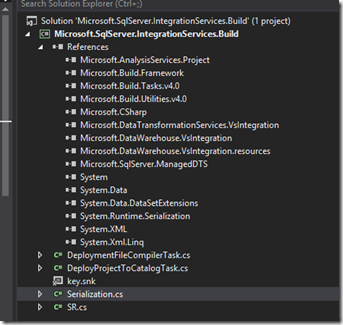
The project may build straight out of the box, however depending on your environment you may need to amend the references so that they are suitable for the environment. I found that because I am running SQL 2014 and visual Studio 2013 a few of the references needed a few changes in order to get everything running smoothly. Once you have added the referenes you should see something like the below (no warnings):
I added a file for the strongly named key (key.snk), set the configuration to release and built the project by right clicking the solution and selecting ‘Build’. If all has gone well you should see something like the following:
Following this you need to take the new dll from the ‘binRelease folder. For the purposes of this blog I placed the file in the path ‘C:Program Files (x86)Microsoft Visual Studio 12.0Common7IDEPrivateAssemblies’ however, you may wish to change this depending upon the environment you are working in and the Visual Studio version which is installed.
Configuring Project Settings
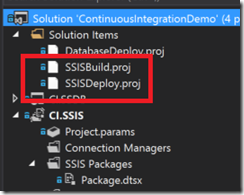
You need to add two xml files to your main project, this may not be required if you only have one SSIS project within your solution, however for larger projects I have found this provides a simple method of maintaining the solution and easily adding new projects to the project for CI deployment.
SSISBuild.proj sample file
SSISDeploy.proj sample file
The files should be added at the top of the solution which should give something like this:
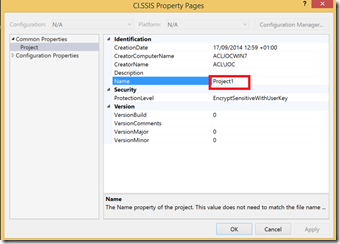
Right click the relevant SSIS project and set the Name property to the value you would like to see when the Project is deployed to the SSIS catalog.
Team City Configuration
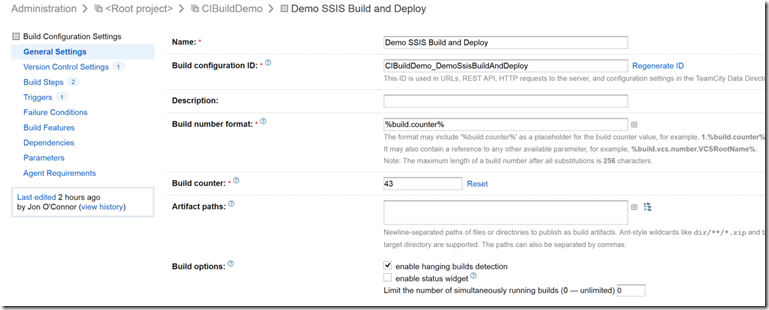
Add a new Build configuration eg ‘SSIS Build and Deploy’ to the project.
Attach the TFS root as per the previous blog In the version control settings tab.
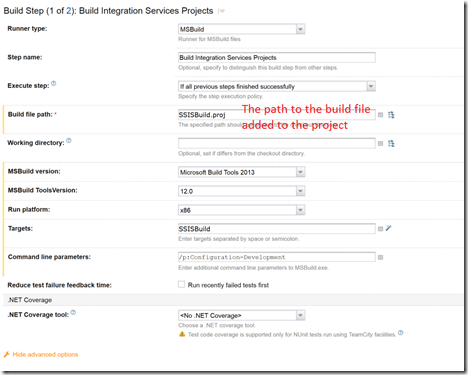
Add a new build step ‘Build SSIS Projects’. Depending on your environment and the Visual Studio version installed you may need to use a different version of MSBuild
You will notice that in the command line parameters here the value of ‘/p:SSISServer=Development
This setting should be set to match a suitable configuration in your project configuration in Visual Studio.
In this example I have used development.
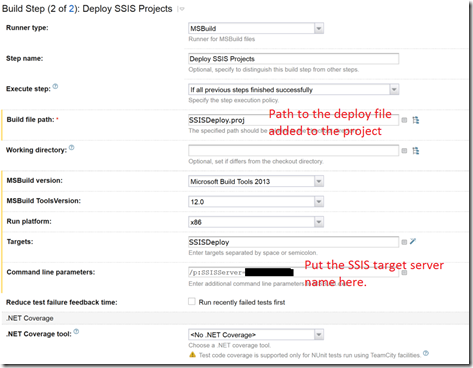
Add another step ‘Deploy SSIS projects’.
Ensure that the command line parameter is of the format: ‘/p:SSISServer=YourDeploymentServerName
Upon completion the setup build steps should look like this:
When you view the project in the main Team City ‘Projects’ section you should see the following if all is well:
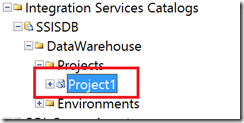
Checking the SSIS catalog we can see that upon check in the project has automatically been deployed to the target server.
See the next blog at: https://adatis.co.uk/continuous-integration-with-teamcity-automating-ssas-build-and-deployment/ for details of how to set up automated deployment of SSAS projects.







You actually make it appear so easy along with your presentation but I in finding this matter to be actually something that I feel
I would by no means understand. It seems too complicated and very extensive for me.
I am looking ahead in your next put up, I will try
to get the cling of it!