
Introduction :
In today’s digital landscape, data holds immense value, but not all data remains equally important as time passes. As data ages, its relevance often diminishes, making it crucial to adopt efficient management strategies.
In this blog post, we will run through the realm of Azure’s storage capabilities, focusing specifically on the Azure Access.
Tiers: Hot, Cold, and Archive. By understanding and leveraging these access tiers, you can optimise your storage costs and make informed decisions regarding data access and performance.
Hopefully this blog post will empower you with the knowledge required to effectively manage your data’s lifecycle, while simultaneously minimizing expenses and harnessing the full potential of your data within the Azure environment.
Join us on this exciting journey as we explore the concepts around data ageing management within Azure.
Access Tiers : Concept
Azure Access Tiers – The Basics:
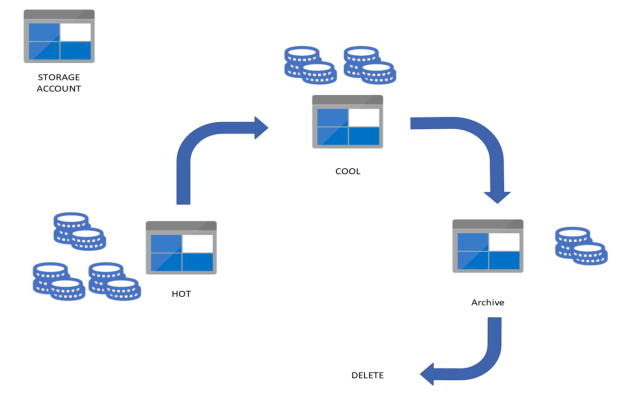
Azure’s storage services offer three types of access tiers, each tailored to different usage and access frequency needs.
Hot Access Tier: The Hot tier is designed for data that is accessed frequently or requires rapid retrieval times. This is the default access tier for data stored in Azure. While storage costs are slightly higher compared to the other tiers, the cost of accessing or performing operations on the data is lower.
Use Case:
-
- Data that’s in active use or data that you expect will require frequent reads and writes.
- Data that’s staged for processing and eventual migration to the cool access tier.
Cold Access Tier: The Cold or “Cool” tier is designed for data that is infrequently accessed and can tolerate a slightly longer retrieval time. Storage costs in the cool tier are lower than the hot tier, making it a cost-effective solution for storing large amounts of data that doesn’t require frequent access. However, accessing the data or performing operations will be more expensive compared to the hot tier.
Use Case:
-
- Short-term data backup and disaster recovery.
- Older data sets that aren’t used frequently, but are expected to be available for immediate access.
- Large data sets that need to be stored in a cost-effective way while other data is being gathered for processing.
Archive Access Tier: The Archive tier is ideal for data that is rarely accessed and can withstand long retrieval times, making it an economical option for long-term storage. The cost of storing data in the Archive tier is significantly lower than the hot or cool tiers, but retrieving data or performing operations is more expensive and can take hours.
Use Case:
-
- Long-term backup, secondary backup, and archival datasets.
- Original (raw) data that must be preserved, even after it has been processed into final usable form.
- Compliance and archival data that needs to be stored for a long time and is hardly ever accessed.
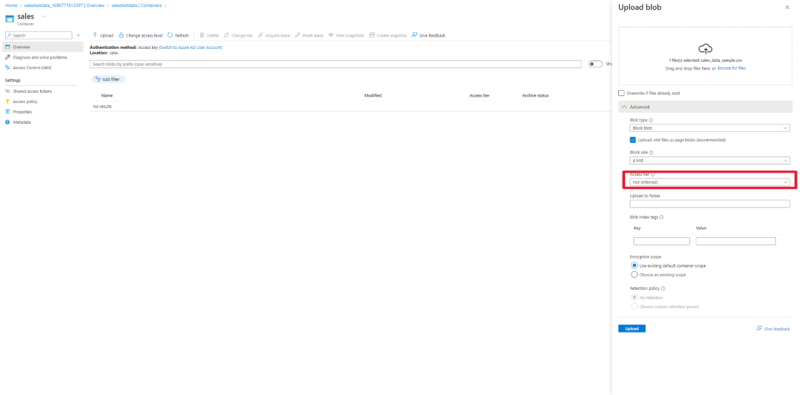
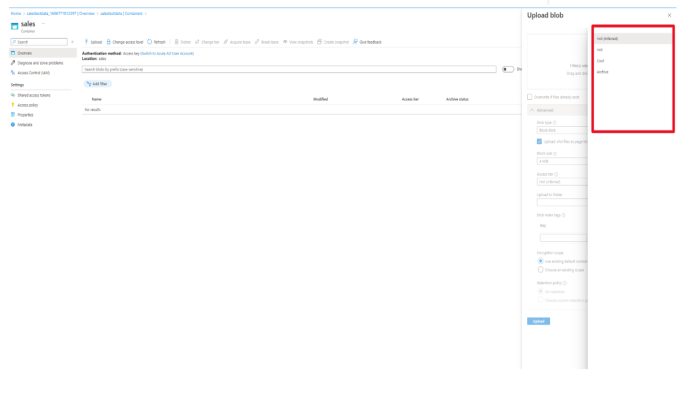
You can see that we have the option to choose our specific access tier for our sales data.
Below is a general guideline looking at the various reasons you would choose a specific access tier based on your data needs.
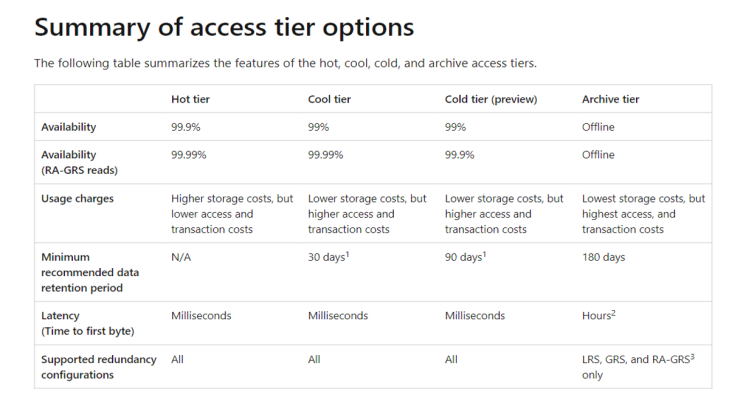
From the graph above an organization can make the decision of which tier is best useful focusing on:
- The comparative storage costs of the Hot, Cool, and Archive tiers.
- The data retrieval costs, which will be the lowest for Hot tier, higher for Cool, and the highest for Archive.
- The minimum storage duration, with the Hot tier typically having no minimum duration, the Cool tier requiring a longer commitment, and the Archive tier requiring the longest.
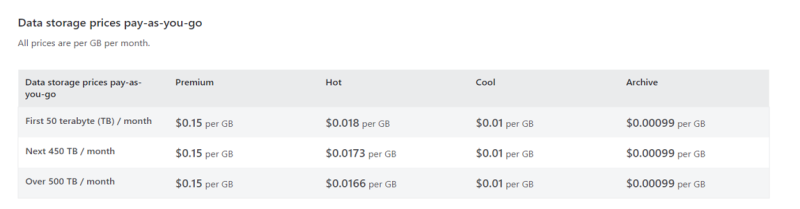
From this graph an organization can look for the varying cost per gigabyte (or other measure of data) for the different access tiers and compare these costs with your data storage needs and access frequency.
Manual Approach :
Let’s use a real world scenario to go through this in Action:
- First we set up a new storage account and enable versioning:
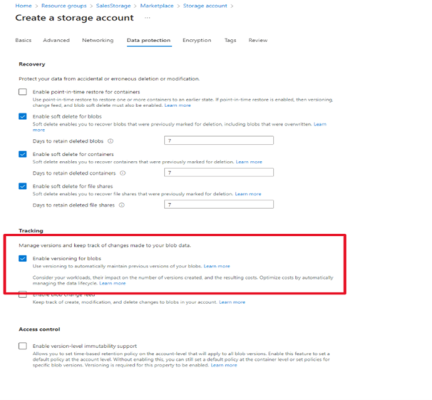
Make sure to click this check box. This allows us to :
- Keep a record of previous versions of blob
- Restore a container that has been deleted
- And most importantly optimize cost by automatically managing the data lifecycle
2. Next up we plan to store our sales data CSV into our sales container:
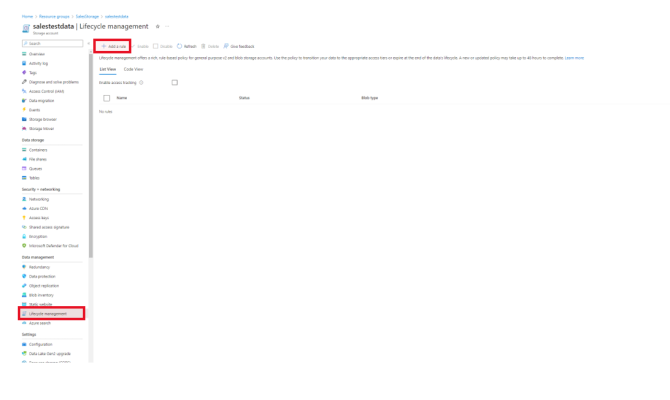
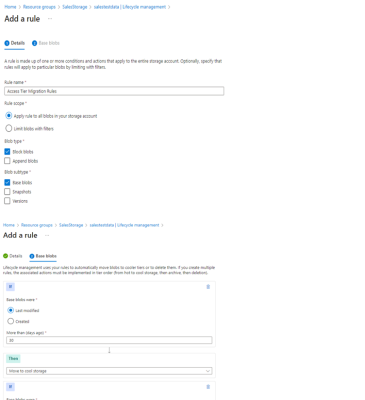
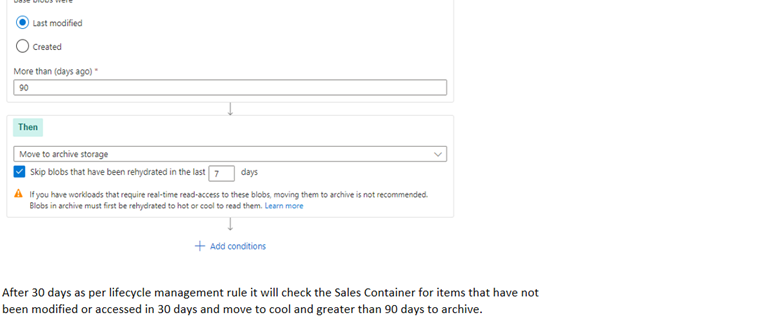
Next we move to the Data Management Tab and select Lifecycle Management and create a new rule for or Data Retention Policy.
This allows us to move data effectively between the different Tiers depending on business policy and the minimum recommended retention period:
 To learn how to build up Azure Lifecycle Management Policies, see Part 2. If you have any questions related to this post please Get in touch and speak to a member of the Adatis team to discuss the topic in greater detail.
Introduction to Data Wrangler in Microsoft Fabric
What is Data Wrangler? A key selling point of Microsoft Fabric is the Data Science
Jul
Autogen Power BI Model in Tabular Editor
In the realm of business intelligence, Power BI has emerged as a powerful tool for
Jul
Microsoft Healthcare Accelerator for Fabric
Microsoft released the Healthcare Data Solutions in Microsoft Fabric in Q1 2024. It was introduced
Jul
Unlock the Power of Colour: Make Your Power BI Reports Pop
Colour is a powerful visual tool that can enhance the appeal and readability of your
Jul
Python vs. PySpark: Navigating Data Analytics in Databricks – Part 2
Part 2: Exploring Advanced Functionalities in Databricks Welcome back to our Databricks journey! In this
May
GPT-4 with Vision vs Custom Vision in Anomaly Detection
Businesses today are generating data at an unprecedented rate. Automated processing of data is essential
May
Exploring DALL·E Capabilities
What is DALL·E? DALL·E is text-to-image generation system developed by OpenAI using deep learning methodologies.
May
Using Copilot Studio to Develop a HR Policy Bot
The next addition to Microsoft’s generative AI and large language model tools is Microsoft Copilot
Apr