In the first part of this blog we looked at setting up an Azure Lifecycle Management Policy manually through the azure portal interface.
In the following section, we will present a more efficient method for setting up Azure Lifecycle Management Policies. This approach leverages Azure PowerShell and involves the direct configuration of a JSON policy from the cloud shell (bash) console. The use of this method facilitates automation and expedites the setup process for our Lifecycle Management Policy.
Scripted Approach
The following steps describe how you can set the blob tier to Archive using an Azure PowerShell script:
- Open an elevated Windows PowerShell session. Make sure that your running PowerShell 5.0 or higher. Type:
$PSVersionTable.PSVersion
- Sign into the Azure PowerShell:
Login-AzAccount
- Define the variables for storage account, access key, container, and the storage context:
$StorageAccountName = “salestestdata”
$StorageAccountKey = “Your Secret Key”
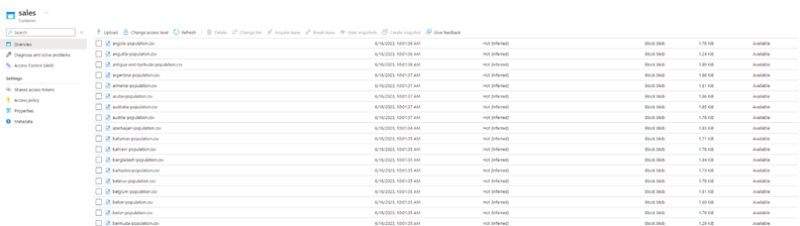
$ContainerName = “sales”
$ctx = New-AzStorageContext -StorageAccountName $StorageAccountName -StorageAccountKey $StorageAccountKey
$blobs = Get-AzStorageBlob -Container “sales” -Context $ctx
Foreach ($blob in $blobs) {
$blob.ICloudBlob.SetStandardBlobTier(“Archive”)
}
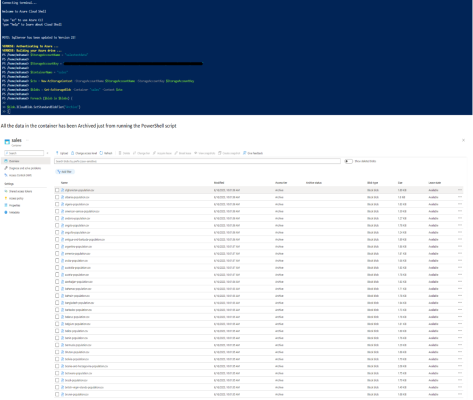
Looking at the example below we can archive all the country data in set running the PowerShell script:
Another Alternative method is creating it as a JSON Format :
- Check the current settings:
$storageAccountName = “salestestdata”
$resourceGroupName = “SalesStorage”
az storage account management-policy show `
–account-name $storageAccountName `
–resource-group $resourceGroupName
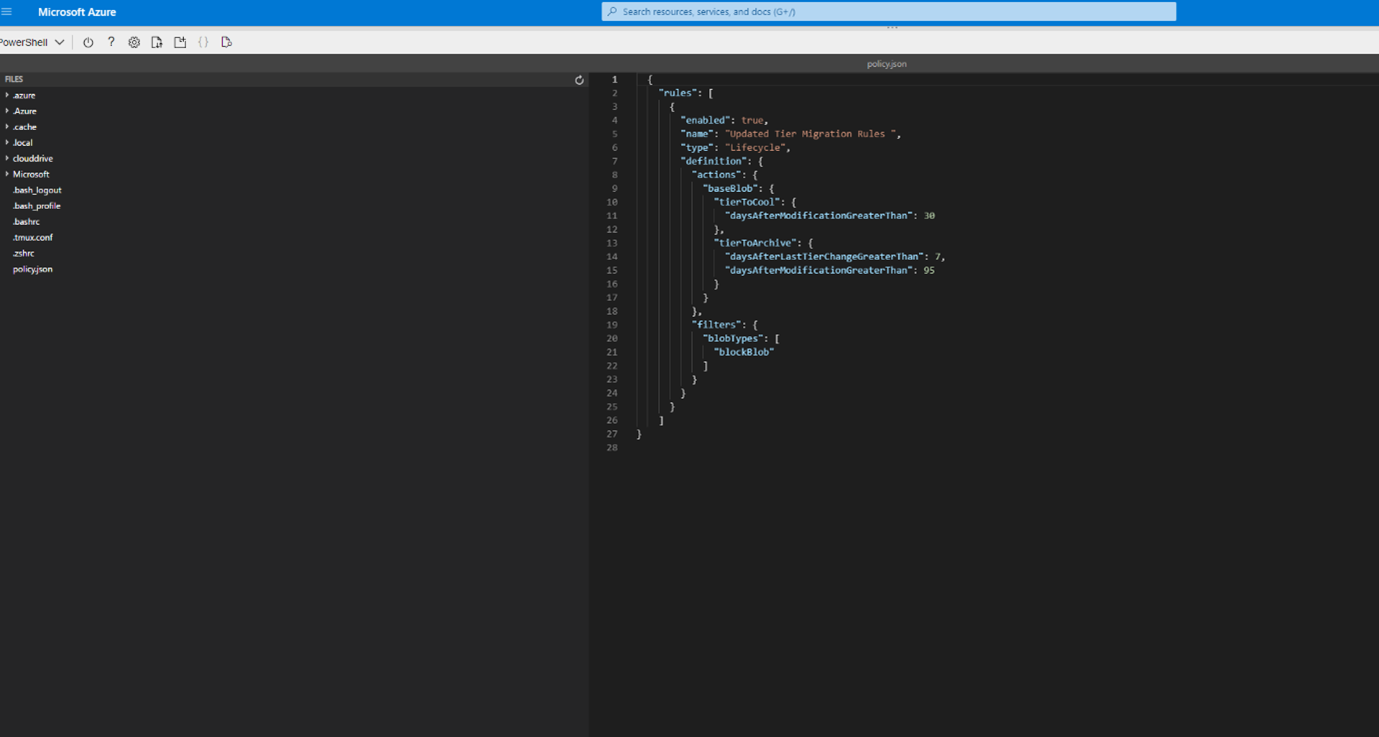
- If there is no existing policy available we create a new one – The policy’s definition is established through a .Json file with the following structure. To create the policy file directly from the cloud shell (bash) console, I create the policy.json file and make the modifications using the embedded editor. Here is an example our existing policy we created manually:

- Once the configuration is complete, we will save the .Json file from the embed editor to the cloud shell storage and then use the following command to apply the policy to the selected storage account.
- We can then run the following command line to take into effect the related JSON Policy : [ az storage account management-policy create –account-name myaccount –policy @policy.json –resource-group myresourcegroup ]
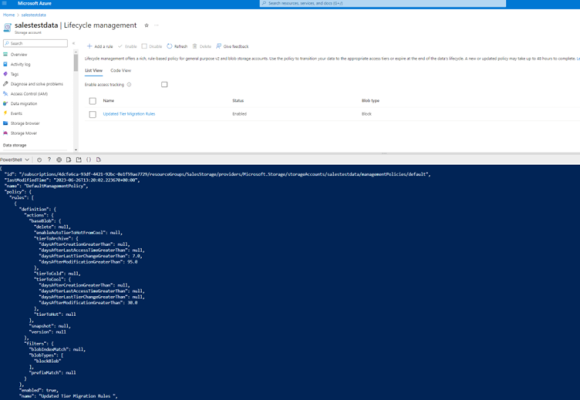
- As you can see above we have created an updated version of our previous existing policy by just utilizing a simple JSON rule and some power shell code, by running this PowerShell script, the JSON policy rule will be applied, and the lifecycle management rule will be set for the specified resource.
Using this Json format could help create a reusable template for the JSON policy rule in PowerShell, using a combination of PowerShell functions and parameters which could be implemented into a framework of choice.
Summary
In essence, understanding and strategically managing data ageing within Azure’s Blob storage via its Access Tiers – Hot, Cold, and Archive – allows us to control costs and optimize data usage. The act of transitioning between tiers involves a process known as rehydration, which can impact the amount of time it takes to access your data. Mastering these elements ensures a cost-effective, efficient approach to data lifecycle management in the Azure environment, giving us the capacity to fully harness the potential of our data at any stage of its lifecycle.
If you have any questions related to this post please Get in touch and speak to a member of the Adatis team to discuss the topic in greater detail.
Introduction to Data Wrangler in Microsoft Fabric
What is Data Wrangler? A key selling point of Microsoft Fabric is the Data Science
Jul
Autogen Power BI Model in Tabular Editor
In the realm of business intelligence, Power BI has emerged as a powerful tool for
Jul
Microsoft Healthcare Accelerator for Fabric
Microsoft released the Healthcare Data Solutions in Microsoft Fabric in Q1 2024. It was introduced
Jul
Unlock the Power of Colour: Make Your Power BI Reports Pop
Colour is a powerful visual tool that can enhance the appeal and readability of your
Jul
Python vs. PySpark: Navigating Data Analytics in Databricks – Part 2
Part 2: Exploring Advanced Functionalities in Databricks Welcome back to our Databricks journey! In this
May
GPT-4 with Vision vs Custom Vision in Anomaly Detection
Businesses today are generating data at an unprecedented rate. Automated processing of data is essential
May
Exploring DALL·E Capabilities
What is DALL·E? DALL·E is text-to-image generation system developed by OpenAI using deep learning methodologies.
May
Using Copilot Studio to Develop a HR Policy Bot
The next addition to Microsoft’s generative AI and large language model tools is Microsoft Copilot
Apr