
I recently started exploring PowerApps and playing around with the layout options it offers.
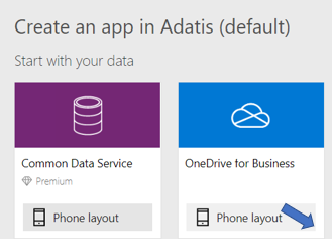
Before you start creating an app you need to choose the appropriate layout. There are two available options:
- Phone layout
- Tablet (Desktop) layout

Most frequently than not you would start with a PowerApp in a phone layout but a tablet version would also be required in the end. Unfortunately, for the time being, there is no way to switch between the two layouts in an easy, unpainful manner. Not all functionalities work the same way in the tablet layout as they do in the phone design. Recreating a phone app to a desktop version can consume a lot of time, especially if it is functionality-rich.
I will demonstrate the steps you should undertake if you encounter the same situation – converting a phone app to a tablet one.
For this purpose, I have an existing phone app created by Microsoft example.
Before diving into the layout conversion, I would like to add a few notes on the phone app creation:
- Create your app through the first option “Start with your data” and not with the second choice of “Start with a blank canvas or a template“. If you generate a blank app then you need to build the screens from scratch. This is also important for the tablet app objects transformation, no resizing would be needed, it will happen by default.
- In this case, the data source is an Еxcel file placed on OneDrive for Business. It is selected during the creation process and not later like in the blank process.
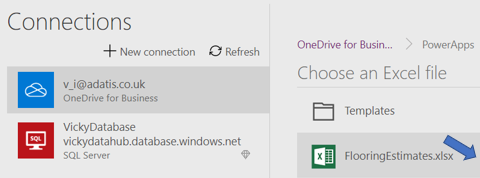
- With this approach, a sample app will be generated with all three screens.

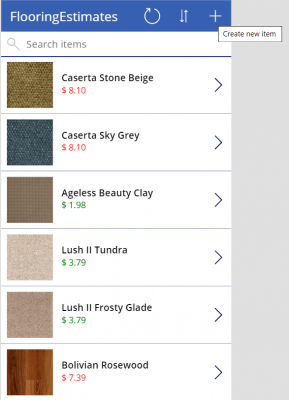
- The phone app looks like the image below with the main functionalities automatically generated for you – Edit and Insert, for instance, to name a few.
The conversion steps are listed below:
- Export your mobile PowerApp to your computer:

2. Create a blank tablet PowerApp and save it to your computer as well.

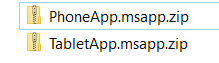
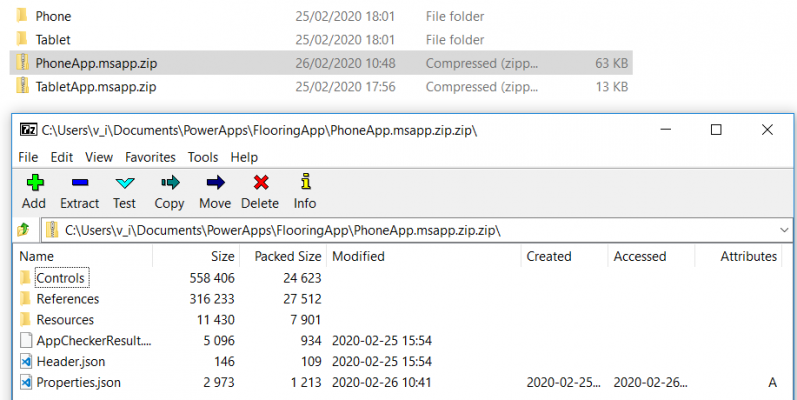
3. Rename both exported files by adding .zip extension and for easier distinction retitle the original mobile PowerApps to PhoneApp and the desktop one change to TabletApp.
4. Now extract both zips in separate directories.
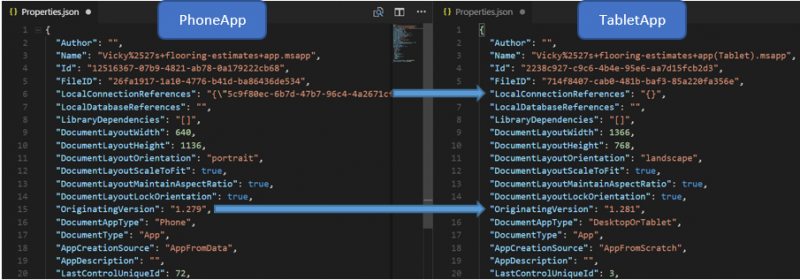
5. Open the properties files from the Phone and Tablet apps, preferably in Visual Studio Code and amend the below settings of the Tablet file:
- Copy the connection details from the Phone file.
- Set the originating version of the tablet properties to match the PhoneApp.
6. Open the export .zip of the Phone app with an archive program (I used 7-Zip) and replace the properties file with the updated properties.json file of the tablet app. Simply drag and drop it in the archive.
7. Close the PhoneApp archive and rename it by removing the .zip suffix.
8. At last, open the new version of the file in PowerApps and check its size. Save the app as your tablet variation.

I hope you find this post helpful, it was inspired by Todd Gadinski‘s blog.
Please don’t hesitate to share your comments and get in touch with Adatis should you have any further inquiries.
Till next time!
Introduction to Data Wrangler in Microsoft Fabric
What is Data Wrangler? A key selling point of Microsoft Fabric is the Data Science
Jul
Autogen Power BI Model in Tabular Editor
In the realm of business intelligence, Power BI has emerged as a powerful tool for
Jul
Microsoft Healthcare Accelerator for Fabric
Microsoft released the Healthcare Data Solutions in Microsoft Fabric in Q1 2024. It was introduced
Jul
Unlock the Power of Colour: Make Your Power BI Reports Pop
Colour is a powerful visual tool that can enhance the appeal and readability of your
Jul
Python vs. PySpark: Navigating Data Analytics in Databricks – Part 2
Part 2: Exploring Advanced Functionalities in Databricks Welcome back to our Databricks journey! In this
May
GPT-4 with Vision vs Custom Vision in Anomaly Detection
Businesses today are generating data at an unprecedented rate. Automated processing of data is essential
May
Exploring DALL·E Capabilities
What is DALL·E? DALL·E is text-to-image generation system developed by OpenAI using deep learning methodologies.
May
Using Copilot Studio to Develop a HR Policy Bot
The next addition to Microsoft’s generative AI and large language model tools is Microsoft Copilot
Apr