
An integration account allows you to build Logic Apps with enterprise B2B capabilities by adding various necessary artifacts. Some of the various artifacts that can be added with an integration account are:
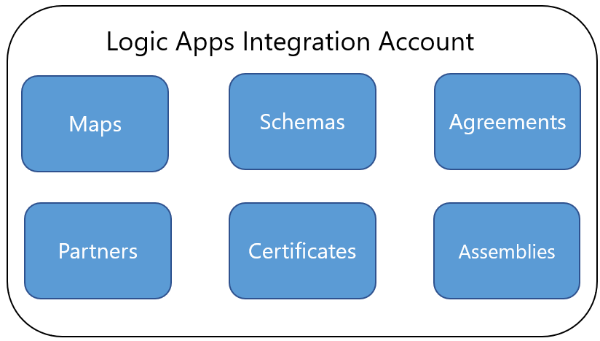
- Schemas: These are standard .xsd files containing the definition of an XML message
- Maps: These are XSLT files that transform XML messages from one format to another.
- Agreements: Business partners need to agree upon some standard rules and protocols to establish B2B communications with each other. These rules will be defined in agreements. These agreements are specific to protocols such as X12, AS2, and others.
- Partners: This is an entity that defines trading partner information. Partner entities will come together in one or more agreements.
- Certificates: Since business transactions are sensitive and prone to security breaches, it is important to have a secure AS2 connection. AS2 connections make use of X.509 certificates.
- Assemblies: In BizTalk maps, it is common to use helper .NET assemblies. To allow a similar approach in Logic Apps maps (XSLT files), we can upload assemblies into an integration account.
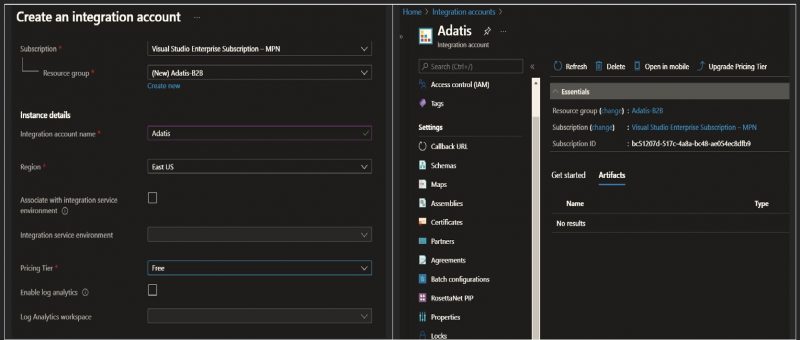
To understand the capabilities of an Integration Account, we’ll use Adatis as the main company and will create a fiction company called ABC and serve as an Adatis trading partner. In case we are EDI service provider a separate Integration account per every customer will need to be created.
For our scenario, we will create one new integration account called Adatis under an Azure resource group called Adatis-B2B. Further any new component (storage acc, logic app and etc.) will be created under that resource group.
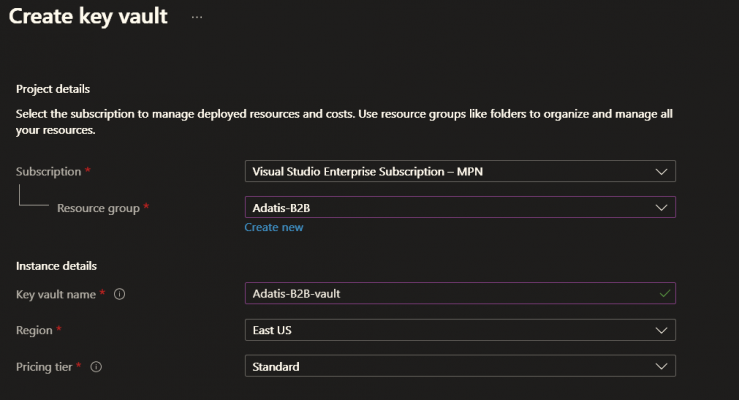
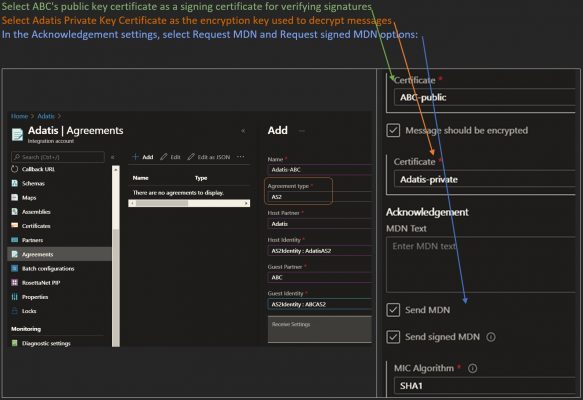
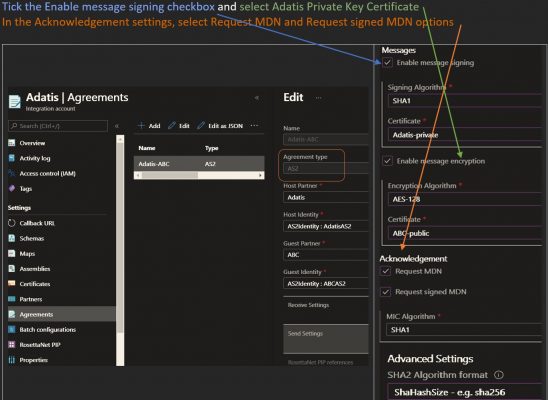
For the AS2 transport protocol, we must make use of x509 certificates for signing and encryption.
We will use Adatis private key to decrypt the messages send by ABC.
Also, we will need an ABC public key to encrypt messages sent to ABC.
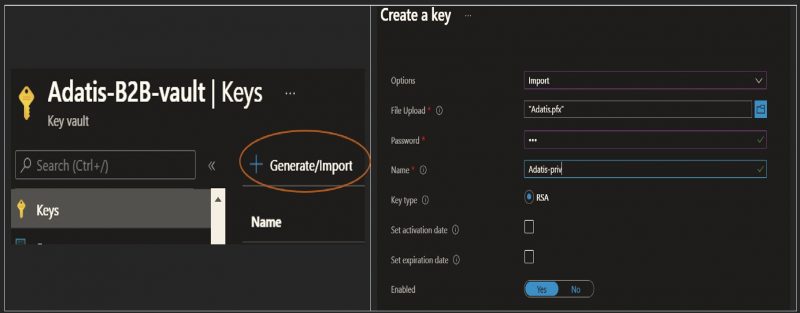
First step is to create Key vault named Adatis-B2B-Vault under the Adatis-B2B resource group:
Once the key vault is created, we need to create access policies for Azure Logic Apps and grant access permission to key vault .By doing this we are allowing the Integration account Adatis to access this key vault and use the private key stored in.
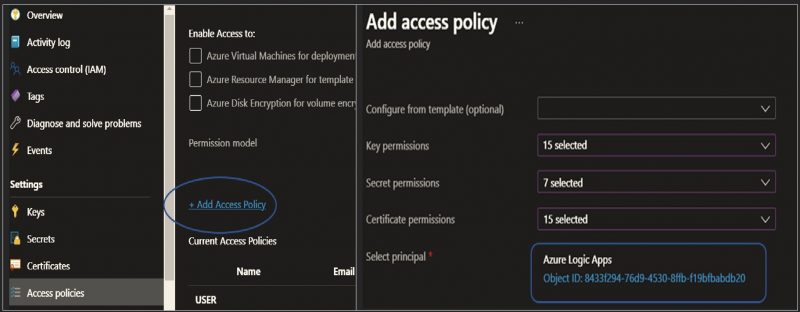
Once the access policy is done, we will have to upload the Adatis private key to the vault
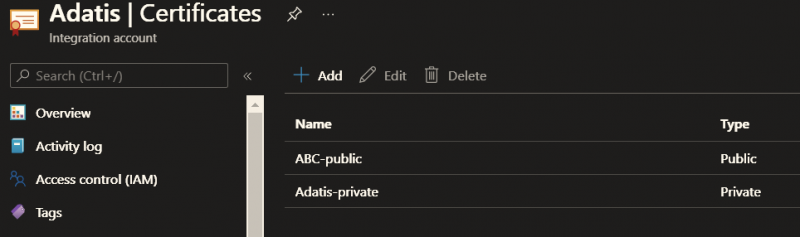
Back to the integration accounts module, we will need to add the following different types of certificates:
- The private key certificate (the one uploaded to the key vault) of the host organization
- The public key certificate of the host organization
- The public key certificate of the trading partners
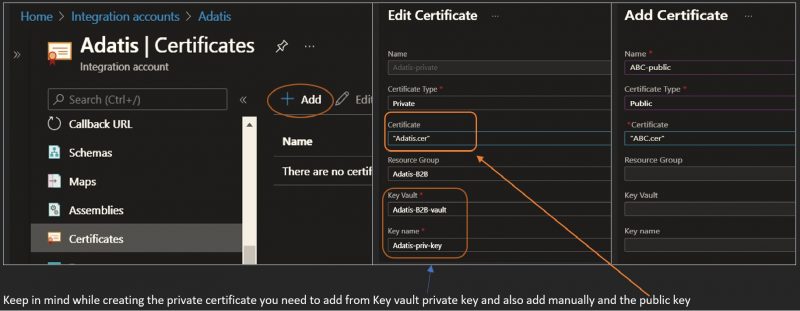
At the end, we need to have inside Integration accounts certificates section something like:
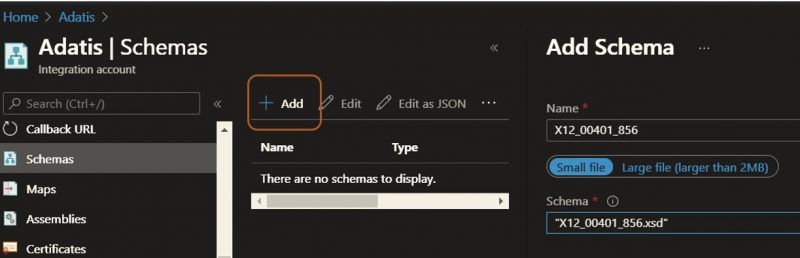
In any B2B interface implementation, Schemas and Maps play a vital role.
Schemas ensure that the messages sent from the trading partner stick to a specific EDI standard.
Maps help to translate messages from one format to another.
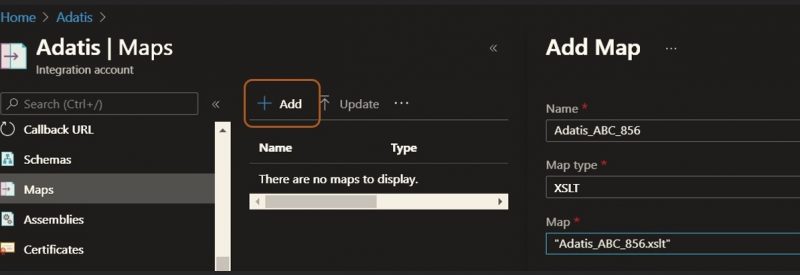
For the purpose of this tutorial, we will upload EDI 856 schema which is Advanced Ship Notice under Schemas:
If we have any custom transformations, we can upload them under the Map:
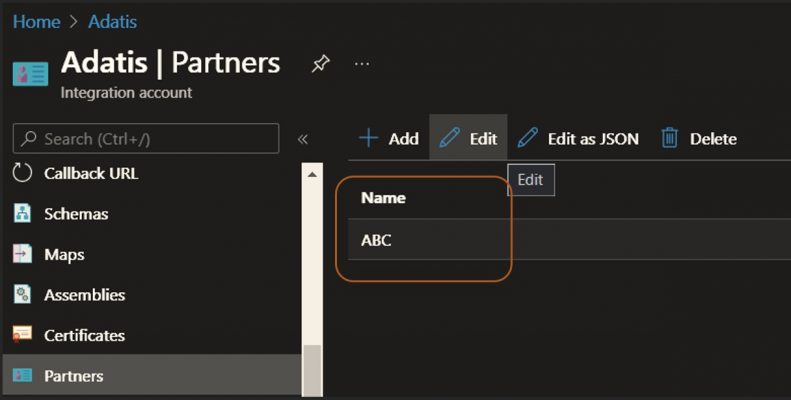
Creating Partners in an integration account are the next step
Any B2B messages will have Sender and Receiver IDs in their headers.
These IDs, along with some Qualifier fields, uniquely identify a trading partner.
The following is our sample EDI header:
ISA*00* *00* *ZZ*AdatisEdi *ZZ*ABCEdi *210808*2116*U*00401*000000011*0*P*:~
GS*SH*AdatisEdi*ABCEdi*210808*2116*11*T*00401~

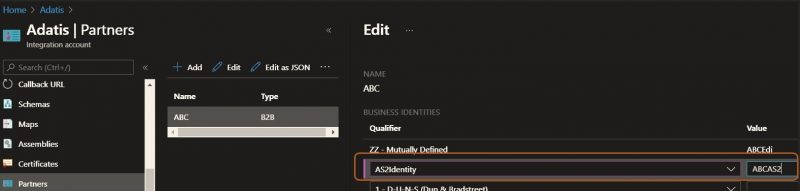
Since we are planning to exchange messages over AS2, we will also need to add AS2Identitie for the partner.
We will add this AS2 Id in the same place where we add the Edi Id:
The following screenshot shows that ABCAS2 is added as an AS2Identity for ABC:
Before clicking the Ok scroll down to reach the Metadata section and add bellow keys:

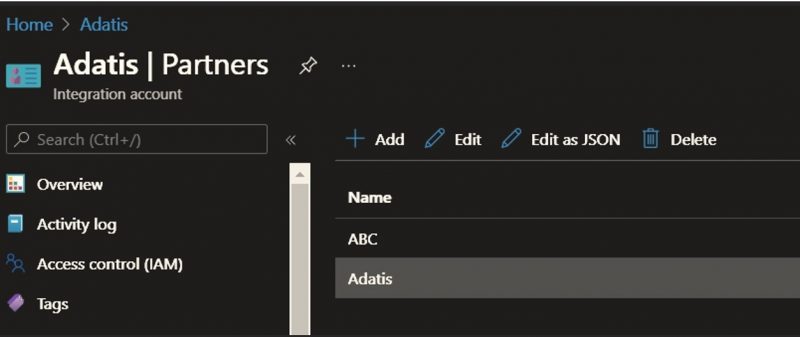
We need to repeat the same steps but, in this case, to create for Adatis:
When trading partners exchange messages over the AS2 protocol, they generally agree upon a few configurations of the AS2 protocol.
Some of these configurations are detailed here:
- They need to agree upon the AS2 identifiers used in AS2 messages
- They need to agree on whether they are going to sign messages with a cryptographic signature
- They need to agree on whether they are going to encrypt messages
- They need to decide whether they want to send out MDNs after an AS2 message is received
- They need to decide whether MDNs are generated synchronously or asynchronously
- They need to decide whether MDNs will be signed or encrypted
Once these configurations are agreed upon, they need to ensure that the EDI engine enforces them.
Integration accounts provide the option to store and enforce them through AS2 agreements.
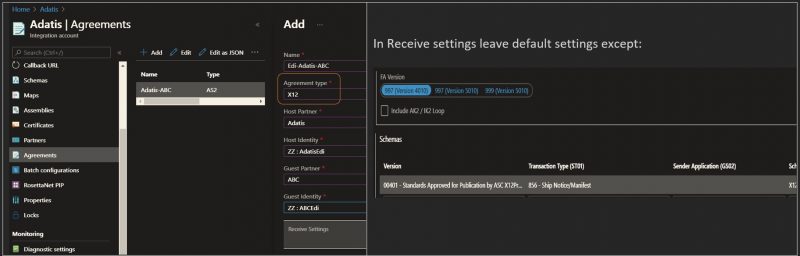
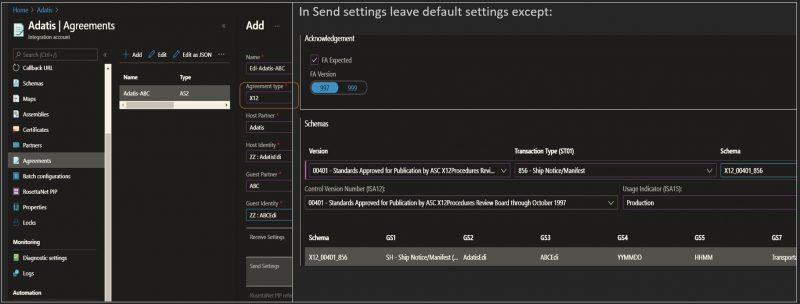
Based on your agreement with trading partner there could be different Send and Receive settings
Adatis sends messages to ABC.
As such, we need to configure the sender-side settings as well:
In B2B messaging, both trading partners need to agree upon variants of the messaging protocols, such as X12.
The following are a few configurations the trading partners should agree upon:
- The EDI format, such as X12 or EDIFACT
- The version of the protocol standards; for example, X12 has versions ranging from 00100 to 00700
- The EDI sender and receiver IDs used in the EDI messages
- The kind of acknowledgments generated; for example, functional or technical acknowledgments
All these can be defined in X12 agreements in an integration account.
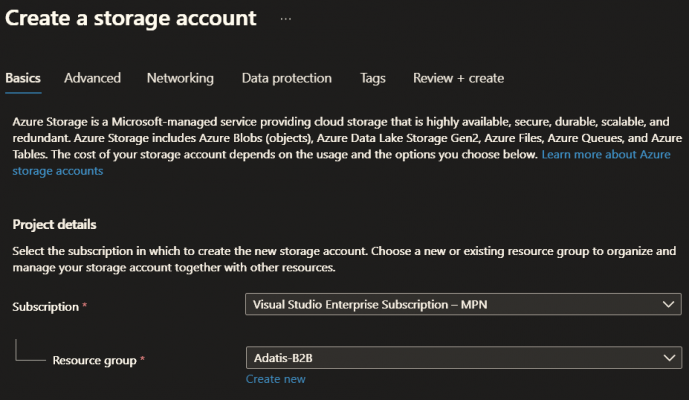
Last step we need to create Storage account on which we will save, decrypt and process messages:
I hope you found this useful! Please follow on on LinkedIn to keep up with all of the latest blogs from the Adatis team.
Introduction to Data Wrangler in Microsoft Fabric
What is Data Wrangler? A key selling point of Microsoft Fabric is the Data Science
Jul
Autogen Power BI Model in Tabular Editor
In the realm of business intelligence, Power BI has emerged as a powerful tool for
Jul
Microsoft Healthcare Accelerator for Fabric
Microsoft released the Healthcare Data Solutions in Microsoft Fabric in Q1 2024. It was introduced
Jul
Unlock the Power of Colour: Make Your Power BI Reports Pop
Colour is a powerful visual tool that can enhance the appeal and readability of your
Jul
Python vs. PySpark: Navigating Data Analytics in Databricks – Part 2
Part 2: Exploring Advanced Functionalities in Databricks Welcome back to our Databricks journey! In this
May
GPT-4 with Vision vs Custom Vision in Anomaly Detection
Businesses today are generating data at an unprecedented rate. Automated processing of data is essential
May
Exploring DALL·E Capabilities
What is DALL·E? DALL·E is text-to-image generation system developed by OpenAI using deep learning methodologies.
May
Using Copilot Studio to Develop a HR Policy Bot
The next addition to Microsoft’s generative AI and large language model tools is Microsoft Copilot
Apr