Introduction
Recently we had a client requirement whereby we needed to upload some files from an on-prem file server to Azure Blob Storage so they could be processed further. The file system connector in ADF V2 with a self-hosted integration runtime was the perfect solution for this so this blog post will discuss the process for getting a basic set up working to test the functionality.
Test Data
The first task is to generate some data to upload. I did this by executing the below PowerShell script to create 100 files, with each being 10 MB in size.
$numberOfFiles = 100
$directory = "C:TempFiles"
$fileSize = 1000000 * 10 # 10 MB

Remove-Item $directory -Recurse
New-Item $directory -ItemType Directory

for ($i = 0; $i -lt $numberOfFiles + 1; $i++)
{
    fsutil file createnew "$directoryTest_$i.txt" $fileSize
}
Now we’ve got some files to upload it’s time to create our resources in Azure.
Azure Configuration
The following PowerShell script uses the Azure RM PowerShell cmdlets to create our resources. This script will provision the following resources in our Azure subscription:
- Resource Group
- ADF V2 Instance
- Storage Account
$location = "West Europe"
$resouceGroupName = "ADFV2FileUploadResourceGroup"
$dataFactoryName = "ADFV2FileUpload"
$storageAccountName = "adfv2fileupload"

# Login to Azure
$credential = Get-Credential
Login-AzureRmAccount -Credential $credential

# Create Resource Group
New-AzureRmResourceGroup -Name $resouceGroupName -Location $location

# Create ADF V2
$setAzureRmDataFactoryV2Splat = @{
    Name = $dataFactoryName
    ResourceGroupName = $resouceGroupName
    Location = $location
}
Set-AzureRmDataFactoryV2 @setAzureRmDataFactoryV2Splat

# Create Storage Account
$newAzureRmStorageAccountSplat = @{
    Kind = "Storage"
    Name = $storageAccountName
    ResourceGroupName = $resouceGroupName
    Location = $location
    SkuName = "Standard_LRS"
}
New-AzureRmStorageAccount @newAzureRmStorageAccountSplat
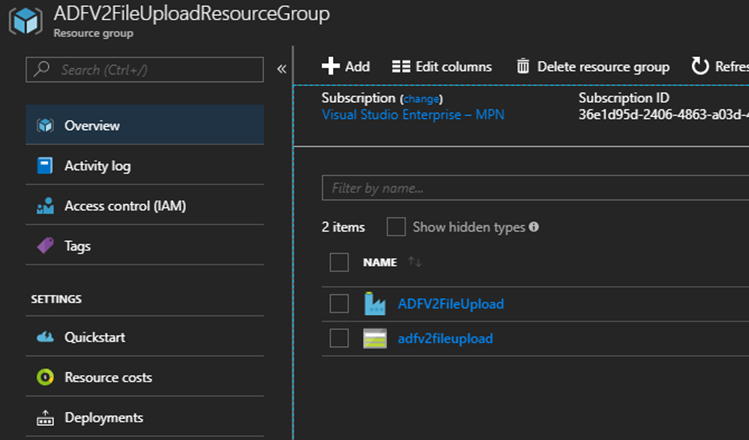
Our Azure Portal should now show the following:

Now we’ve got our resources provisioned it’s time to configure ADF to access our on-prem data.
ADF Configuration
Self-Hosted Integration Runtime
In ADF V2 the integration runtime is responsible for providing the compute infrastructure that carries out data movement between data stores. A self-hosted integration runtime is an on-premise version of the integration runtime that is able to perform copy activities to and from on-premise data stores.
When we configure a self-hosted integration runtime the data factory service, that sits in Azure, will orchestrate the nodes that make up the integration runtime through the use of Azure Service Bus meaning our nodes that are hosted on-prem are performing all of our data movement and connecting to our on-premises data sources while being triggered by our data factory pipelines that are hosted in the cloud. A self-hosted integration runtime can have multiple nodes associated with it, which not only caters for high availability but also gives an additional performance benefit as ADF will use all of the available nodes to perform processing.
To create our self-hosted integration runtime we need to use the following PowerShell script:
$credential = Get-Credential
Login-AzureRmAccount -Credential $credential

$resouceGroupName = "ADFV2FileUploadResourceGroup"
$dataFactoryName = "ADFV2FileUpload"
$integrationRuntimeName = "SelfHostedIntegrationRuntime"

# Create integration runtime
$setAzureRmDataFactoryV2IntegrationRuntimeSplat = @{
    Type = 'SelfHosted'
    Description = "Integration Runtime to Access On-Premise Data"
    DataFactoryName = $dataFactoryName
    ResourceGroupName = $resouceGroupName
    Name = $integrationRuntimeName
}
Set-AzureRmDataFactoryV2IntegrationRuntime @setAzureRmDataFactoryV2IntegrationRuntimeSplat

# Get the key that is required for our on-prem app
$getAzureRmDataFactoryV2IntegrationRuntimeKeySplat = @{
    DataFactoryName = $dataFactoryName
    ResourceGroupName = $resouceGroupName
    Name = $integrationRuntimeName
}
Get-AzureRmDataFactoryV2IntegrationRuntimeKey @getAzureRmDataFactoryV2IntegrationRuntimeKeySplat
The above script creates the integration runtime then retrieves the authentication key that is required by the application that runs on our integration runtime node.
The next step is to configure our nodes, to do this we need to download the integration runtime at https://www.microsoft.com/en-gb/download/details.aspx?id=39717.
Once we run the downloaded executable the installer will run and install the required application, the application will then open on the following screen asking for our authentication key:

We can enter the authentication key retrieved in the previous step into the box and click register to register our integration runtime with the data factory service. Please note that if your organisation has a proxy you will need to enter the details to ensure the integration runtime has the connectivity required.
After clicking register we receive the following prompt, click finish on this and allow the process to complete.

Once the process is complete our integration runtime is ready to go.
More information on creating the self-hosted integration runtime can be found at https://docs.microsoft.com/en-us/azure/data-factory/create-self-hosted-integration-runtime.
ADF Pipeline
Now we’ve got our self-hosted integration runtime set up we can begin configuring our linked services, datasets and pipelines in ADF. We’ll do this using the new ADF visual tools.
Linked Services
The first step is to create our linked services. To do this we open up the visual tools, go to the author tab and select connections; we can then create a new linked service to connect to Azure Blob Storage:

Next we need to create a linked service for our on-prem file share.
First create a new linked service and select the file system connector, we can then fill in the relevant details.

There are a couple of things to note with the above configuration, the first is we have selected our self-hosted integration runtime for the “Connect via integration runtime” option. We have also specified an account that has access to the folder we would like to pick files up from, in my case I have configured a local account however, if you were accessing data from a file share within your domain you would supply some domain credentials.
Datasets
For our pipeline we will need to create two datasets, one for our file system that will be our source and another for blob storage that will be our sink.
Firstly, we will create our file system dataset. To do this we will create a new dataset and select the file system connector, we will then configure our connection tab, like below:

As above, we have selected our linked service we created earlier, added a filter to select all files and opted to perform a binary copy of the files in the directory.
Next, we need to create a dataset for blob storage. To do this we will create a new dataset using the Azure Blob Storage connector, we will then configure our connection tab, like below:

This time we have entered the container we’d like to copy our files to as the directory name in our file path, we have also opted for a binary copy again.
Pipeline
The final step is to create our pipeline that will tie everything together and perform our copy.
First, create a new pipeline with a single copy activity. The source settings for the copy activity are as follows:

The settings for the sink are:

In this situation we have set the copy behaviour to “Preserve Hierarchy”, which will preserve the folder structure from the source folder when copying the files to blob storage.
Now we’ve got everything set up we can select “Publish All” to publish our changes to the ADF service.
Testing
We’ve completed all of the necessary configuration so we can now trigger our pipeline to test that it works. In the pipeline editor click the trigger button to trigger off the copy. We can then go to the monitor tab to monitor the pipeline as it runs:

The pipeline will take a couple of minutes to complete and on completion we can see that the files we selected to upload are now in our blob container:

Conclusion
To conclude, ADF V2 presents a viable solution when there is a need to copy files from an on-prem file system to Azure. The solution is relatively easy to set up and gives a good level of functionality and performance out of the box.
When looking to deploy the solution to production there are some more considerations such as high availability of the self-hosted integration runtime nodes however, the documentation given on MSDN helps give a good understanding of how to set this up by adding multiple nodes to the integration runtime.


what about instances where the files exist outside of the Self-hosted IR box ?
for example on another server in the on prem data centre or through a mapped drive?