What is the issue
I recently had a need to move a Microsoft Team Foundation Server (TFS) backlog I had created in an on-premises instance of TFS to a newly created Microsoft Visual Studio Online (VSO) instance. My existing on-premises TFS backlog had multiple Features, Backlog Items and Tasks as well as detailed information for each item; my new VSO backlog was completely empty. This blog post will describe steps to transfer my TFS backlog from on-premises to VSO but it can be used or slightly edited when transferring TFS backlogs between any versions of TFS
Steps for migration
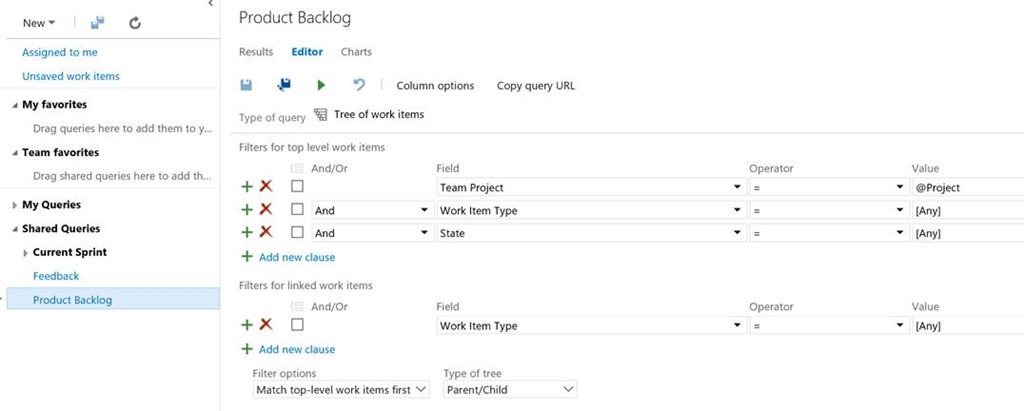
1. Export your current on-premises TFS backlog to Excel with the required level of information. To do this, navigate to the TFS webpage for your on-premises TFS and open the work tab, open the ‘Queries’ page and create a new query. Be sure to change the ‘Type of query’ to ‘Tree of work items’ and customise the query to include all relevant information that has been added to your on-premises TFS backlog which you wish to transfer, in my ‘Column Options’ I included; ID, Work Item Type, Title, Assigned To, Effort, State and Iteration Path.
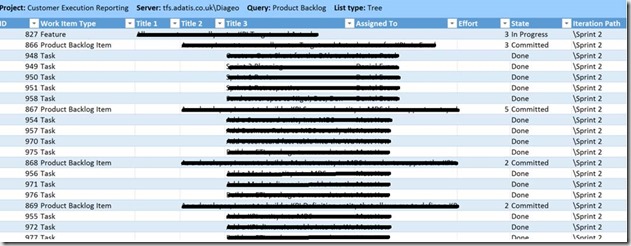
2. Open Excel (with the Team Foundation Server add-in), go to the ‘Team’ tab and select ‘New List’ then connect to the on-premises TFS and the relevant project, finally choosing your query from the Query List. You should then have a table representing the items in your backlog.
3. Create a dummy Feature, Product Backlog Item and Task in your new VSO TFS backlog (A separate item for however many different levels you have in your backlog). This is to give you the correct number of indented title columns for your level hierarchy.
4. Create a query in your VSO TFS as described in Step 1 which directly matches the one created in your on-premises TFS with the same columns, filters etc.
5. Open another instance of Excel and follow the instructions in step 2 but this time connect to the VSO TFS project and open the query created in step 4. Copy all the rows from your table created from your on-premises TFS query in Excel from step 2 and paste them underneath the dummy items in your on-line query. Do not copy the ID’s for the items you are copying, leave them blank as the ID’s will be assigned once we publish them to your VSO TFS.
*You may get validation errors for the newly added items, I had validation errors due to unsupported field values for ‘State’ where I had ‘In Progress’ values in my on-premises TFS which was not in the list of supported values for my VSO TFS. This is due a TFS constraint where you cannot create a new item (which we are effectively doing) unless it is in its ‘initial state’. To rectify this I filtered the ‘State’ column for where the value is not ‘New’ (which is their initial State for the column) and then manually changed all the values to ‘New’. After the backlog has been published you will need to navigate to the backlog in the on-line TFS and manually change the state of those items on the board back to what they were in the on-premises TFS backlog.
6. Once the new items have been added select ‘Publish’ and the changes will be uploaded to TFS. Navigate to the new on-premises TFS backlog webpage and check that everything has been added successfully.


Introduction to Data Wrangler in Microsoft Fabric
What is Data Wrangler? A key selling point of Microsoft Fabric is the Data Science
Jul
Autogen Power BI Model in Tabular Editor
In the realm of business intelligence, Power BI has emerged as a powerful tool for
Jul
Microsoft Healthcare Accelerator for Fabric
Microsoft released the Healthcare Data Solutions in Microsoft Fabric in Q1 2024. It was introduced
Jul
Unlock the Power of Colour: Make Your Power BI Reports Pop
Colour is a powerful visual tool that can enhance the appeal and readability of your
Jul
Python vs. PySpark: Navigating Data Analytics in Databricks – Part 2
Part 2: Exploring Advanced Functionalities in Databricks Welcome back to our Databricks journey! In this
May
GPT-4 with Vision vs Custom Vision in Anomaly Detection
Businesses today are generating data at an unprecedented rate. Automated processing of data is essential
May
Exploring DALL·E Capabilities
What is DALL·E? DALL·E is text-to-image generation system developed by OpenAI using deep learning methodologies.
May
Using Copilot Studio to Develop a HR Policy Bot
The next addition to Microsoft’s generative AI and large language model tools is Microsoft Copilot
Apr