Goal of this blog
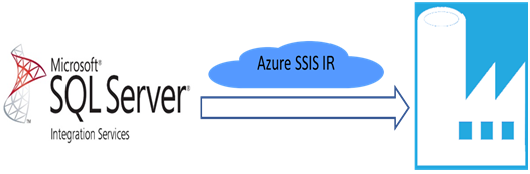
- There can be scenario where organization wants to migrate there existing SSIS ETL process on cloud so instead of rewriting SSIS package using Cloud specific ETL tools like Azure Data Factory we can directly migrate SSIS packages and call it through Azure Data Factory.
- Goal of this blog is to show how SSIS packages hosted on on-premise can be migrated to Azure Data Factory (ADF) using Azure-SSIS Integration Runtime (IR).
Azure-SSIS IR supports
- Running packages deployed into SSIS catalog (SSISDB) hosted by Azure SQL Database server/Managed Instance (Project Deployment Model.
- Running packages deployed into file system, Azure Files, or SQL Server database (MSDB) hosted by Azure SQL Managed Instance (Package Deployment Model)
- For this blog we will be considering SSIS packages deployed on SSIS Catalog (SSISDB) hosted on Azure SQL Database.
There are 3 major steps involved for deploying and executing SSIS package on ADF, which we will cover in this blog:
- Provision Azure-SSIS Integration Runtime (IR) in Azure Data Factory
- Deploy SSIS Package on SSISDB
- Configure SSIS package in ADF to execute
Provision Azure-SSIS integration runtime in Azure Data Factory
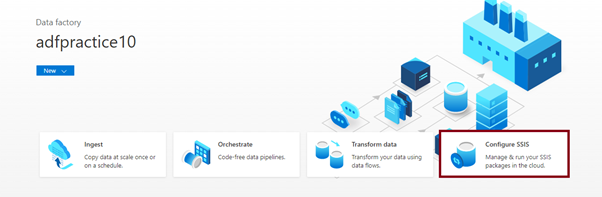
Step 1: Go to Azure Data factory page and select configure SSIS
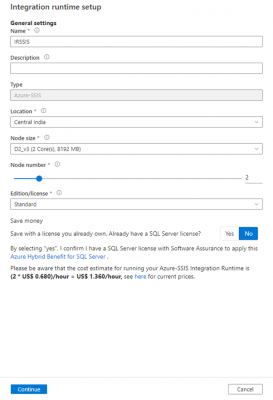
Step2: Fill the IR name and select the required node size. Then click Continue
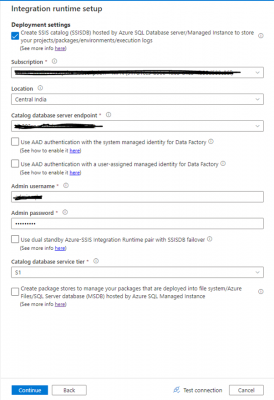
Step 3: Provide details of Azure SQL DB where you want to host SSIS package in the SSIS catalog. Then click Continue.
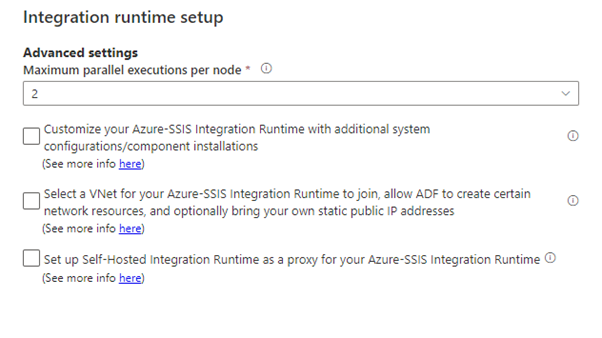
Step 4: Choose the maximum parallel execution per node. Then click Continue.
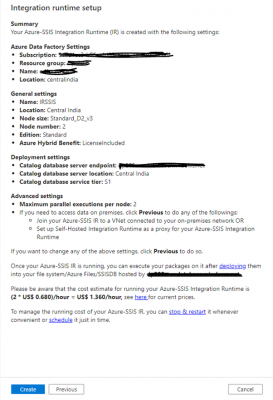
Step 5: Verify the summary of IR setup. Then click Create to provision SSIS IR.
Once your IR is created it will take 2-3 minutes to run and you can see the IR in ADF under the Manage and then select Integration runtimes tab
Integration runtimes tab
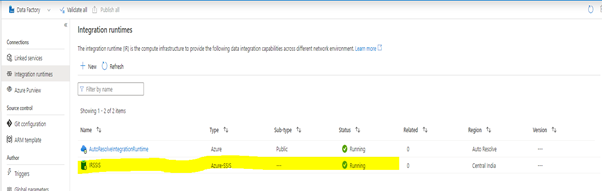
You will be able to view the new created Integration Runtime.
Once the Integration Runtime is created the next step is to deploy SSIS package on SSISDB
Deploy SSIS Package on SSISDB
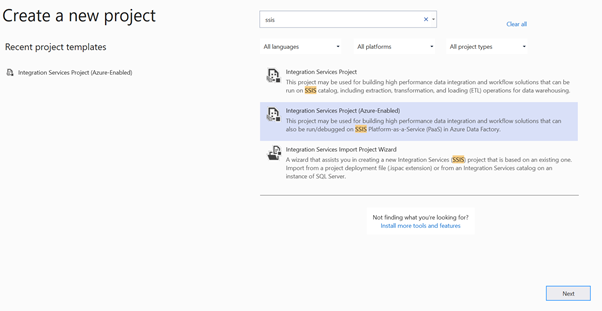
Step 1: Open Visual studio and create new Integration Services Project (Azure enabled).
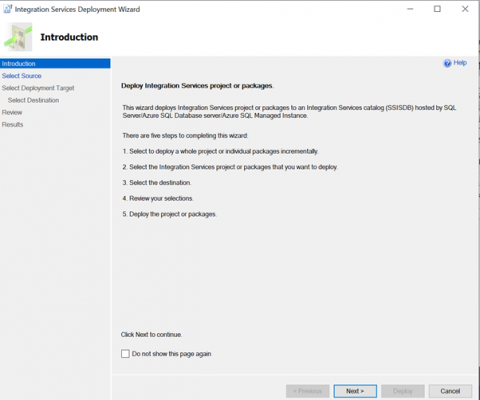
Step 2: Right click on the project with SSIS package and select deploy to get the Integration Services Deployment wizard and click Next.
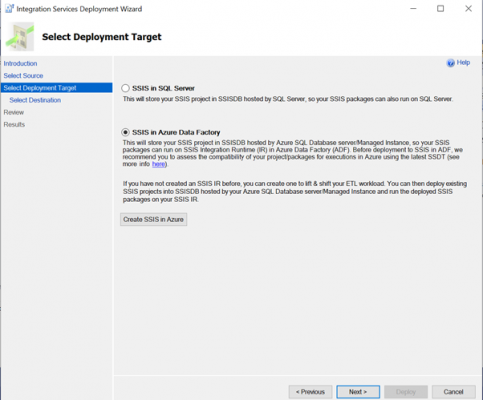
Step 3: Select the SSIS in Azure Data Factory and click Next.
Step 4: Enter the Azure SQL DB connection details
- Server name
- Authentication
- Login
- Password
Browse path of SSIS DB to host SSIS Package and click Next

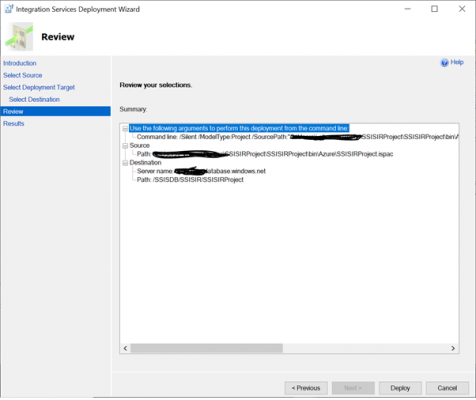
Step 5: Review and click Deploy
Step 6: Check the status of package deployment against each action
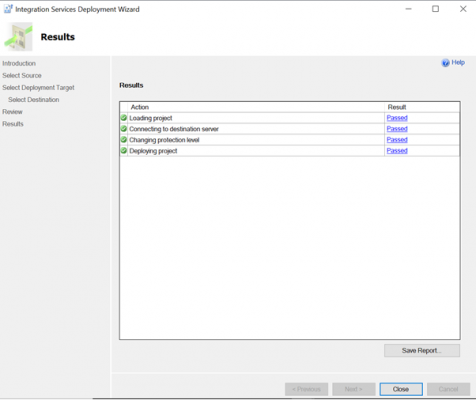
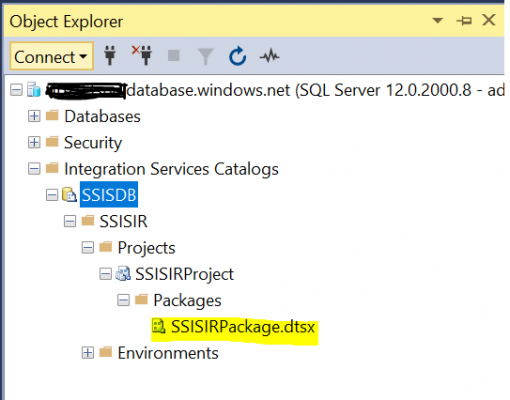
Step 7: Verify the package deployment on Integration Catalog of Azure SQL DB.
Once the SSIS package is deployed the last step is to configure SSIS Packages on Azure Data Factory
Configure SSIS Package on Azure Data Factory
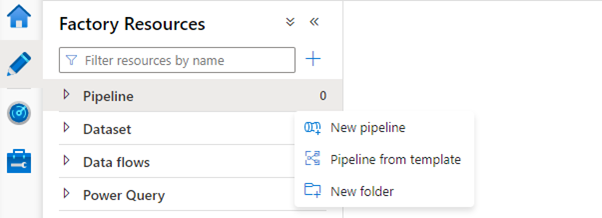
Step 1: Go to Azure Data Factory and Create new Pipeline
Step 2: Drag the Execute SSIS package from General tab of Activity in the pipeline and configure settings by adding below details
Azure SSIS IR : Existing Azure SSIS Integration runtime that is linked to Azure SQLB where Package is deployed
Package location : SSIS DB
Folder : Folder in SSIS DB where SSIS Package is deployed
Project : SSIS Project Name that is deployed on SSIS DB
Package : Name of package
After adding package location and folder you can refresh to population project and package name in the drop down

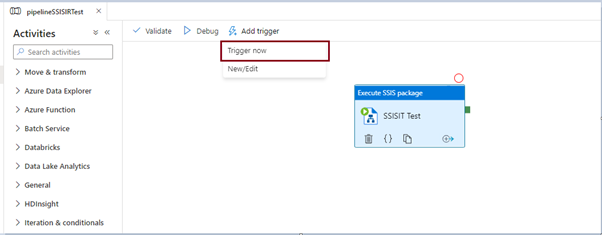
Step 3: Publish and trigger the pipeline and ADF
Once the configuration settings are complete, you can publish and trigger the pipeline to run the SSIS package through ADF.
To do this, click the Trigger Now option in pipeline and check the status of pipeline run in monitor section of ADF.
You can check the status of pipeline under pipeline run

Conclusion
In this blog we have explored the steps that you can follow to migrate and run your on-premise SSIS package on Azure Data Factory. Please follow us on LinkedIn for more exciting blog content!
Introduction to Data Wrangler in Microsoft Fabric
What is Data Wrangler? A key selling point of Microsoft Fabric is the Data Science
Jul
Autogen Power BI Model in Tabular Editor
In the realm of business intelligence, Power BI has emerged as a powerful tool for
Jul
Microsoft Healthcare Accelerator for Fabric
Microsoft released the Healthcare Data Solutions in Microsoft Fabric in Q1 2024. It was introduced
Jul
Unlock the Power of Colour: Make Your Power BI Reports Pop
Colour is a powerful visual tool that can enhance the appeal and readability of your
Jul
Python vs. PySpark: Navigating Data Analytics in Databricks – Part 2
Part 2: Exploring Advanced Functionalities in Databricks Welcome back to our Databricks journey! In this
May
GPT-4 with Vision vs Custom Vision in Anomaly Detection
Businesses today are generating data at an unprecedented rate. Automated processing of data is essential
May
Exploring DALL·E Capabilities
What is DALL·E? DALL·E is text-to-image generation system developed by OpenAI using deep learning methodologies.
May
Using Copilot Studio to Develop a HR Policy Bot
The next addition to Microsoft’s generative AI and large language model tools is Microsoft Copilot
Apr