You may have heard about Microsoft’s new Azure Products – Azure Data Lake Storage and Data Lake Analytics. If not, take a look at the official blurb here!
What is it?
Essentially it’s hadoop-made-easy – the storage engine is a WebHDFS layer with a management overlay that takes care of scaling and cluster distribution so you don’t have to. For many hadoop veterans this will feel as uncomfortable as a grizzled DBA allowing Azure SQL DB to determine the best backup schedule on their behalf. But for everyone else, this removes a significant technical barrier to using truly scalable, distributed storage. What’s more, your store can be accessed by any hadoop-compatible technologies, so you can integrate with your existing architecture as a hassle-free migration path.
Data Lake Analytics provides the parallel querying engine, comes courtesy of a new language U-SQL, based on Apache YARN (which is essentially a version 2.0 of their populate Apache MapReduce). Once again, the big difference being that all of the cluster management is being done for you – and on a pay-as-you-use model.
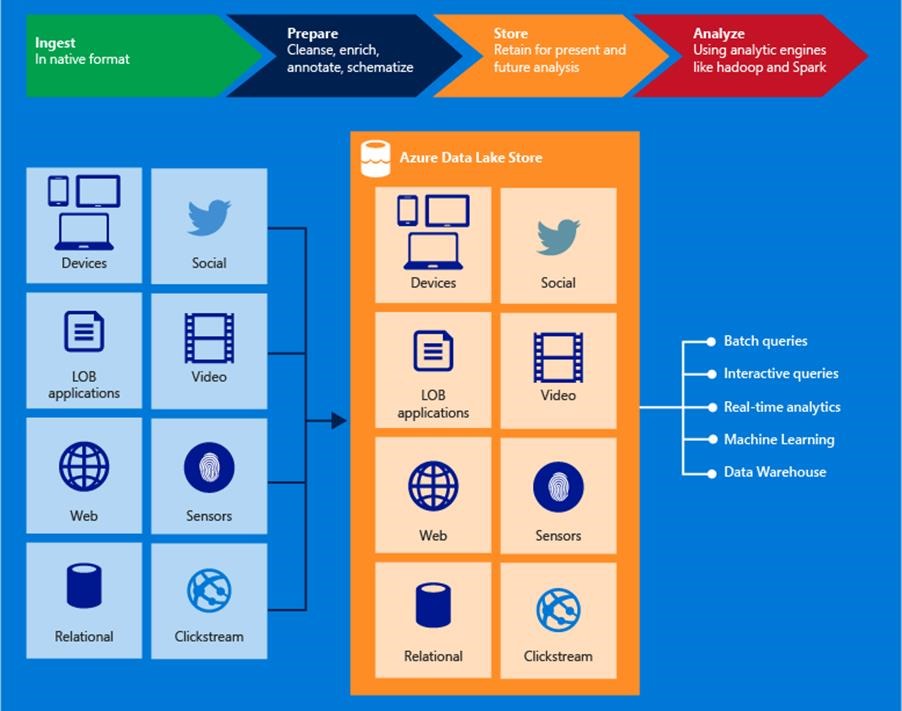
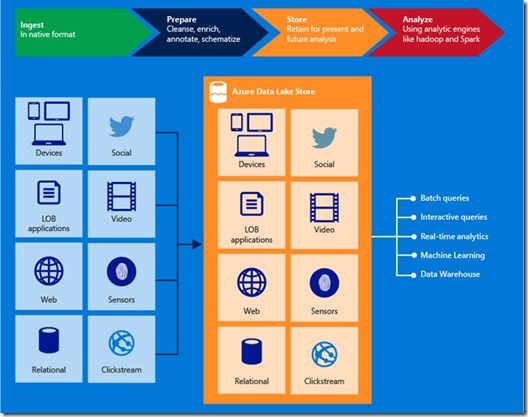
For a more detailed overview, take Microsoft’s own overview page. Their architectural vision has the Data Lake as the central hub for all data-based operations, they headline with a diagram making this very clear:
The goal is for the Data Lake Storage to be a dumping ground for any and all of your data, be it structured, semi-structured or entirely unstructured. The competitive price of Azure storage means they’re now pushing a “store first, think of questions to ask later” methodology – initial indications are that 1Gb of data will cost just £0.05 per month. This makes it an attractive offer for most archiving scenarios where the data still needs to be accessible in some form. I’ve a few thoughts around where this is heading and what it means to the Data Warehouse, but first I’ll run through how to get your Data Lake set up – you can figure out what you’re going to do with it later!
Creating your Azure Data Lake Store
First you’ll need to set up your storage account – you can do this through any valid Azure subscription. At the time of writing, the Azure Data Lake elements are in public preview, so you’ll need to sign up and be accepted first.
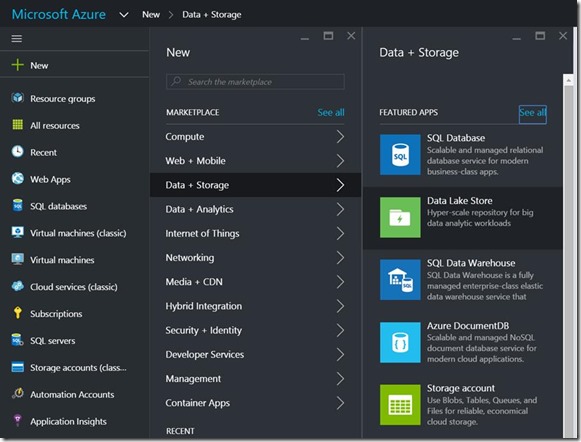
To create your storage account, simply go to New > Data + Storage > Data Lake Store:
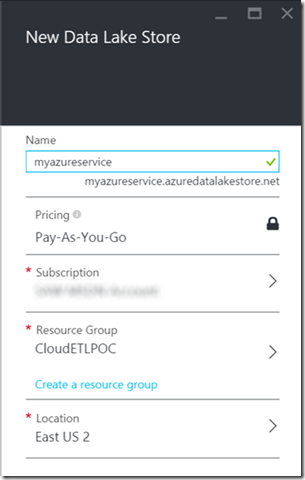
You’ll be presented with the usual configuration screen:
Again, at the time of writing this service is only available in the East US 2 location. A few minutes later, your Data Lake Store will be ready to go!
You can now begin loading files into the store, ready for use. You have several options on how to get your data into the store, but for now we’ll go with the most basic.
Uploading your first file using Data Explorer
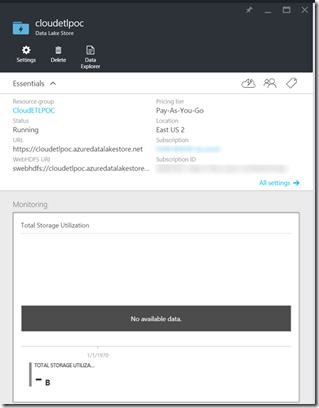
Open up the resource blade for your DLS and you’ll see a standard overview panel for your new object.
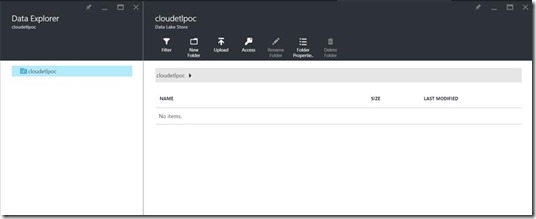
I’ll let you explore the settings and monitoring options yourself. What we’re interested in is the Data Explorer. Click that button (or there’s another entry point via settings) and you’ll be presented with the new Data Explorer blade.
Here you can easily see all of the objects that have been uploaded to the store so far. Let’s add a file by clicking the upload button.
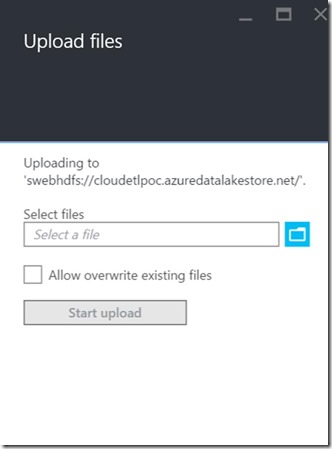
You’ll see a basic upload screen:
And if we select a csv file (or one of many supported file types that takes your fancy), we can click start upload to send the file across.
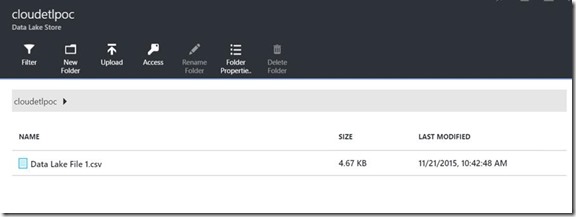
You’ll receive a portal notification when the upload has completed, and the data explorer view will refresh to show us our new contents:
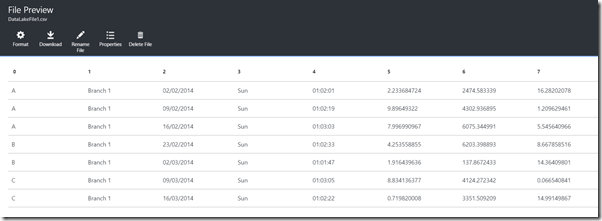
Clicking on the file will then open it up in the file preview blade, so you can explore the various objects contained in the store:
And that’s it – your file is now available through a variety of methods. You can treat your Azure Data Lake Store like any other WebHDFS layer, or you can spin up an Azure Data Lake Storage account to write U-SQL against your stored file.
A minor word of warning here – in my initial attempts of using the store, I found it to have difficulty recognising column titles within flat files, I’d receive parsing errors where it was trying to convert titles into numerical fields etc. This is most likely because I’m new to U-SQL as a language and the documentation is very much a work in progress still. I’m assuming this limitation will be easy to work around but have, for now, removed column titles from my sample sheets.
Over the next few weeks, I’ll be exploring other methods of getting data into your Data Lake Store, whether it’s programmatically through C# or Powershell, streamed through Event Hubs and Azure Streaming Analytics or even more traditionally, uploading to relational database tables through SSIS, all of which can then be accessed via a single interface.
I will also be looking at U-SQL in particular, and how it can be leveraged in a new-world Warehousing Solution.

Introduction to Data Wrangler in Microsoft Fabric
What is Data Wrangler? A key selling point of Microsoft Fabric is the Data Science
Jul
Autogen Power BI Model in Tabular Editor
In the realm of business intelligence, Power BI has emerged as a powerful tool for
Jul
Microsoft Healthcare Accelerator for Fabric
Microsoft released the Healthcare Data Solutions in Microsoft Fabric in Q1 2024. It was introduced
Jul
Unlock the Power of Colour: Make Your Power BI Reports Pop
Colour is a powerful visual tool that can enhance the appeal and readability of your
Jul
Python vs. PySpark: Navigating Data Analytics in Databricks – Part 2
Part 2: Exploring Advanced Functionalities in Databricks Welcome back to our Databricks journey! In this
May
GPT-4 with Vision vs Custom Vision in Anomaly Detection
Businesses today are generating data at an unprecedented rate. Automated processing of data is essential
May
Exploring DALL·E Capabilities
What is DALL·E? DALL·E is text-to-image generation system developed by OpenAI using deep learning methodologies.
May
Using Copilot Studio to Develop a HR Policy Bot
The next addition to Microsoft’s generative AI and large language model tools is Microsoft Copilot
Apr