
Intuitive and powerful search technologies are becoming more and more important as businesses look to get more value from their unstructured data. Having the ability to full text search across an entire organisation’s worth of files can present huge opportunities for efficiency and understanding. Modern search tools now offer Artificial Intelligence (AI) capabilities that allow value driven enrichment of the raw content using Machine Learning and Data Science techniques. Microsoft’s Azure Cognitive Search product is a leader in this space and offers an excellent search experience with many out-of-the-box AI competencies.
The Basics
Azure Cognitive Search is made up of a few core components.
Indexes: Indexes are the central asset of Cognitive Search and every document processed by Cognitive Search ends up in an index. The index itself is made up of JSON records containing various attributes of the processed documents, in some cases an attribute could be the raw content but attributes could also include a selection of metadata such as size, creation date, author.
Indexers: Indexers are the orchestration brain of Cognitive Search and used to process a file from its storage location into the index. An indexer can run on a schedule and contains logic to handle failures and field mappings.
Skillsets: Skill sets are the groupings of individual steps that are orchestrated by the indexer. These steps are run sequentially and can perform native tasks such as shaping json objects, cognitive enrichment tasks using common Cognitive Services such as entity extraction, and custom cognitive enrichment tasks using models deployed using Azure Functions.
Data sources: Data sources are simply connections to storage accounts where documents / files / data is held ready for indexing.
Importing Data with cognitive enrichment
To start importing documents that require cognitive enrichment you can follow an import wizard provided through the Azure Portal. There are several data sources that you can obtain documents from for this purpose including,
• Azure Blob Storage
• Azure Data Lake Storage Gen2 (in preview)
• Azure Table Storage
• Azure Cosmos DB
• Azure SQL Database
• SQL Server on Azure Virtual Machines
• SQL Managed instances on Azure
For this walk-through we will use Azure Blob Storage but be aware you could use any of the above.
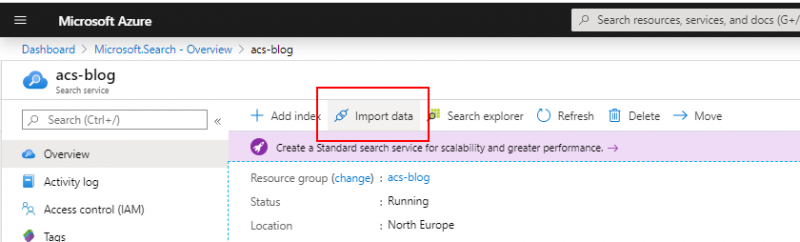
1 Start the wizard
Navigate to the Azure Portal, create a new Azure Cognitive Search service resource and open it up once the deployment completes. From the overview tab, use the “Import Data” button to start the wizard.
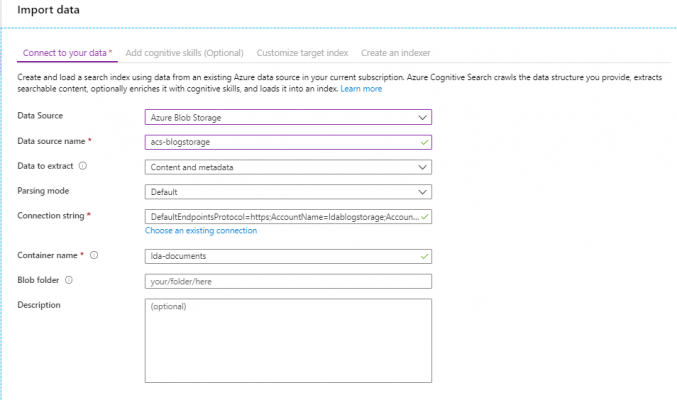
2 Connect to your data
Choose the data source type, give it a name and use the “Choose an existing connection” button to connect to a blob storage account. If your files are within a folder then you can specify this here as well.
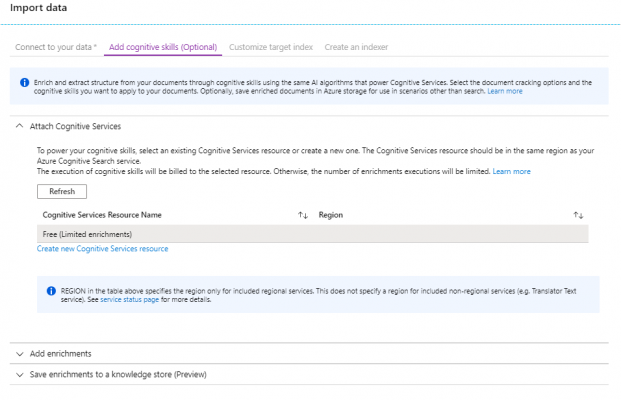
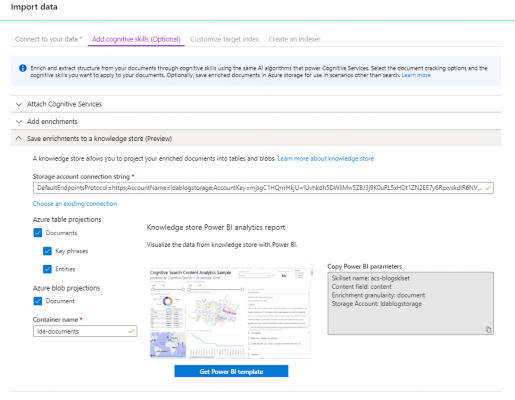
3 Add cognitive skills
Navigate to the next screen and you will see that a free (limited enrichments) cognitive service is ready for use. This will allow 20 documents to be enriched per day per subscription so will not work for outside of a POC but is perfect for this blog.
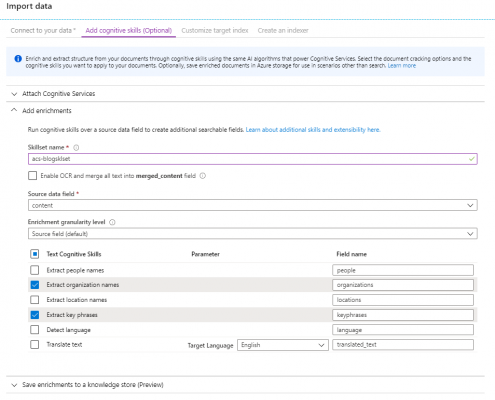
Now you can create your Skillset. If you know your documents contain images or handwriting you can enable Optical Character Recognition (OCR) so that this content is included in the enriched document also. Choose the skills you require from the list. In this example I have chosen to extract organization names and key phrases. If you were to attach a paid cognitive service, you can also do image tagging and facial analysis.
Finally, you can save the cognitive enrichment output into a Knowledge Store, which allows you to analyse the outputs using Power BI or other tools after the indexer has completed. Tick all the boxes and supply a container for the outputs to be stored in.
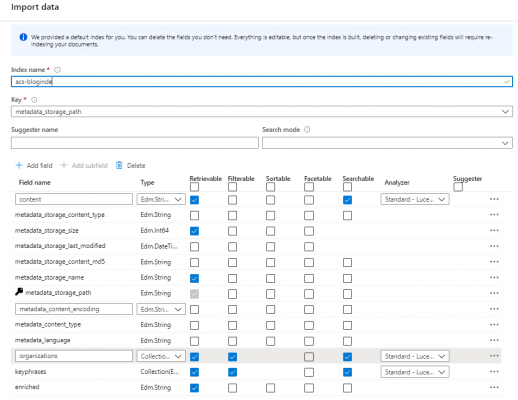
4 Customise target index
At this point you can choose the fields you want to display in your index and create new fields to hold attributes you will derive using custom enrichment skills. The options available for each field are:
– Retrievable: meaning the field can be displayed in client tools
– Filterable: meaning the index can be filtered using this field
– Sortable: meaning records can be sorted using this field
– Facetable: meaning documents can be grouped using this field
– Searchable: Full text search is enabled on this field using the standard Lucene analyser
Review the list of fields and configure them as required. Additionally, I have added an “enriched” field, which is an internal field that will be populated with the fully enriched content making it easier for developers to understand the content that is being returned from the skillset.
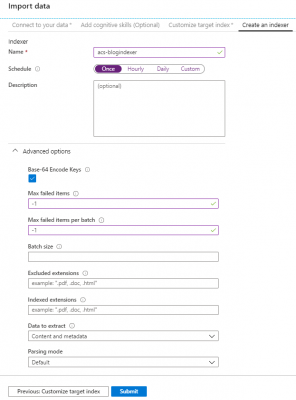
5 Create an indexer
The final step of this wizard is to create the indexer. Provide a name and change the “Max failed items” fields to be -1. This ensures that a failed document will not fail the indexer, instead it will be skipped. If this is not the desired behaviour then a failure threshold can be configured here instead.
6 Run the indexer
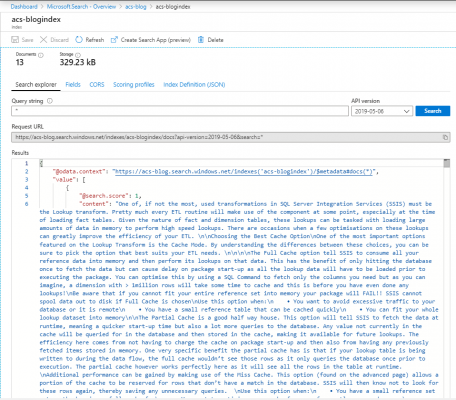
Once you click submit the indexer will run and your index will be populated with the content of your documents. When you notice the indexer is complete, head over to the index, open it up and search it using a single * character in the “Query string” to see all contents.
At this point it is useful to note that the definition of your indexer, index and skillset are all available as JSON documents through the portal. This means you can view, customise and export these definitions to suit your needs. Particularly in some scenarios, you may need to manually enhance the skillset to work with custom AI enrichments.
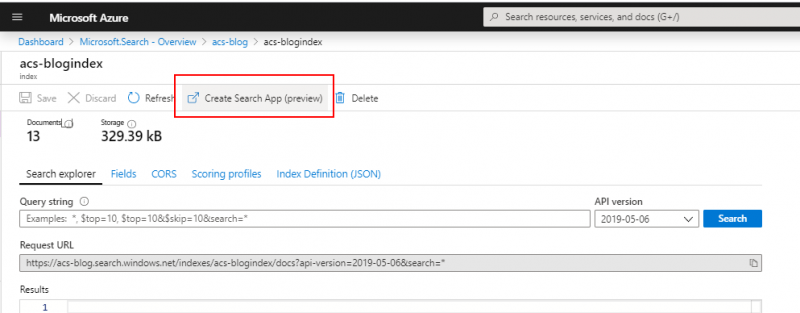
7 Accessing the index
Navigate to the index and click “Create search app (preview)”.
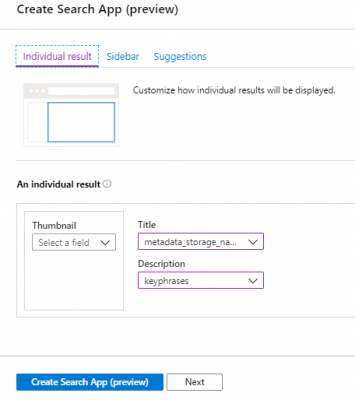
This will allow you to create a custom built HTML file that can display records from your index. Choose to enable CORS and the select a Title field, e.g. metadata_storage_name and a description field e.g. key phrases. You can use the other two tabs to make further configurations but for now, click “Create search app (preview)” to download the app.
Open the downloaded file and you can type search terms into the search box. This will then filter the index and return the results as per the below screen shot

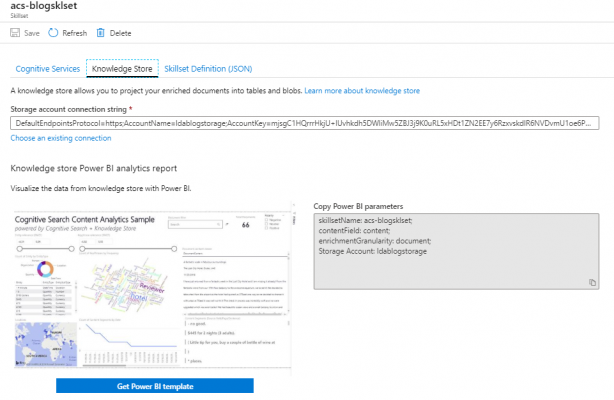
8 Using the knowledge store
Navigate to the Skillset and open it up. Choose the “Knowledge Store” tab and then click “Get Power BI template”. This will take you a github repository where you can download the template from. Make sure you grab the storage access key whilst it downloads as you will need this shortly.
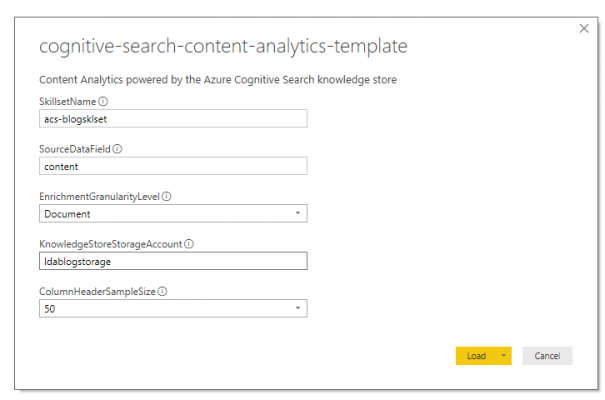
Once the .pbit template is downloaded, open it up and you will be prompted to supply the parameters shown above.
Once config is complete, you will see the Power BI dashboard load
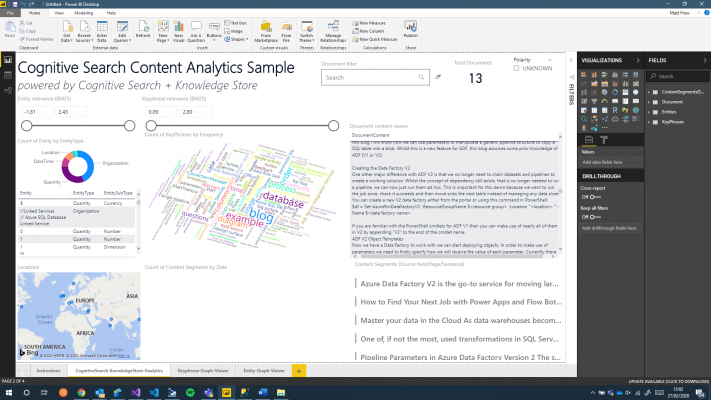
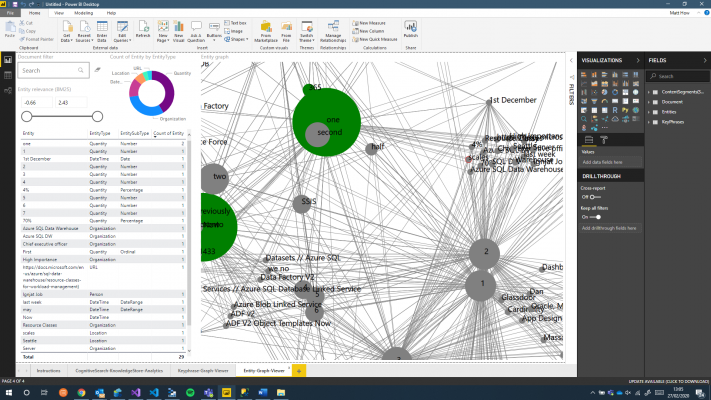
In addition to this main view, there is also graph views that map your key phrases and entities.
Hopefully this blog gives you an insight in to the things that can be achieved with Azure Cognitive Search. A future blog will show how to extend this basic setup to include custom AI enrichments using Azure Function.
Introduction to Data Wrangler in Microsoft Fabric
What is Data Wrangler? A key selling point of Microsoft Fabric is the Data Science
Jul
Autogen Power BI Model in Tabular Editor
In the realm of business intelligence, Power BI has emerged as a powerful tool for
Jul
Microsoft Healthcare Accelerator for Fabric
Microsoft released the Healthcare Data Solutions in Microsoft Fabric in Q1 2024. It was introduced
Jul
Unlock the Power of Colour: Make Your Power BI Reports Pop
Colour is a powerful visual tool that can enhance the appeal and readability of your
Jul
Python vs. PySpark: Navigating Data Analytics in Databricks – Part 2
Part 2: Exploring Advanced Functionalities in Databricks Welcome back to our Databricks journey! In this
May
GPT-4 with Vision vs Custom Vision in Anomaly Detection
Businesses today are generating data at an unprecedented rate. Automated processing of data is essential
May
Exploring DALL·E Capabilities
What is DALL·E? DALL·E is text-to-image generation system developed by OpenAI using deep learning methodologies.
May
Using Copilot Studio to Develop a HR Policy Bot
The next addition to Microsoft’s generative AI and large language model tools is Microsoft Copilot
Apr