One of our clients provided us with a bunch of Integration Services packages for upgrade. As all of them were part of the same SQL job, we decided to bundle them into a solution.
The solution (.sln) is a container that groups and manages the projects that you use. Within one solution you can have one or more projects. Note that when you create a new solution, it creates files that have the extensions, .sln and .suo. In this article, we`ll discuss how to create .sln
You can create it either in Visual Studio, or in Notepad (Notepad++).
Option 1: Create solution in Visual Studio
- Open Visual Studio. Make sure you`re using the version that is applicable to your SSIS packages version.
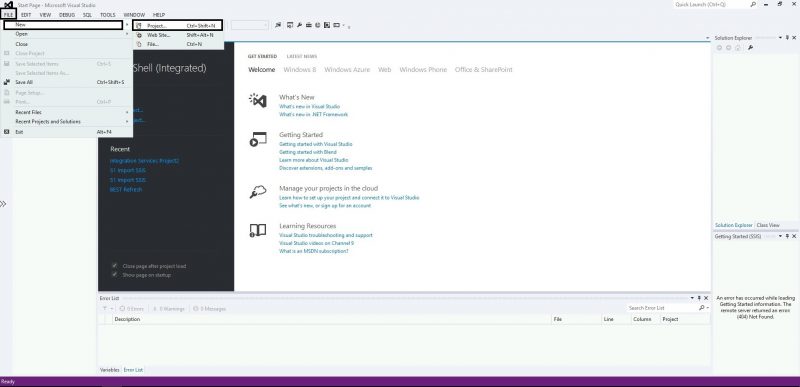
- From the Menu bar at the top of the app, select File -> New -> Project …
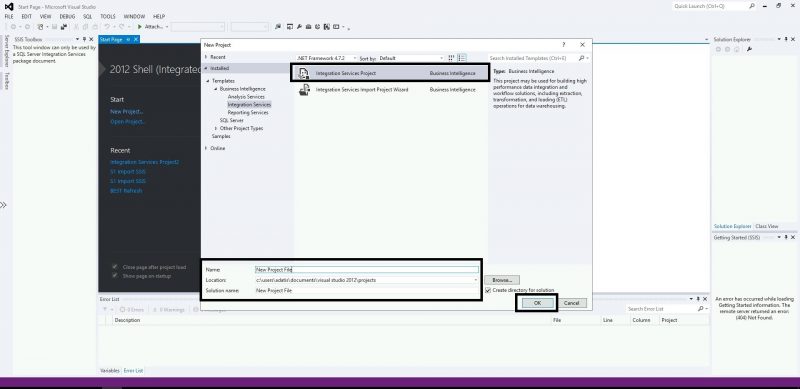
- Properly name the Project and save the file into the folder where the packages are.

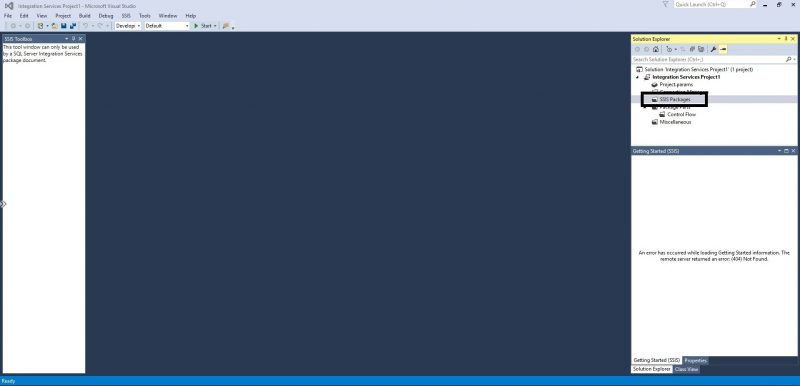
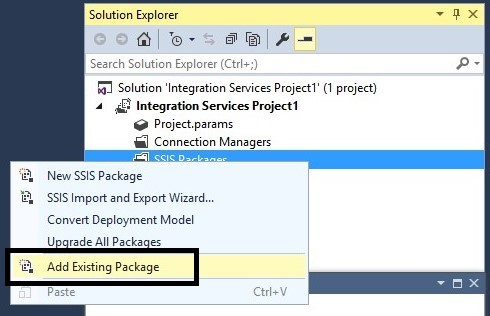
- From the Solution Explorer, right click on SSIS packages and then choose the Add Existing Package option.


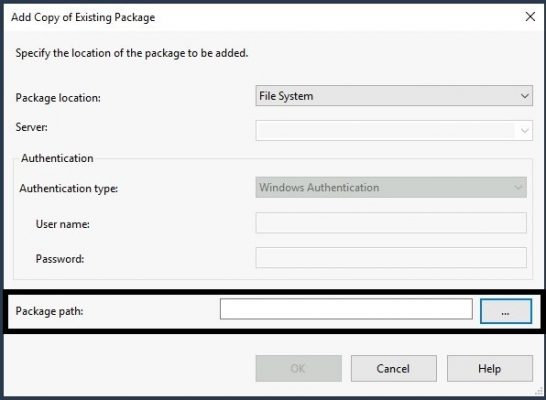
- In the window, browse for your packages. You need to load them one by one.

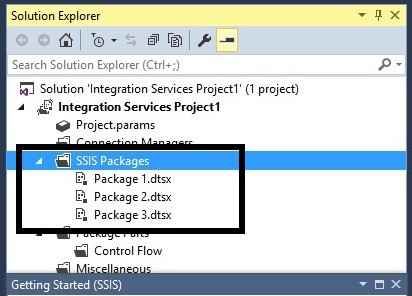
- They all will appear under SSIS Packages in the Solution Explorer.

- Save the Visual Studio work and close it.
- Go back to the folder where your packages are. The solution file is there.


Option 2: Create a solution in Notepad++
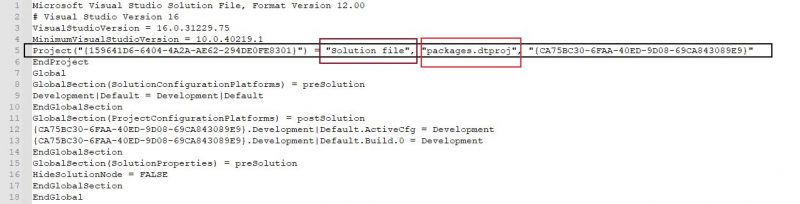
If you use our code from below, you can create the solution within seconds.
When you save the code, you have to specify the file extension to be .sln. For example, name it Solution file.sln
Then a Visual Solution file will appear in your folder.
Microsoft Visual Studio Solution File, Format Version 12.00
# Visual Studio Version 16
VisualStudioVersion = 16.0.31229.75
MinimumVisualStudioVersion = 10.0.40219.1
Project("{159641D6-6404-4A2A-AE62-294DE0FE8301}") = "Solution file", "packages.dtproj", "{CA75BC30-6FAA-40ED-9D08-69CA843089E9}"
EndProject
Global
GlobalSection(SolutionConfigurationPlatforms) = preSolution
Development|Default = Development|Default
EndGlobalSection
GlobalSection(ProjectConfigurationPlatforms) = postSolution
{CA75BC30-6FAA-40ED-9D08-69CA843089E9}.Development|Default.ActiveCfg = Development
{CA75BC30-6FAA-40ED-9D08-69CA843089E9}.Development|Default.Build.0 = Development
EndGlobalSection
GlobalSection(SolutionProperties) = preSolution
HideSolutionNode = FALSE
EndGlobalSection
EndGlobal
Please, keep in mind a few things before proceeding:
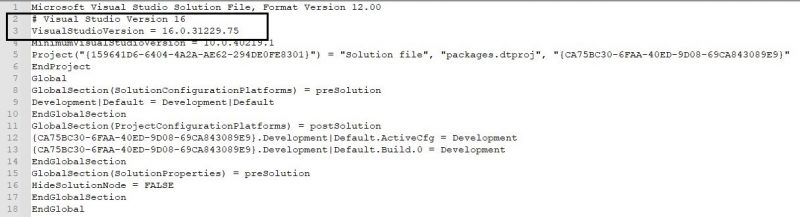
- Adjust the solution version in lines 2 and 3 to your packages version. In our example, we create a solution based on Visual Studio version 16.0. Check all versions from in the Microsoft official documentation for Visual Studio releases.

- Change the names in line 5. In the first box you choose your solution name. In the second, however, you have to point to the relevant proj file name. You should already have in the folder where your packages are.

Introduction to Data Wrangler in Microsoft Fabric
What is Data Wrangler? A key selling point of Microsoft Fabric is the Data Science
Jul
Autogen Power BI Model in Tabular Editor
In the realm of business intelligence, Power BI has emerged as a powerful tool for
Jul
Microsoft Healthcare Accelerator for Fabric
Microsoft released the Healthcare Data Solutions in Microsoft Fabric in Q1 2024. It was introduced
Jul
Unlock the Power of Colour: Make Your Power BI Reports Pop
Colour is a powerful visual tool that can enhance the appeal and readability of your
Jul
Python vs. PySpark: Navigating Data Analytics in Databricks – Part 2
Part 2: Exploring Advanced Functionalities in Databricks Welcome back to our Databricks journey! In this
May
GPT-4 with Vision vs Custom Vision in Anomaly Detection
Businesses today are generating data at an unprecedented rate. Automated processing of data is essential
May
Exploring DALL·E Capabilities
What is DALL·E? DALL·E is text-to-image generation system developed by OpenAI using deep learning methodologies.
May
Using Copilot Studio to Develop a HR Policy Bot
The next addition to Microsoft’s generative AI and large language model tools is Microsoft Copilot
Apr