In the final blog of this series we will take the regression model we have created earlier in the series and make it accessible so it can be consumed by other programs.
Making the experiment accessible to the outside world
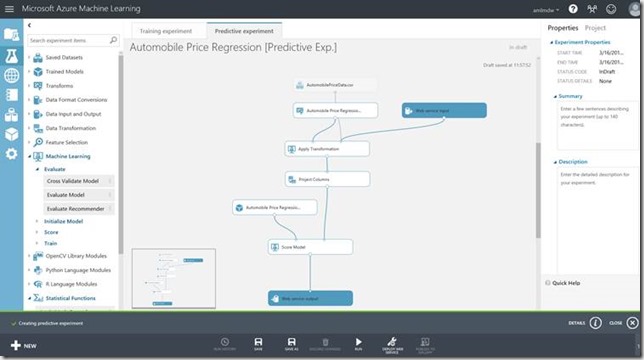
The next part of the process is to make the whole experiment accessible to the world outside of Azure ML. To do so you need to create a Web Service. This can be achieved by clicking Set Up Web Service button next to Run and then selecting Predictive Web Service [Recommended]. The experiment will change in front of your eyes and you should be left with a canvas looking similar to the one displayed below.
If you would like to get back to your training experiment at any time you can do so by clicking Training experiment in the top right corner. You can then run the predictive web service again to update the predictive experiment.
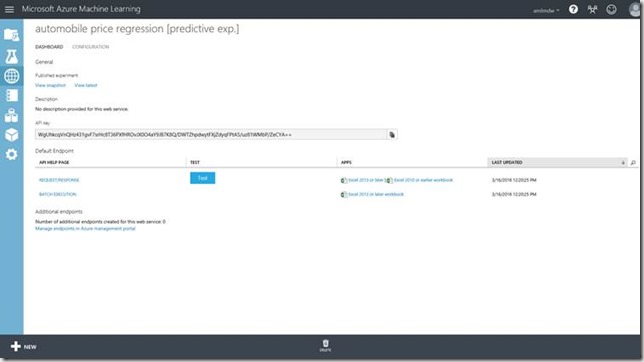
Whilst in the predictive experiment window run the experiment once again and then click Deploy Web Service. Having done this, you should be displayed with the below screen:
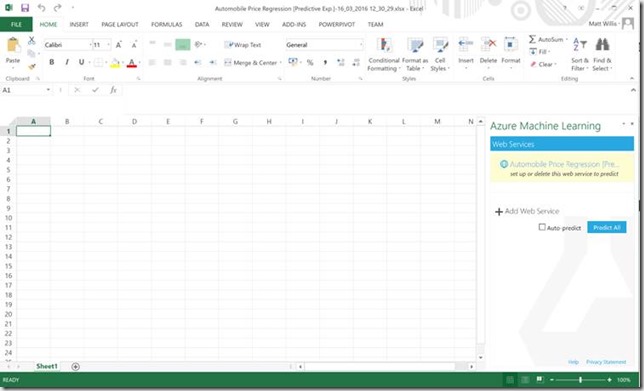
Select Excel 2013 or later in the same row as REQUEST/RESPONSE. Click the tick to download the Excel document, open it and click Enable Editing, you will see something like the image below. If you are using Excel 2010 feel free to follow the example, it will be fairly similar, but not identical.
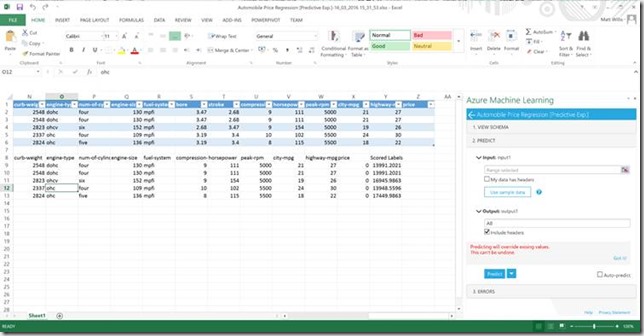
Click Automobile Price Regression [Predictive Exp.] to begin. Click Use sample data to quickly construct a table with all the appropriate columns and a few examples. Feel free to alter the sample data to your heart’s content. Once you’re happy with your data, highlight it and select it as the Input range selected. Chose an empty cell as the Output. Click Predict. You should see something similar to below:
You should now be able to see a replica table with a Scored Labels column displaying the estimated price for each row.
Go ahead and rerun the experiment putting in whatever attribute values you desire. This experiment will now always return a Scored Label relating to the price based upon the training model.
What next?
This has just been a toe dip into the world of Azure ML. For more information on getting started with Azure ML track down a copy of Microsoft Azure Essentials – Azure Machine Learning by Jeff Barnes, this is a great starting point.
If you want to know what you can do with Azure ML and how to start using Azure ML within other programs then check out my upcoming blog which will show you how to integrate Azure ML straight into Visual Studio.


Introduction to Data Wrangler in Microsoft Fabric
What is Data Wrangler? A key selling point of Microsoft Fabric is the Data Science
Jul
Autogen Power BI Model in Tabular Editor
In the realm of business intelligence, Power BI has emerged as a powerful tool for
Jul
Microsoft Healthcare Accelerator for Fabric
Microsoft released the Healthcare Data Solutions in Microsoft Fabric in Q1 2024. It was introduced
Jul
Unlock the Power of Colour: Make Your Power BI Reports Pop
Colour is a powerful visual tool that can enhance the appeal and readability of your
Jul
Python vs. PySpark: Navigating Data Analytics in Databricks – Part 2
Part 2: Exploring Advanced Functionalities in Databricks Welcome back to our Databricks journey! In this
May
GPT-4 with Vision vs Custom Vision in Anomaly Detection
Businesses today are generating data at an unprecedented rate. Automated processing of data is essential
May
Exploring DALL·E Capabilities
What is DALL·E? DALL·E is text-to-image generation system developed by OpenAI using deep learning methodologies.
May
Using Copilot Studio to Develop a HR Policy Bot
The next addition to Microsoft’s generative AI and large language model tools is Microsoft Copilot
Apr