Recently I have been working with Simon Whiteley on a project to produce a scalable BI solution in the cloud. To achieve this we have been using the Azure Automation feature (see here for further details) to schedule Azure PowerShell runbooks which we have been using to determine the status of VM’s in the environment and changing their configuration as required.
As soon as you need the PowerShell scripts to do more than very basic functions, such as print ‘Hello World’ they require permission to be able to administer the environment. To do this you need to create what is essentially a service account in Azure with the required permissions and then save these credentials. The credentials are then used when running the PowerShell scripts. I’m writing this as whilst it’s a fairly straightforward operation once you have discovered what you need to do it took me a while to figure out what was required.
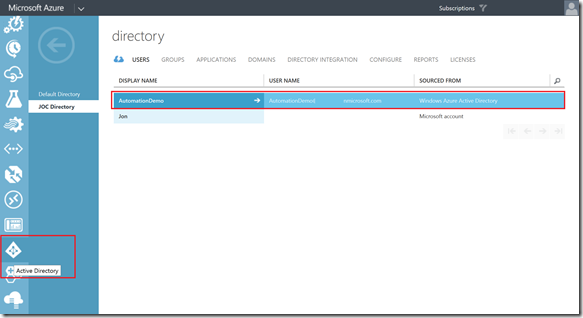
In order to set this up first navigate to the Active Directory (AD) section for the required subscription of the Azure Portal, if you do not have a local user setup for automation tasks you will need to create one. Below is a screenshot of such a user setup in the portal.

1. To create a new user select ‘Add user’ from the options at the bottom of the screen. Give the account a suitable name and setup as a ‘New user in your organisation’.

2. Setup a standard user. It is important you do not enable Multi-Factor authentication for this account as this will not work for an unattended service account.

3. Following this the user will be assigned a temporary password, this must be changed to a fixed one. Once you click create you will be provided with the login details for the account, write these down or email them as they will be required later.


4. Ensure the user is setup as an administrator of the subscription. To do this navigate to ‘Subscriptions’ and select ‘Manage administrators’.

5. Add the user to the subscription as a co-administrator.

6. In order to use the new account you will need to sign out of the portal and sign in as the new user using the details from step 3. This will allow you to set a new password for the account. Save the password for the new account safely as you will need this.

8. Log back in under the original account. The next step is to create a credential that will be used in the PowerShell script for automation. Select the automation icon and it will prompt you to create a new account (you can skip this step if you already have an account created).

9. Click the arrow to view the details of the newly created automation account and then assets and ‘Add Setting’. You should see an option like the below, from this you need to select ‘Add Credential’.

10. Choose to add a PowerShell credential

11. Provide the details for the account created in step 2 with the password from step 6.

You should now be able to create and execute a runbook with automation services. As a test the below runbook can be used to list the virtual machines currently running in the environment:

Introduction to Data Wrangler in Microsoft Fabric
What is Data Wrangler? A key selling point of Microsoft Fabric is the Data Science
Jul
Autogen Power BI Model in Tabular Editor
In the realm of business intelligence, Power BI has emerged as a powerful tool for
Jul
Microsoft Healthcare Accelerator for Fabric
Microsoft released the Healthcare Data Solutions in Microsoft Fabric in Q1 2024. It was introduced
Jul
Unlock the Power of Colour: Make Your Power BI Reports Pop
Colour is a powerful visual tool that can enhance the appeal and readability of your
Jul
Python vs. PySpark: Navigating Data Analytics in Databricks – Part 2
Part 2: Exploring Advanced Functionalities in Databricks Welcome back to our Databricks journey! In this
May
GPT-4 with Vision vs Custom Vision in Anomaly Detection
Businesses today are generating data at an unprecedented rate. Automated processing of data is essential
May
Exploring DALL·E Capabilities
What is DALL·E? DALL·E is text-to-image generation system developed by OpenAI using deep learning methodologies.
May
Using Copilot Studio to Develop a HR Policy Bot
The next addition to Microsoft’s generative AI and large language model tools is Microsoft Copilot
Apr