Master Data Services in SQL Server Denali now includes an Excel add-in that allows MDS users to add and update data that exists within Master Data Services. For those of you that haven’t had a chance to download the latest CTP, this post gives an overview of what’s possible in the Excel Add-in.
Excel Add-in Overview
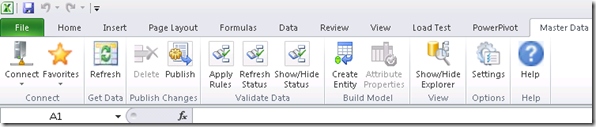
Once you install the Excel add-in (available here for download) you will see an additional toolbar in the ribbon, as shown below:

At a high level, the following functionality is available within the MDS add-in:
- Retrieve members from a master data entity
- Add or Update members (including annotations) and publish the changes back to MDS
- Create entities in MDS if you have sufficient permission
- Run the business rules
I don’t want this post to go on for ever, so today I’m going to focus on retrieving and updating members.
Retrieving MDS Entity Members
The Excel Add-in comes with a sidebar called the Explorer that can be used to connect to an MDS model and retrieve data from an entity within the model. What I quite like is that there is a filter button that allows a user to specify how to filter the data before loading it. In the example below, I’ve connected to the sample customer model, and have filtered the customer entity to only show customers of type 1 and customers from Seattle:

On the same filtering window its possible to choose the attributes to display. Therefore in the above example, by clicking the ‘Load Data’ button, a filtered list of customer members will be shown:

Editing Members
Once the members have been retrieved, editing is just a simple case of typing into the field that you want to change. In the example below I’ve chosen to change the names of two of the customers, which has caused the cells to be highlighted, informing me of the changes that I’ve made:

Domain-based attributes are also picked up nicely by Excel. Not that I imagine it would make too much sense, but it’s possible to change the Sales District North Western US (WUSSL) to Central US (CEUS), for example. Excel handles this by rendering a drop down for this domain attribute:

As it is in Master Data Manager, within Excel it’s also possible to display a domain attribute’s name.
Regardless of the type of attribute that gets changed, the changes will just remain in the Excel sheet until I click the publish button:

Clicking the the publish button will result in being prompted to make an optional annotation for each of the changes:

The annotations, as well as the member updates, will be committed to the Master Data Services database. The end result is that the transactions can be viewed as per 2008 R2 in Master Data Manager, or by right clicking in Excel and choosing ‘View Transactions’.
Summary
The Excel add-in doesn’t contain all the functionality available within Master Data Manager, but provides an interface that clearly Excel-based data stewards will be very comfortable with. It’s also much easier to do bulk updates in the Excel front-end, when compared to the web front-end.
That’s about if for now. There’s more to the Excel add-in, which I’m aiming to cover at SQLBits 9, plus Master Data Manager has been given a complete overhaul in Denali – hopefully I’ll find the time to cover that soon…
Introduction to Data Wrangler in Microsoft Fabric
What is Data Wrangler? A key selling point of Microsoft Fabric is the Data Science
Jul
Autogen Power BI Model in Tabular Editor
In the realm of business intelligence, Power BI has emerged as a powerful tool for
Jul
Microsoft Healthcare Accelerator for Fabric
Microsoft released the Healthcare Data Solutions in Microsoft Fabric in Q1 2024. It was introduced
Jul
Unlock the Power of Colour: Make Your Power BI Reports Pop
Colour is a powerful visual tool that can enhance the appeal and readability of your
Jul
Python vs. PySpark: Navigating Data Analytics in Databricks – Part 2
Part 2: Exploring Advanced Functionalities in Databricks Welcome back to our Databricks journey! In this
May
GPT-4 with Vision vs Custom Vision in Anomaly Detection
Businesses today are generating data at an unprecedented rate. Automated processing of data is essential
May
Exploring DALL·E Capabilities
What is DALL·E? DALL·E is text-to-image generation system developed by OpenAI using deep learning methodologies.
May
Using Copilot Studio to Develop a HR Policy Bot
The next addition to Microsoft’s generative AI and large language model tools is Microsoft Copilot
Apr