I’m currently working on a relatively lightweight PaaS modern data warehouse project, and as part of the build there was a requirement to add automated testing into the platform. While I was thinking about how I could achieve this – I remembered during the 2018 SQLBits I attended there was a DevOps session by the sabin.io team in which they did something very similar. They used PowerShell to add tests into part of a continuous integration pipeline hosted on VSTS through a framework called Pester. In this blog, I will talk about my implementation of Pester, but specifically look at it through the context of hosting it in a Azure PaaS environment (something which adds a small amount of overhead to its implementation and took me a while to get working).
What is Pester?
Pester is basically a ubiquitous test and mock framework for PowerShell (hosted on GitHub here). It can literally be used to test anything – as long as you can invoke whatever you are trying to test through PowerShell. This includes SQL statements, Azure resources, Windows resources, etc. Pester provides the language to DEFINE and EXECUTE the test case. I won’t go through the numerous advantages of automated testing, but lets just say its pretty useful to have it as part of a platform to alert you about issues early. I won’t talk about it so much in the context of DevOps CI/CD, but its got use cases here too. Microsoft is also on board with the framework, and it comes pre-installed with Windows builds nowadays.
How do I define a test case?
Describe defines a group of tests, and all test files must contain at least one describe block. It then defines a single test case, so in my example below it will invoke a SQL statement to return a result which is then tested.
The test is then passed or failed using an assertion such as Should be 0 or Should BeNullOrEmpty based on the object passed to it. You can also use other variations such as ShouldBeExactly or even Should Throw to pass a test based on a terminating error.
In the code segment below, I’m checking keys that were unable to lookup against our dimensions from the fact tables. One thing to be careful of (as there was no related error message) was that you will need to alias your COUNT or SUM in the SQL query and then call that as a property of your result object afterwards to check against.
Describe "Warehouse Award Fact -1 Keys" {
    It "Award Fact - Supplier -1 Keys" {
        $Query = "SELECT COUNT(*) AS AwardSupplier FROM Warehouse.FctAward WHERE SupplierKey = -1 "
        $Result = Invoke-Sqlcmd -ServerInstance $AsqlServerName -Database $AsqlDatabaseName -Query $Query -Username $AsqlUsername -Password $AsqlPassword
        $Result.AwardSupplier | Should be 0
    }
    It "Award Fact - Contract -1 Keys" {
        $Query = "SELECT COUNT(*) AS AwardContract FROM Warehouse.FctAward WHERE ContractKey = -1 "
        $Result = Invoke-Sqlcmd -ServerInstance $AsqlServerName -Database $AsqlDatabaseName -Query $Query -Username $AsqlUsername -Password $AsqlPassword
        $Result.AwardContract | Should be 0
    }
}
As part of the definition I decided it would be best to spit the test blocks up into logical groups, and then keep them all within the same file. However, if you wanted to test both data and something else such as Azure resources, then I would consider splitting out the tests into separate files to keep things modular. In terms of tests, to give you an idea of the sort of things we were keen to monitor, I created the following:
- Stage row counts match clean row counts
- Business keys are distinct within source
- Business keys were distinct within dimensions
- Total £ amounts matched between source and warehouse
- No MDS errors existed on data import
- Fact table unknown keys for each dimension (above)
- Misc tests that tripped us up during early build phases based on assumptions
These tests were added to over time and formed a group of acceptance tests for each DW run. As data is always changing, its good to have these to validate your initial premises put in place around a data set.
While I didn’t need to use it, there are also commands to mock variables therefore putting the PowerShell code into a specific state for a particular test. This is helpful to avoid changing the real environment while replicating states.
Standing up Pester in Azure
Implementing the pester framework with traditional resources is already well documented and very simple to get started in both a manual and automated way. Unfortunately as I was working on a fully PaaS project, I needed to implement the framework within Azure. This did not seem to be as well documented. To help me out with the task, I went straight to Azure Automation – for anyone that has not used this before, its basically a way to host PowerShell scripts within Runbooks. While it was fairly intuitive to import the Pester framework from their GitHub repo, there is also an option with Automation to select from a modules gallery. Pester is part of this gallery, so for ease of use, I would download it here which also makes maintenance slightly easier. Its also worth mentioning that its also worth defining important variables such as DB connections, etc outside of the Runbook within Automation and then passing them in as parameters. Think of this as similar to environment variables on a SSIS project. Credentials such as our Runas account are also defined externally to the runbook.
Now on to the important bit; defining the testing execution script.
The first body of code will connect to Azure using the Runas account as a service principal. This allows us to execute the script without using our own credentials. Setup of this account is a whole separate blog in itself so I won’t go into that detail here.
Once this has been defined, the script will then connect into Blob storage to extract the tests (defined above), and place it in the local Temp directory of Azure Automation. This was one of my major blockers initially as I was trying to find a way to Invoke the test scripts from within the same PS script as the execution, therefore not needing to host the tests anywhere and keep everything contained in a runbook or parent/child runbooks. Unfortunately (as far as I can tell) the Invoke-Pester command which executes the tests needs a separate file location to be defined. Either way, we had a blob storage area already setup for the project so this was not really an overhead to create a new container to store the tests in. Automation uses a Temp folder internally to store anything, so I used this to land the tests ready for processing.
# Get required variables
$AutomationConnectionName = Get-AutomationVariable -Name 'AutomationConnectionName'

# Connect to an automation connection to get TenantId and SubscriptionId
$Connection = Get-AutomationConnection -Name $AutomationConnectionName
$TenantId = $Connection.TenantId
$SubscriptionId = $Connection.SubscriptionId

# Login to Azure using AzureRunAsConnection
Connect-AzureRmAccount -ServicePrincipal -TenantId $Connection.TenantId -ApplicationId $Connection.ApplicationId -CertificateThumbprint $Connection.CertificateThumbprint

# Connect to Storage Account to get tests script
$resourceGroup = Get-AutomationVariable -Name 'ResourceGroupName'
$storageAccountName = Get-AutomationVariable -Name 'PreStageBlobStorageAccountName'
$storageAccount = Get-AzureRmStorageAccount -ResourceGroupName $resourceGroup -Name $storageAccountName
$ctx = $storageAccount.Context
$data = Get-AzureStorageBlobContent -Blob "PesterTests.ps1" -Container 'pester' -Destination "C:Temp" -Context $ctx
The next section of the script will depend on what you want to do with the results. For me, we already had an ETL control schema setup in our SQLDB, so it felt right to submit the results into a new table in there for reporting purposes. Alternatively you could create a new schema called UnitTesting or similar. There are also lots of other things you could do with the results, i.e. to trigger other events or use in a CI/CD environment.
The below code will open up a SQLDB connection, and then create a function to insert rows into the DB which will call in the next block of code. For security purposes, the parameters are defined outside the SQL command and added in at execution. While there are quite a few things you can extract from a pester test result, I decided to take the Test Name, Test Result, and Failure Message – to keep things simple. I also included an inserted date so we can work out the latest tests, as well as a Trigger Id to join it back into the parent pipeline that called the test scripts. This ties in nicely to other bits of our ETL reporting framework.
# Open SQL connection
$DBServer = Get-AutomationVariable -Name 'DatabaseServerFullName'
$DBName = Get-AutomationVariable -Name 'DatabaseName'
$DBUsername = Get-AutomationVariable -Name 'DatabaseAdminUsername'
$DBPassword = Get-AutomationVariable -Name 'DatabaseAdminPassword'
$sqlConnection = New-Object System.Data.SqlClient.SqlConnection
$sqlConnection.ConnectionString = "Server=$DBServer;Database=$DBName;UID=$DBUsername;PWD=$DBPassword"
$sqlConnection.Open()

# Create GUID to group tests together
$GUID = [guid]::Newguid()
$GUID = $GUID.ToString()

# Create Inserted datetime
$Inserted = Get-Date

# Define function to submit to database
function Do-InsertRow {

    $sqlCommand = New-Object System.Data.SqlClient.SqlCommand
    $sqlCommand.Connection = $sqlConnection

    $sqlCommand.CommandText = "SET NOCOUNT ON; " +
        "INSERT INTO BISystem.UnitTests (TriggerId,TestName,TestResult,FailureMessage,Inserted)" +
        "VALUES (@TriggerId,@TestName,@TestResult,@FailureMessage,@Inserted); "

    $sqlCommand.Parameters.Add((New-Object Data.SqlClient.SqlParameter("@TriggerId",[Data.SQLDBType]::NVarChar, 50))) | Out-Null
    $sqlCommand.Parameters.Add((New-Object Data.SqlClient.SqlParameter("@TestName",[Data.SQLDBType]::NVarChar, 200))) | Out-Null
    $sqlCommand.Parameters.Add((New-Object Data.SqlClient.SqlParameter("@TestResult",[Data.SQLDBType]::NVarChar, 10))) | Out-Null
    $sqlCommand.Parameters.Add((New-Object Data.SqlClient.SqlParameter("@FailureMessage",[Data.SQLDBType]::NVarChar, 500))) | Out-Null
    $sqlCommand.Parameters.Add((New-Object Data.SqlClient.SqlParameter("@Inserted",[Data.SQLDBType]::DateTime2))) | Out-Null

    $sqlCommand.Parameters[0].Value = $PipelineTriggerID
    $sqlCommand.Parameters[1].Value = $TestName
    $sqlCommand.Parameters[2].Value = $TestResult
    $sqlCommand.Parameters[3].Value = $TestError
    $sqlCommand.Parameters[4].Value = $Inserted

    $sqlCommand.ExecuteNonQuery()

}
Time to Invoke the test scripts. This can be done through the Invoke-Pester command. As mentioned above, I had to pass in the test scripts location. I also defined the PassThru parameter so that the results were passed into an $Output object ready to deconstruct and write to SQLDB. While its not mandatory you can also define the test groups to pickup as part of the invocation, which has the added bonus of being able to use wildcards against.
The script will then loop round each object in the array of the $Output object defined previously. For each one, it will extract the attributes of the test that I’m after and then call my Insert to DB function to write the results to SQLDB.
# Invoke Pester
$Output = Invoke-Pester -Script C:TempPesterTests.ps1 -PassThru -TestName '*CaSIE*'

# Output Results
Write-Output "TestNameFilter: $($Output.TestNameFilter)."
Write-Output "Total Count: $($Output.TotalCount)."
Write-Output "Passed Count: $($Output.PassedCount)."
Write-Output "Failed Count: $($Output.FailedCount)."
Write-Output "Time: $($Output.Time)."
Write-Output ""

# Loop over TestResult objects to submit to database
$Output.TestResult | ForEach-Object {
    $TestName = $_.Name
    $TestResult = $_.Result
    $TestError = $_.FailureMessage
    Write-Output "Test Result: $($TestName), $($TestResult), $($TestError)"
    Do-InsertRow
}

# Close the connection.
if ($sqlConnection.State -eq [Data.ConnectionState]::Open) {
    $sqlConnection.Close()
}

# Show done when finished (for testing/logging purpose only)
Write-Output "Finished Running Tests"
Once everything has been created and you’ve tested the scripts via the test pane and checked the results populate into the database, you are ready to hook it into your ADF pipelines and integrate it into your solution! To do this is very simple – within each Runbook you can create a webhook to the runbook for any external resources to call. This comes in the form of a secret URL which will then kick off the runbook with the embedded script. Passing parameters into the runbook at this point requires a bit more work and I go into this detail in a separate blog post. Be careful to take a copy of this URL, as you cannot view it after creation. Its then just a case of creating a web activity in your ADF pipeline to call this, to run the scripts. All in all, a very straightforward mechanism.
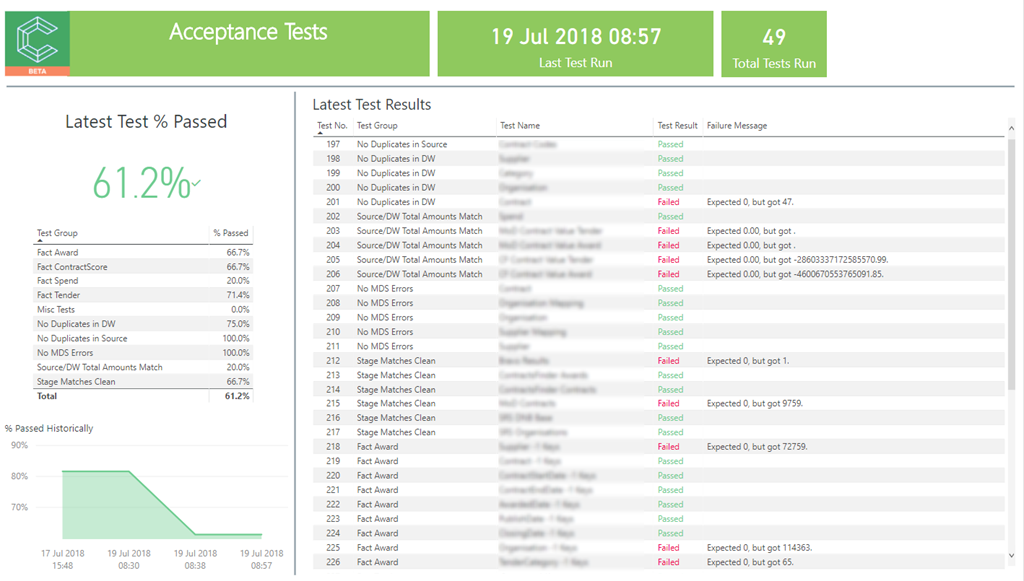
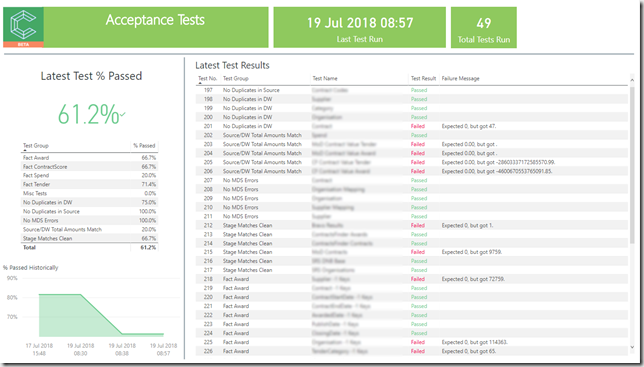
Once the results were in SQLDB I also defined a view on top of the table as I was having trouble extracting the test group out. To make things simple, I just re-worded the individual test cases to include this, and then use a CHARINDEX to split them out, thus meaning I could now report by group also. I also added a field to calculate the Latest Test result set, thus meaning we were only reporting on the most relevant test set. I then built a Power BI report on top of this to integrate into our existing solution (below). Test results were presented as a measure % Passed (defined below). This was then displayed overall, vs each test group, and then vs each individual test.
% Passed =
VAR PercentPassed =
DIVIDE(
CALCULATE(COUNT('BISystem UnitTestsView'[TestId]),'BISystem UnitTestsView'[TestResult] = "Passed", 'BISystem UnitTestsView'[LatestTest] = 1),
CALCULATE(COUNT('BISystem UnitTestsView'[TestId]),'BISystem UnitTestsView'[LatestTest] = 1)
)
RETURN
IF(PercentPassed = BLANK(),0,PercentPassed)
Summary
Pester is a great tool to use to add automated testing in to your project. It’s taken a few hours to stand up but now that’s been done, it’s just a case of defining tests. The ubiquitous nature of the framework means we can define all sorts of test across data/software/hardware. The thing I like the most about using it is that its simple. While I decided it was best to populate the test results into a database for ease of use for reporting, it might also be worth investigating population into the VSTS testing framework. Hopefully you will find this blog useful.


Introduction to Data Wrangler in Microsoft Fabric
What is Data Wrangler? A key selling point of Microsoft Fabric is the Data Science
Jul
Autogen Power BI Model in Tabular Editor
In the realm of business intelligence, Power BI has emerged as a powerful tool for
Jul
Microsoft Healthcare Accelerator for Fabric
Microsoft released the Healthcare Data Solutions in Microsoft Fabric in Q1 2024. It was introduced
Jul
Unlock the Power of Colour: Make Your Power BI Reports Pop
Colour is a powerful visual tool that can enhance the appeal and readability of your
Jul
Python vs. PySpark: Navigating Data Analytics in Databricks – Part 2
Part 2: Exploring Advanced Functionalities in Databricks Welcome back to our Databricks journey! In this
May
GPT-4 with Vision vs Custom Vision in Anomaly Detection
Businesses today are generating data at an unprecedented rate. Automated processing of data is essential
May
Exploring DALL·E Capabilities
What is DALL·E? DALL·E is text-to-image generation system developed by OpenAI using deep learning methodologies.
May
Using Copilot Studio to Develop a HR Policy Bot
The next addition to Microsoft’s generative AI and large language model tools is Microsoft Copilot
Apr