Recently I’ve been doing some work for a client who have upgraded their SAP system previously sitting on Oracle to SAP HANA, the new in memory version of SAP.
They currently have a Microsoft Warehouse sitting on top of SAP using SQL Server 2014. I was tasked with moving the source of the Warehouse from the previous non-Unicode version of SAP, to the new Unicode based HANA version.
This blog explains the step by step process of setting up the connection to SAP HANA from SSIS.
SAP HANA Driver Install
The best type of driver to connect to SAP HANA from SSIS is the HANA ODBC connector. This along with all the other HANA connectors are installed as part of the HANA Client Installation process. There is a 32-bit and 64-bit version of the client, I recommend installing both as Visual Studio will require the 32 bit version but a better performance can be obtained using the 64 bit version when the packages are deployed to SQL Server.
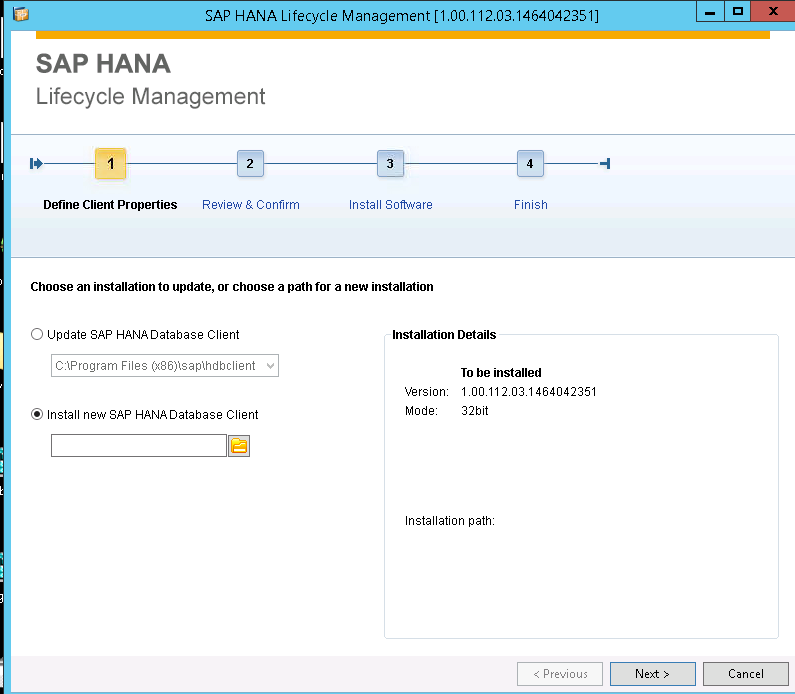
Installing the Client is a straight forward process, I’ll briefly list the steps but won’t go into detail about this here:
1.Download the setup file from the SAP website under downloads. Once downloaded run the hdbsetup.exe file.
2. Select Install new SAP HANA Database Client, then press next.
3.The process will then go through and install each of the drivers, once complete hit finish.
Add Connection to your SSIS Project
Once the drivers are installed we are ready to add the new connector to the SSIS packages.
1. Open your solution in Visual Studio.
2. In Solution Explorer, under your SSIS Project, right click the Connection Manager and select New Connection Manager.
3. Select ODBC from the list of Connection Manager Types.
4. The next screen will ask you to set up a Data Connection, for this select New, even if you have a current ODBC connection set up to this server it will not be using the new HANA driver previously installed so a new one is required.
5. On the Connection Manager screen select Use Connection Manager, and the press the Build button.
6. You will need to create a DSN on your development machine, NOTE* This will not be deployed when you deploy your solution to another server. Therefore the DSN will need to be created on the target server also, an explanation on how to do this can be found below.
7. Select the tab across the top labelled Machine Data Source and select New.
8. You may select either a Machine Data Source or a User Data Source. A Machine data source will allow other users sharing your development machine use the connection, this requires you to be an administrator on the box to be able to do this. Regardless of which option is selected the following steps are the same.
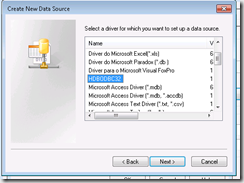
9. When selecting a driver select HDBODBC32, this is the HANA ODBC connection. You will only be able to select the 32 bit version of the driver in Visual Studio as it is a 32 bit application. Later we will discuss setting up the 64 bit version.
10. Select Next and then finish.
11. You will then be asked to name this data source and give the server name and port, of your HANA server.
12. Be sure to take note of the Name you give this data source as you will need it later when setting up the 64 bit driver.
13. Next you will be asked for a Username and Password to connect to the server with, enter these and select OK.
14. The next step is optional depending how you usually set up your SSIS packages. Personally I tend to keep Package Protection Levels set to DoNotSaveSensitve, and then keep passwords for connection strings saved in a Variable, then set the password via an expression. If you do a similar thing set this up now, if you tend to encrypt sensitive, you obviously do not need to do this step and the connection password will be inside the connection manager.
Now that your connection is set up, you can continue to build your package as normal.
The next step of the process comes in after the project has been deployed to the server (UAT, Dev or Live).
DSN Set up on Server
When your solution is deployed to the Integration Services Catalogue, the DSN that the connection manager was using is not deployed with it. The DSN sits outside of the SSIS project and therefore needs to be set up on the destination server separately.
The first step will be to install the HANA drivers on the Server, following the same instructions above as we did for our development machine.
To set up the DSN we will use the ODBC Connection Manager built into Windows. There are 2 versions of the connection manager one for 32 bit connections and one for 64 bit connections. The same process needs to be carried out using both obviously selecting the appropriate driver for the corresponding connection manager.
To open the ODBC Connection Manager, press the Start button and type ODBC, the 2 connection managers should be returned, as seen below:
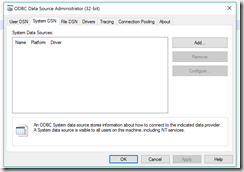
Once open you will see tabs across the top for User DSN and System DSNs. With a deployed solution I strongly recommend using a system DSN, as the user you are creating a User DSN with is unlikely to be the same user that the SSIS package is executed as.
Under the System DSN click the Add button. This will launch the Connection Setup Wizard, the same as we saw in Visual Studio.
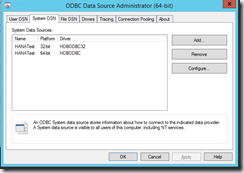
Following the same setup process as we did when creating the DSN in Visual Studio, we should end up with something similar as seen below:
Notice that both the 32bit and 64bit DSNs are named the same, this allows you to switch what DSN to use without changing the connection string in the package. SQL Server will use the one that is available based on if it is running in 32 bit or 64 bit mode.
And that’s it, you should be good to go!
If you have any problems connecting to SAP HANA from SSIS please leave a comment below with the issues and we can see if we can help!
Alternatively if you found this blog useful please let me know!
Scott.




is there way to update records in SAP HANA Cloud using SSIS?